Top 11 Easiest and Low Maintenance Fruit Trees UK

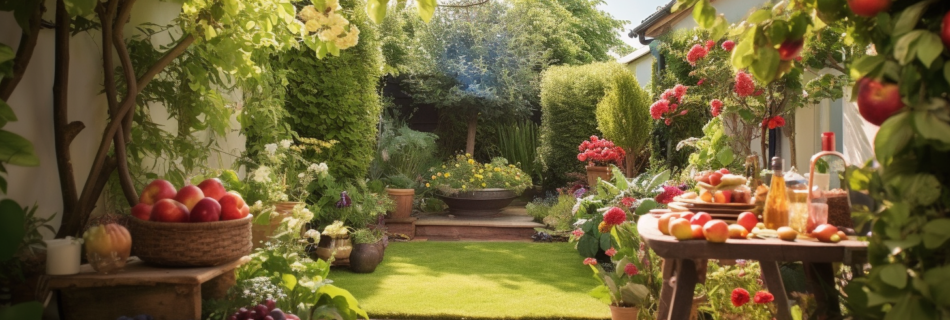
Looking to grow your own fruit trees in the UK? Worried about the time and effort it might require? Look no further!

We’ve got you covered with our expert advice on the top 11 easiest and low maintenance fruit trees specifically suited for the UK climate.

From classic favorites like apple and pear trees to unique options like quince and medlar trees, we’ll guide you through everything you need to know to enjoy the pride and satisfaction of harvesting your own delicious homegrown fruit.

Let’s get started!

Top 11 Easiest and Low Maintenance Fruit Trees UK

When choosing fruit trees for your garden in the UK, there are several factors to consider. First, think about the specific environmental conditions required by different types of fruit trees. For example, lemon trees thrive in warm and sunny environments. Apple trees, on the other hand, need good soil drainage and ample sunlight to grow and produce fruit successfully.

Next, consider the maintenance requirements of the fruit trees you are considering. Pear trees, for instance, require regular pruning and watering to ensure healthy growth. Plum trees, on the other hand, are known for their optimal growth and fruitful production.

Lastly, think about the potential challenges that may arise when growing fruit trees. Cherry trees, for instance, are known to be susceptible to pests and diseases. However, they are also known for their ability to self-pollinate, which can be an advantage in certain situations.

1. Lemon Tree

If you want a low maintenance fruit tree in the UK, consider planting a lemon tree. Despite not being native to the UK, lemon trees can thrive under the right conditions. Here’s why they’re a great choice:

  • Lemon trees prefer a warm and sunny environment, so they need to be placed in a bright location with plenty of sunlight.
  • They require well-draining soil to avoid waterlogging, making them suitable for growing in pots or containers.
  • Lemon trees need regular watering, especially during the growing season, but they don’t like to be overwatered.

With a little care and attention, lemon trees can be low maintenance and provide you with delicious and tangy fruits. So why not add a touch of Mediterranean charm to your garden with a lemon tree?

2. Apple Trees

To grow low maintenance apple trees in the UK, there are several key factors to consider. First, it is important to choose a location with good soil drainage, ample sunlight, and protection from strong winds. These conditions will help ensure the health and growth of the trees.

Regular pruning during the dormant season is beneficial for apple trees. This practice promotes healthy growth and fruit production. By removing dead or diseased branches, the tree’s overall health can be improved.

Watering is crucial, especially in the first few years after planting. Regular watering during dry periods will result in a better crop. This is particularly important for young trees as they establish their root systems.

Fertilizer may be necessary to provide the necessary nutrients for growth and fruit production. It is important to choose the right type and apply it according to the manufacturer’s instructions.

It is also important to be vigilant for pests and diseases that can affect apple trees. Common problems include apple scab, powdery mildew, and codling moth. Taking appropriate measures to prevent or treat these issues will help maintain the health of the trees and ensure a good harvest.

With proper care and attention, apple trees can be relatively low maintenance fruit trees in the UK. By considering factors such as location, pruning, watering, fertilizing, and pest control, you can enjoy the benefits of homegrown apples with minimal effort.

3. Pear Trees

Maintain your pear trees in the UK by regularly pruning, fertilizing, watering, and protecting them from pests and diseases.

Pruning the tree helps remove dead or damaged branches and encourages new growth.

Fertilizing with a balanced fertilizer in the spring provides the tree with essential nutrients for optimal growth and fruit production.

Watering regularly, especially during dry spells, prevents dehydration and ensures the tree stays healthy.

Protecting the tree from pests and diseases involves keeping the area clean and removing fallen fruit or leaves that may attract them.

Harvest the fruit when it’s ripe and store it in a cool, dry place to extend its shelf life.

4. Plum Tree

Continuing from the previous subtopic on pear trees, let’s now delve into the topic of plum trees, which are among the top 11 easiest and low maintenance fruit trees in the UK.

Plum trees can be relatively low maintenance, but they still require some care to grow and produce fruit optimally. Prune the tree regularly to remove dead, diseased, or damaged branches and encourage new shoots.

Fertilize the tree in the spring with a balanced fertilizer to provide the necessary nutrients for growth and fruit production. Water the tree regularly, especially during dry spells, to prevent dehydration.

Keep the area around the tree clean to protect it from pests and diseases. Harvest the ripe fruit and store it in a cool, dry place for longer shelf life.

5. Cherry Tree

How can you ensure that your cherry tree remains one of the top 11 easiest and low maintenance fruit trees in the UK? Here are some tips to keep your cherry tree healthy and productive:

  • Prune the tree regularly to remove dead, diseased, or damaged branches, and to encourage new growth.
  • Fertilize the tree in the spring with a balanced fertilizer to provide the necessary nutrients for growth and fruit production.
  • Water the tree regularly, especially during dry spells, to prevent dehydration.

By following these simple steps, you can enjoy a bountiful harvest of sweet or sour cherries from your low maintenance cherry tree.

Just imagine the satisfaction of plucking ripe cherries straight from your own garden, and the joy of sharing them with your loved ones. Cherries aren’t only delicious, but they also add a splash of vibrant color to your outdoor space.

6. Fig Tree

To ensure that your fig tree remains one of the top 11 easiest and low maintenance fruit trees in the UK, all you need to do is provide it with regular pruning, fertilization, and watering.

Prune the tree regularly to remove dead or damaged branches and encourage new growth.

Fertilize the tree in the spring with a balanced fertilizer to give it the nutrients it needs.

Water the tree regularly, especially during dry spells, to prevent dehydration.

Keep the area around the tree clean to protect it from pests and diseases.

Harvest the figs when they’re ripe and enjoy them fresh or use them in various recipes.

Remember that fig trees can be sensitive to cold temperatures, so choose a location that offers some protection or consider growing them in containers that can be brought indoors during winter.

With a little bit of care, you can enjoy the unique and delicious taste of fresh figs from your own garden.

7. Apricot Trees

To maintain the status of apricot trees as one of the top 11 easiest and low maintenance fruit trees in the UK, you simply need to provide them with regular pruning, fertilization, and watering.

Here are some expert tips for keeping your apricot trees thriving:

  • Prune the tree regularly to remove dead, diseased, or damaged branches, and to encourage new growth.
  • Fertilize the tree in the spring with a balanced fertilizer to give it the nutrients it needs.
  • Water the tree regularly, especially during dry spells, to prevent dehydration.

By following these simple steps, you can ensure that your apricot tree stays healthy and produces an abundance of sweet and juicy fruit.
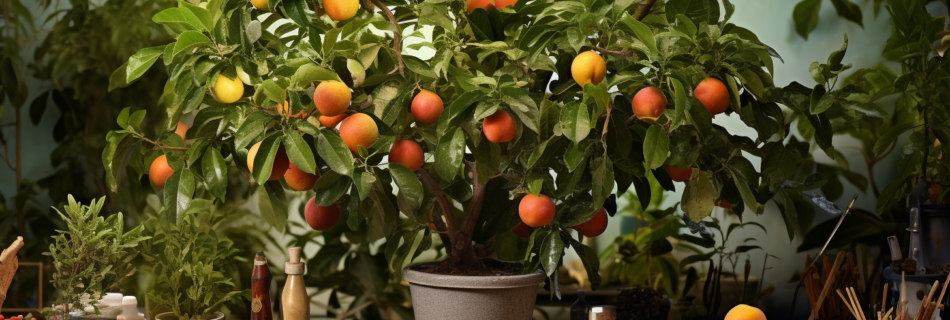
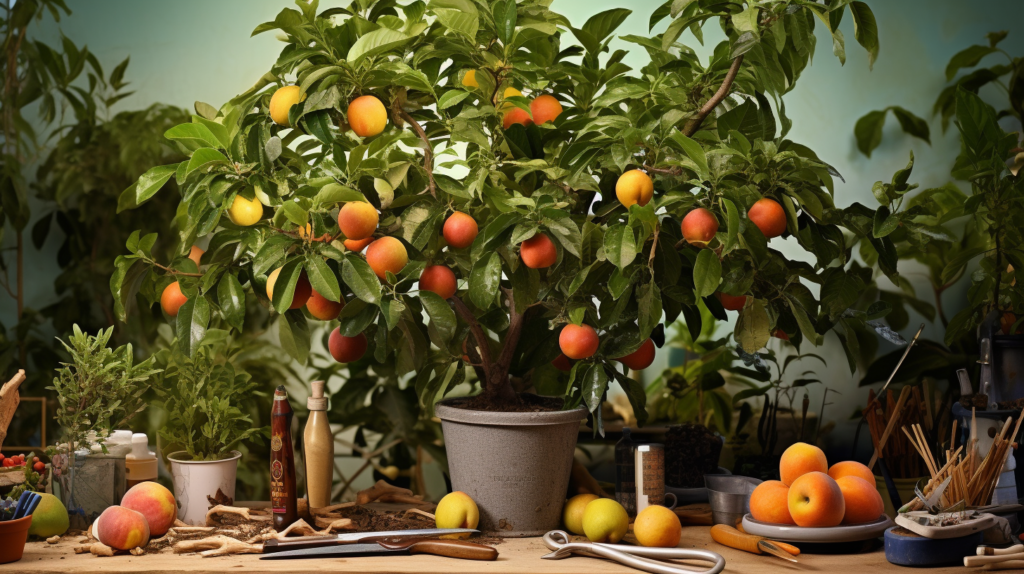
8. Peach Tree

If you’re looking for an easy and low maintenance fruit tree in the UK, consider planting a peach tree. Peaches are hardy and can produce an abundance of sweet and juicy fruit with minimal care.

To maintain a peach tree, regularly prune it to remove dead or damaged branches and encourage new growth. Fertilize the tree in the spring with a balanced fertilizer to provide the necessary nutrients for growth and fruit production.

Water the tree regularly, especially during dry spells, to prevent dehydration. Keep the area around the tree clean to protect it from pests and diseases. Harvest the ripe fruit and store it in a cool, dry place for longer shelf life.

Remember to spray the tree with fungicide in early spring to prevent peach leaf curl, a common fungal disease. With a little care, you can enjoy the delicious taste of fresh peaches from your garden.

9. Mulberry Tree

When caring for a mulberry tree in the UK, it’s important to regularly prune dead or damaged branches and encourage new growth. This helps to maintain the health and shape of the tree.

Fertilizing the tree in the spring with a balanced fertilizer provides it with the necessary nutrients for optimal growth and fruit production.

Watering the tree regularly, especially during dry spells, prevents dehydration and ensures the tree remains healthy.

It’s also crucial to protect the tree from pests such as caterpillars and birds, which can damage the fruit.

Finally, harvesting the fruit when it’s fully ripe and storing it properly will help to preserve its delicious taste.

10. Blueberry Tree

Growing a blueberry tree in the UK is a low maintenance and rewarding experience.

To ensure success, plant blueberry bushes in well-drained soil with a pH of 4.5 to 5.5. If your soil isn’t acidic enough, amend it with sulphur or use a container filled with acidic potting soil.

Mulch around the base of the plant with organic matter to retain moisture and suppress weeds. Water regularly during dry spells, but be careful not to overwater to prevent root rot.

Fertilize once a year in spring with an acidic fertilizer. Prune in late winter or early spring to remove dead or crossing branches and promote new growth.

Protect the bushes from birds with netting or a scarecrow. With minimal care, you can enjoy the sweet and nutritious taste of fresh blueberries straight from your garden in the UK.

11. Nectarine Tree

To continue the discussion from the previous subtopic, let’s delve into the low maintenance and rewarding experience of growing a Nectarine Tree in the UK.

Here are some tips for maintaining nectarine trees:

  • Prune the tree regularly to remove dead, diseased, or damaged branches, and to encourage new growth.
  • Fertilize the tree in the spring with a balanced fertilizer to provide it with the necessary nutrients.
  • Water the tree regularly, especially during dry spells, to prevent dehydration.

Growing a nectarine tree can be a great option for those in the UK who want to enjoy the delicious taste of fresh nectarines straight from their garden. With minimal care, you can have sweet and juicy fruit right at your doorstep.

Remember to protect the tree from pests and diseases and harvest the fruit when ripe. Just be mindful of peach leaf curl and spray the tree with fungicide in early spring to prevent it.

Enjoy the low maintenance and bountiful rewards of growing a nectarine tree in the UK!

Best Fruit Trees for Small Gardens Uk

For small gardens in the UK, the best fruit trees are those that can be grown in pots or containers and don’t take up too much space. Dwarf varieties of apples, pears, plums, cherries, and peaches are suitable options. You can also consider figs, quinces, apricots, and nectarines, which can be grown in containers.

Dwarf fruit trees typically grow to around 3-4 meters tall and 2-3 meters wide, making them space-efficient while still producing a good crop of fruit.

Growing fruit trees in pots or containers is a viable option for small gardens, as it allows for flexibility and mobility. When choosing a pot or container, make sure it’s at least 50cm deep and has proper drainage holes. Use a high-quality potting mix with plenty of organic matter.

Plant your tree following the instructions on the packaging, water it well, and place it in a sunny spot, preferably south-facing. Regular watering during dry periods and some care and attention will ensure your dwarf fruit tree bears fruit in no time.

Best Fruit Trees for Northern England

If you’re looking for the best fruit trees for Northern England, consider planting apple trees such as Coxs Orange Pippin, Egremont Russet, or Northern Spy. These apple varieties are well-suited to the climate and soil conditions in this region, ensuring a successful harvest.

Cherries are another great option for Northern England, with sweet varieties like Stella and Sunburst being less susceptible to frost. Sour cherries can also thrive in this region with proper cold protection.

Pear trees, although requiring a bit more care, can produce delicious fruits in Northern England. Consider planting Williams Bon Chretien or Conference varieties for a successful pear harvest.

Plum trees, particularly the Victoria variety, are also well-suited to this region. While pear and plum trees may require a little more attention, the results will be well worth the effort.

Small Fruit Trees for Garden in UK

Looking to add small fruit trees to your garden in the UK? If you have limited space but still want to enjoy the fruits of your labor, there are several options available. Here are four small fruit trees that are suitable for gardens in the UK.

  1. Dwarf Apple Tree: These apple trees only grow to be about 6-8 feet tall, making them perfect for smaller yards or gardens. Despite their size, they still produce full-size apples, allowing you to enjoy a bountiful harvest.
  2. Meyer Lemon Tree: Meyer lemons are known for their sweet and fragrant flavor. A Meyer lemon tree will only grow to be about 8-10 feet tall, making it a great choice for smaller garden spaces.
  3. Cherry Tree: Whether you prefer sweet or sour cherries, a cherry tree can be a delightful addition to your garden. These trees typically only grow to be 10-12 feet tall, so they won’t take up too much room.
  4. Peach Tree: Peaches are a summertime favorite, and fortunately, peach trees don’t require a large amount of space to thrive. These trees can fit well in smaller gardens and provide you with delicious, juicy peaches to enjoy.

Unusual Fruit Trees UK

Looking to add some uniqueness to your garden? Consider planting an unusual fruit tree in the UK. Here are three unusual fruit trees that can add a touch of novelty to your garden:

  • Quince Tree: The quince tree produces a yellowish-green fruit that’s a cross between an apple and a pear. It has a distinctive aroma and is commonly used in jams and preserves. Planting a quince tree can bring a traditional touch to your garden and provide you with a delicious ingredient for your homemade preserves.
  • Medlar Tree: The medlar tree produces plum-like fruits that are often used in jams or pies. Although they’re too tart to eat fresh, they can be transformed into delicious preserves. Planting a medlar tree can give your garden an exotic flair and provide you with unique ingredients for your baking adventures.
  • Mulberry Tree: The mulberry tree produces red or black berries that have a taste similar to a combination of raspberries and blackberries. The berries can be eaten fresh or used in various culinary creations, such as pies, jams, or even wine. Planting a mulberry tree can add a touch of sweetness to your garden and provide you with a delightful treat during the harvesting season.

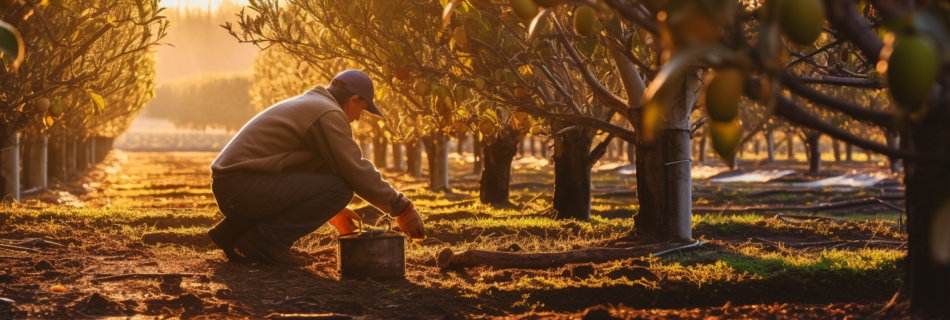
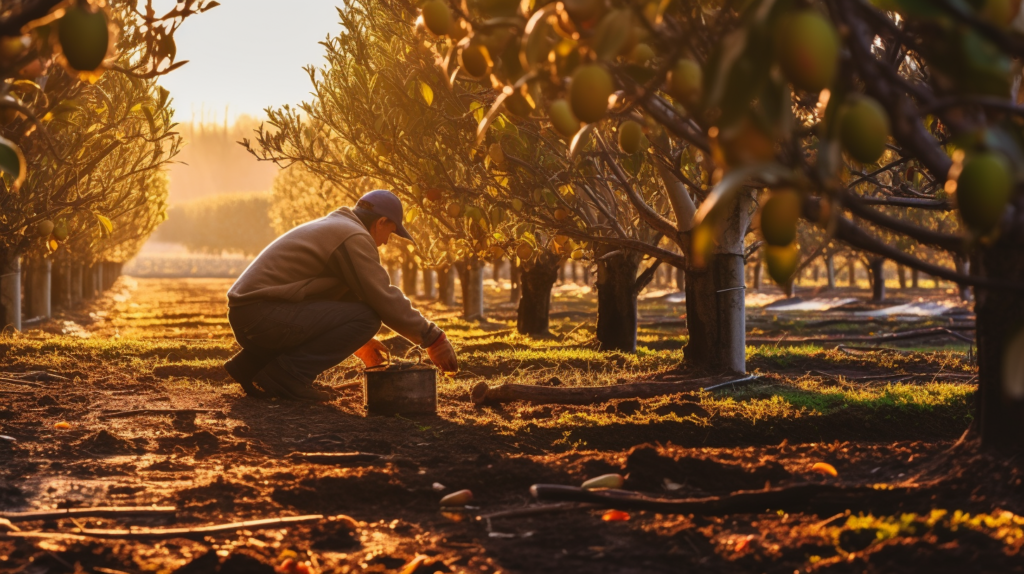
Best Time to Plant Fruit Trees UK

The best time to plant fruit trees in the UK is between late October and early November. This allows the roots to establish themselves before winter arrives. While spring planting can also be successful, it’s important to ensure that the soil isn’t too wet.

When choosing a location for your fruit tree, make sure it receives full sun and has good drainage. Avoid low-lying areas that are prone to frost and try to find a sheltered spot to protect the tree from strong winds.

To plant the tree, dig a hole twice as wide as the root ball and backfill it with soil mixed with compost or well-rotted manure. Water the tree thoroughly after planting. If necessary, stake the young tree with a 1m tall stake to provide support as it grows and produces fruit. You can remove the stake after 3-5 years once the tree has reached maturity.

Which is the Easiest Fruit Tree to Grow in the UK

The easiest fruit tree to grow in the UK is the apple tree. With its hardy nature and ability to tolerate a range of conditions, apple trees can thrive in most parts of the country. They require minimal maintenance, needing only annual pruning and feeding to produce a bountiful crop of delicious apples each year.

If you’re new to growing fruit trees or have limited space in your garden, a dwarf apple variety is a great choice. These compact trees still yield plenty of tasty apples while taking up less room than standard-sized varieties.

Here are three reasons why growing an apple tree is a rewarding and enjoyable experience:

  • Abundance of fruit: Apple trees are known for their generous fruit production, ensuring you’ll have plenty of apples to enjoy or share with friends and family.
  • Versatility in use: Apples can be used in a variety of ways, from making pies and crumbles to juicing and preserving. The possibilities are endless!
  • Beautiful blossoms: In addition to the tasty fruit, apple trees also offer stunning blossoms in the spring, adding beauty and fragrance to your garden.

What is the Hardiest Fruit Tree in UK?

When it comes to the hardiest fruit tree in the UK, you can’t go wrong with the apple tree. It’s known for its ability to withstand extremely low temperatures, withstanding as low as -30 degrees Fahrenheit.

Other cold-hardy fruit trees include the sour cherry, apricot, and peach, which can tolerate temperatures down to about -20 degrees Fahrenheit. However, the hardiness of a fruit tree also depends on its cultivar or variety. It’s important to research and choose a cultivar that’s known for its hardiness if you’re looking for a truly tough fruit tree.

Keep in mind that there are some varieties of apples that are more cold-hardy than others. So, if you want a fruit tree that can thrive in the UK’s unpredictable weather, consider planting an apple tree or other cold-hardy options like the sour cherry, apricot, or peach.

Frequently Asked Questions

Can Fruit Trees Be Grown in Containers in the UK?

Yes, fruit trees can be grown in containers in the UK. Choose dwarf varieties like apples, pears, plums, cherries, and peaches. Figs, quinces, apricots, and nectarines can also be grown in containers. They are space-efficient and still produce a good crop of fruit.

How Can I Protect My Fruit Trees From Pests and Diseases in the UK?

To protect your fruit trees from pests and diseases in the UK, prune regularly, water adequately, and fertilize as needed. Use fungicides or insecticides when necessary and monitor for signs of infestation or disease.

What Are Some Options for Small Fruit Trees Suitable for Gardens in the UK?

For small gardens in the UK, consider dwarf varieties of apples, pears, plums, cherries, and peaches. Figs, quinces, apricots, and nectarines can be grown in containers. These space-efficient trees still produce a good crop of fruit.

What Are Some Unusual Fruit Trees That Can Be Grown in the UK?

Some unusual fruit trees that can be grown in the UK include quince, medlar, mulberry, and fig trees. These trees offer unique fruits like yellowish-green quinces, plum-like medlars, red or black mulberries, and versatile figs.

When Is the Best Time to Plant Fruit Trees in the UK?

The best time to plant fruit trees in the UK is in late autumn or early winter when the trees are dormant. This allows them to establish their roots before the spring growth begins.

Conclusion

Growing your own fruit trees in the UK doesn’t have to be a daunting task. With the top 11 easiest and low maintenance fruit trees specifically suited for the UK climate, you can enjoy delicious homegrown fruit without the hassle.

From apple and pear trees to more unique options like quince and medlar trees, there are options for every garden size and space.

With our expert advice on care and maintenance, you can confidently harvest your own fruits and enjoy the satisfaction of a fruitful garden.

The 6 Best Fruit Trees for Small Gardens UK

Looking to add some fruit trees to your small garden in the UK? Not sure which ones would be the best fit? Look no further!

In this article, we’ll explore the six best fruit trees for small gardens in the UK. From apple trees to quince trees, we’ll delve into their characteristics, growth requirements, and the delicious fruits they provide.

Whether you have limited space or a sunny spot, we’ve got you covered. Let’s transform your small garden into a fruitful oasis!

6 Best Fruit Trees for Small Gardens UK

Looking to grow fruit trees in your small garden in the UK?

Consider the Apple Tree, which comes in both dwarf and standard varieties, providing fresh apples for consumption.

Pear Trees, such as the popular ‘Conference’ variety, are self-fertile and require a sunny spot to thrive.

Plum Trees, Cherry Trees, and Quince Trees are also excellent options, offering compact sizes, beautiful blossoms, and delicious fruits for your enjoyment.

Apple Tree

For a small garden in the UK, consider planting an apple tree. Apple trees are a great choice because they can provide you with fresh apples for consumption. There are different varieties available, including dwarf varieties like ‘Bramleys Seedling’ that can reach around 3m (10ft), and standard varieties that can grow up to 7m (23ft) in height.

These trees require a sunny spot and can be planted from seeds. Apples are also one of the easiest fruit trees to grow in the UK. So, if you have limited space but still want to enjoy the taste of homegrown apples, an apple tree would be a perfect addition to your small garden.

Pear Trees

If you have limited space in your small garden, consider planting pear trees, as they’re one of the best fruit trees for small gardens in the UK. Pear trees, especially dwarf varieties like the popular ‘Conference’, reach a manageable height of around 3m (10ft).

They’re self-fertile, meaning you don’t need another tree nearby for pollination. Pear trees thrive in sunny spots and provide fresh, delicious pears for consumption.

When growing pear trees in small gardens, consider training them against walls or fences using techniques like espalier or fan training to maximize space.

With their compact size and fruitful yield, pear trees are an excellent choice for adding beauty and flavor to your small garden.

Plum Tree

When considering the best fruit trees for small gardens in the UK, the plum tree stands out for its compact size and abundant yield.

Plum trees are perfect for limited spaces and can be trained against walls or grown in containers. They’re highly productive and offer a beautiful display of spring blossoms that add to the landscape.

Some varieties of plum trees are self-fertile, making them ideal for small gardens where space is a concern. The plums themselves are delicious and can be enjoyed fresh or used in a variety of recipes.

With their compact size and bountiful harvest, plum trees are an excellent choice for those looking to grow fruit in small gardens.

Cherry Tree

If you’re looking for a fruit tree that’s compact and ideal for small gardens in the UK, the cherry tree is an excellent choice. Here’s why:

  • Compact size: Cherry trees are known for their compact growth habit, making them perfect for limited spaces where multiple trees may not fit.
  • Self-fertile varieties: Some cherry tree varieties are self-fertile, meaning you only need one tree to produce fruit.
  • Beautiful spring blossoms: Cherry trees produce stunning blossoms in the spring, enhancing the aesthetic appeal of your garden.
  • Delicious cherries for consumption: Cherry trees provide an abundance of delicious cherries that can be enjoyed fresh or used in recipes.

With their compact size, self-fertile varieties, beautiful blossoms, and delicious fruit, cherry trees are a fantastic addition to small gardens in the UK.

Quince Tree

Continue exploring the best fruit trees for small gardens in the UK with the quince tree, an excellent choice for its unique fruit and self-fertile nature.

The quince tree produces unusual fruits that resemble large yellow apples. It can grow up to 5m (16ft) tall and is suitable for making jams and jellies.

The quince tree is self-fertile, so you don’t need another tree nearby for pollination. It requires a sunny spot in your garden to thrive.

The quince tree adds a touch of flavor and uniqueness to your garden while providing a bountiful harvest of flavorful fruits.

Consider planting a quince tree in your small garden to enjoy its distinctive fruit and low-maintenance nature.

Medlar Tree

Now let’s delve into the Medlar Tree, another excellent choice for the best fruit trees for small gardens in the UK, and discover its unique characteristics and benefits.

  • The Medlar Tree produces small brown fruits that are perfect for cooking into pies or crumbles. These fruits add a distinct flavor and uniqueness to your garden. The tree can grow up to 4m (13ft) tall and requires full sun.
  • One of the main advantages of the Medlar Tree is its suitability for making excellent jelly. The fruits have a high pectin content, which is essential for jelly making. You can enjoy homemade Medlar jelly spread on toast or used as a condiment.

Best Fruit Trees for Small Spaces in UK

When choosing fruit trees for small spaces in the UK, consider the best varieties that thrive in limited areas.

For apple trees, dwarf varieties like ‘Bramleys Seedling’ can grow up to 3m (10ft), while standard varieties can reach up to 7m (23ft).

Pear trees, such as the popular ‘Conference’ variety, also have dwarf options that reach around 3m (10ft).

Plum trees are compact in size and can be trained against walls or grown in containers, making them suitable for limited spaces.

Cherry trees, with their beautiful spring blossoms, are also ideal for small gardens.

Quince trees, known for their unusual fruit resembling large yellow apples, can grow up to 5m (16ft) tall.

And for a unique addition to your garden, consider the medlar tree, which produces small brown fruits for cooking into pies or crumbles.

These fruit trees not only provide fresh and delicious produce, but they also add beauty and flavor to your small space.

Small Fruit Trees for Garden In Uk

To maximize the potential of your small garden in the UK, consider planting a variety of small fruit trees that will thrive in limited spaces. These trees not only provide fresh fruits for consumption but also add beauty and uniqueness to your garden.

Here are some options to consider:

  1. Dwarf Apple Tree: These trees grow to about eight feet tall and are perfect for small spaces. They produce delicious apples that can be used for cooking or eating fresh.
  2. Dwarf Cherry Tree: With a height of around six feet, these trees are suitable for small yards or patios. They offer beautiful spring blossoms and produce sweet cherries for consumption or recipes.
  3. Dwarf Lemon Tree: Growing to about six feet tall, these trees add a citrus touch to small spaces. Lemons can be used in baking, cooking, or making refreshing drinks.
  4. Apricot Tree: These trees can be as small as six feet tall, making them ideal for smaller gardens. They bear sweet and juicy apricots that are perfect for snacking or using in recipes.

These fast-growing fruit trees, along with patio fruit trees, can be found at various nurseries and online platforms. When growing fruit trees in small spaces, make sure to choose self-fertile varieties, provide adequate sunlight, and consider training them against walls or fences to save space.

With the right care and attention, you can enjoy the taste of fresh-picked fruits from your own backyard.

Fast Growing Fruit Trees UK

If you’re looking for fast-growing fruit trees in the UK, consider planting varieties that will quickly reach maturity and bear fruit. Apple trees are a great option, with some dwarf varieties like ‘Bramleys Seedling’ reaching around 3m (10ft) and standard varieties growing up to 7m (23ft). They require a sunny spot and can be planted from seeds.

Pear trees, like the popular ‘Conference’ variety, also mature and produce fruit within a few years. They’re self-fertile, so you don’t need another tree nearby, and they require a sunny spot as well.

Plum trees are compact in size and can be trained against walls or grown in containers. They’re highly productive and some varieties are self-fertile.

Cherry trees, with their beautiful spring blossoms, are compact and ideal for small gardens. Some varieties are self-fertile, and they provide delicious cherries for consumption.

Quince trees take a bit longer, around 5-6 years, to reach full maturity, but they produce large and flavorsome fruits.

When choosing fast-growing fruit trees, do your research and seek advice from local gardening centers or nurseries for assistance.

Patio Fruit Trees in UK

Now let’s delve into the world of patio fruit trees in the UK and discover how to maximize your small garden space while enjoying delicious homegrown fruits.

When it comes to patio fruit trees, there are a variety of options to choose from that will thrive in small spaces. Here are two sub-lists to help you make the most of your patio:

  1. Dwarf Citrus Trees:
  • Meyer lemons and Satsuma oranges are perfect for patios. They can be grown in containers and provide a fresh supply of citrus fruits.
  • Regular pruning will help keep the trees small and manageable while ensuring optimal fruit production.
  1. Other Patio Fruit Trees:
  • Fig trees are a great choice as they can be kept small with regular pruning and produce delicious fruits.
  • Blueberries make lovely patio plants and offer health benefits. They can be grown in containers and provide an abundance of tasty berries.

When growing patio fruit trees, it’s important to provide adequate water and fertilizer for optimal growth. Consider the specific needs of each tree and provide the appropriate sunlight and soil conditions.

Dwarf Fruit Trees Near Me in UK

When searching for dwarf fruit trees near you in the UK, consider visiting local gardening centers or nurseries for a wide selection of compact varieties that are perfect for small gardens. These establishments often carry a range of dwarf fruit trees, such as dwarf apple, cherry, lemon, and apricot trees.

Dwarf apple trees typically grow to about eight feet tall and produce delicious apples for cooking or eating fresh.

Dwarf cherry trees, on the other hand, reach a height of about six feet and offer sweet cherries for consumption or recipes.

Dwarf lemon trees add a touch of citrus to small spaces and can be used in baking, cooking, or making refreshing drinks.

If you’re looking for a smaller fruit tree for your garden, consider the dwarf apricot tree, which can be as small as six feet tall and provides sweet and juicy apricots for snacking or recipes.

These varieties thrive in small yards or patios and can bring the joy of homegrown fruit to your doorstep.

Which Fruit Trees Bear Fruit Fastest UK

Are you wondering which fruit trees in the UK bear fruit the fastest? When it comes to fruit trees, it’s natural to want to see results as quickly as possible.

Here are some fruit trees that bear fruit relatively fast in the UK:

  • Apple trees: Many apple tree varieties reach full maturity and start producing fruit in just 3-4 years. This makes them a popular choice for those looking for quick results.
  • Pear trees: Like apple trees, pear trees also mature and produce fruit in just a few years. They’re a great option for those who prefer pears over apples.
  • Quince trees: While it takes slightly longer for quince trees to reach full maturity (around 5-6 years), they produce large and flavorsome fruits that are worth the wait.

To ensure you choose the fastest-growing varieties, it’s always a good idea to do some research and seek advice from local gardening centers or nurseries. They can provide you with valuable insights and recommendations based on your specific needs and preferences.

What is the Least Messy Fruit Tree?

If you’re looking for a fruit tree that won’t create a mess in your small garden, consider planting a dwarf citrus tree.

Dwarf citrus trees, like lemon or orange trees, are an excellent choice because they produce minimal debris compared to other fruit trees.

Their compact size makes them ideal for small spaces, such as patios or balconies. Dwarf citrus trees typically grow to about six feet tall, making them easy to manage and harvest.

You can enjoy the benefits of fresh citrus fruits for cooking, baking, or making refreshing drinks without worrying about excessive fallen leaves or fruit.

Dwarf citrus trees add a touch of beauty to your garden with their fragrant blossoms and glossy foliage.

With proper care and regular pruning, you can maintain the cleanliness of your small garden while enjoying the delicious fruits from your dwarf citrus tree.

Frequently Asked Questions

Can Fruit Trees Be Grown in Containers in Small Gardens?

Yes, fruit trees can be grown in containers in small gardens. They are a great option for saving space and still enjoying fresh fruit. Choose dwarf varieties and provide adequate sunlight, water, and nutrients for optimal growth.

What Is the Best Way to Save Space When Growing Fruit Trees in Small Gardens?

To save space when growing fruit trees in small gardens, consider training them against walls or fences using techniques like espalier or fan training. This maximizes space and allows you to grow apple, pear, plum, or cherry trees in a compact manner.

Are There Any Self-Fertile Fruit Tree Varieties Recommended for Small Gardens in the Uk?

Yes, there are self-fertile fruit tree varieties recommended for small gardens in the UK. Self-fertile trees like ‘Conference’ pear and some cherry varieties are great options as they don’t require another tree nearby for pollination.

Can Plums and Cherries Be Grown in Small Gardens? How Can They Be Trained to Save Space?

Yes, plums and cherries can be grown in small gardens. To save space, you can train them against walls or fences using techniques like espalier or fan training. This maximizes space while still allowing for a bountiful harvest.

Where Can I Find Dwarf Fruit Trees in the Uk?

You can find dwarf fruit trees in the UK at PCC Community Markets Plant Department in Oregon and Washington, Dwarf Fruit Trees Online for mail-order delivery, and Four Winds Growers in California. Enjoy fresh-picked fruit from your own backyard!

Conclusion

If you have a small garden in the UK and are looking to add fruit trees, there are plenty of options available to you. From apple trees to quince trees, there are varieties that can thrive in small spaces and provide delicious fruits.

Consider dwarf fruit trees for even more convenience and easy maintenance. With their compact size, they are perfect for small gardens and can be easily managed. They also tend to produce fruits earlier than standard-sized trees, allowing you to enjoy the fruits of your labor sooner.

When choosing fruit trees for your small garden, it’s important to consider the specific requirements of each variety. Some fruit trees require full sun, while others can tolerate partial shade. Make sure to choose varieties that are well-suited to your garden’s conditions.

Proper pruning and training techniques are also essential for maintaining the size and shape of your fruit trees. Regular pruning helps to encourage healthy growth and maximize fruit production. It’s a good idea to familiarize yourself with these techniques before planting your trees.

With the right choices, you can transform your small garden into a fruitful oasis and enjoy the benefits of homegrown fruit. Imagine being able to pick fresh apples or plums right from your own backyard. The satisfaction and joy of growing your own fruit are unbeatable.

So, don’t be discouraged by the size of your garden. With some careful planning and research, you can find the perfect fruit trees that will thrive in your small space. Start small, with a couple of trees, and gradually expand as you gain more experience. Before you know it, you’ll have a bountiful garden filled with delicious fruits. Happy gardening!

Top 10 Best Kitchen Compost Bin No Fruit Flies Reviews and Buying Guide

Looking for a solution to keep fruit flies out of your kitchen compost bin? Look no further!

In this article, we’ll explore the top 10 best kitchen compost bins designed specifically to keep those pesky flies away.

From the iTouchless 13 Gallon Automatic Trash Can with Odor-Absorbing Filter and Lid Lock to the OXO Good Grips Easy-Clean Compost Bin, we’ll review each bin’s features and benefits to help you make an informed decision.

Let’s dive into the world of kitchen compost bins and find the perfect solution for your kitchen.

Details of The Best Kitchen Compost Bin No Fruit Flies

When searching for the best kitchen compost bin for a fly-free environment, look for a bin that’s equipped with features to prevent fruit flies from becoming a nuisance.

The iTouchless 13 Gallon Automatic Trash Can with Odor-Absorbing Filter and Lid Lock is an excellent choice. iTouchless is a well-respected brand known for its quality construction and user-friendliness. This automatic trash can features a touchless lid opener and a sensor-activated bin, making garbage collection more efficient and hygienic. The bin is also equipped with an odor-absorbing filter and a lid lock to control odors and prevent pests like fruit flies.

Another option is the NEW OXO Good Grips Easy-Clean Compost Bin, which has a stylish and modern design. This bin is easy to clean and has a secure lid to control odor. The OXO brand is known for its great design, easy cleaning, and odor prevention features.

These bins, along with others like the Utopia Compost Bin and the EPICA Countertop Compost Bin, all have unique features such as size, capacity, design, and odor control. They’re made from durable materials and are easy to clean, ensuring a fly-free environment for your kitchen composting needs.

iTouchless 13 Gallon Automatic Trash Can with Odor-Absorbing Filter and Lid Lock (Best Overall)

If you’re looking for the best overall kitchen compost bin with no fruit flies, the iTouchless 13 Gallon Automatic Trash Can with Odor-Absorbing Filter and Lid Lock is a top choice.

iTouchless is a trusted brand known for its efficient and hygienic waste disposal systems.

This trash can features infrared technology, an odor-absorbing filter, and a lid lock to keep pests out and odors contained.

Is Itouchless a Good Brand

iTouchless’ 13 Gallon Automatic Trash Can with Odor-Absorbing Filter and Lid Lock is widely regarded as the best overall kitchen compost bin for its exceptional functionality and innovative features.

iTouchless is a well-respected and trusted brand in the industry of automated waste disposal systems. Their products are designed to make garbage collection more efficient, hygienic, and convenient for both commercial and residential customers.

iTouchless offers automatic trash cans with touchless lid openers and sensor-activated bins, which ensure hands-free use. Their products are praised for quality construction, user-friendliness, affordability, and durability, making them an ideal choice for reliable automated waste management solutions.

If you’re looking for a kitchen compost bin that combines convenience, effectiveness, and durability, iTouchless is a brand that you can trust.

NEW OXO Good Grips Easy-Clean Compost Bin, White (Best Kitchen Waste Bin & Easy To Clean)

Looking for the best kitchen compost bin that keeps fruit flies away? Look no further than the NEW OXO Good Grips Easy-Clean Compost Bin in white. This bin offers a stylish and modern design that will complement any kitchen decor.

With its 1 gallon capacity, it can hold up to 2 weeks’ worth of food scraps or garden waste, reducing the need for frequent emptying. The built-in odor control filters help to reduce unpleasant smells, ensuring a fresh and odor-free composting experience.

Constructed with durability in mind, this kitchen compost bin is made of high-quality plastic and features easy-to-clean surfaces. The secure lid and built-in filter keep odors contained while allowing excess moisture to escape, ensuring that your compost stays fresh and pest-free.

Its convenient size and easy setup instructions make it simple to start composting and reduce waste in your home.

Overall, the NEW OXO Good Grips Easy-Clean Compost Bin is the best kitchen compost bin for those who want to compost easily and efficiently while keeping fruit flies at bay. Its stylish design, odor control features, and durable construction make it a top choice for any kitchen.

Start composting today and contribute to a greener environment.

OXO Good Grips Easy-Clean Indoor Compost Bin For Kitchen (Convenient Size and Design)

The OXO Good Grips Easy-Clean Indoor Compost Bin for Kitchen offers a convenient size and design for easy composting in your kitchen.

With a capacity of 0.75 gallons, it’s perfect for storing food scraps and other compostable materials until you’re ready to transfer them to an outdoor compost pile.

The bin features a secure lid to prevent pests and control odor, making it a practical and efficient solution for composting in small spaces.

How Often Should I Change the Charcoal Filter in My Compost Bin

To maintain optimal performance, it’s important to regularly change the charcoal filter in your OXO Good Grips Easy-Clean Indoor Compost Bin for Kitchen. For regular use, it’s recommended to change the charcoal filter every 2-3 months. However, if you’re using the compost bin less frequently, you can wait up to 6 months before needing to replace the filter.

It’s crucial to check the charcoal filter for any discoloration or odor, as this indicates that it’s no longer functioning properly and should be replaced. By regularly changing the charcoal filter, you ensure that it effectively absorbs and filters out any unpleasant odors from your compost bin, keeping your kitchen fresh and odor-free.

Utopia Compost Bin for Kitchen Countertop (Rust Proof & Best Indoor Composting Bin)

If you’re looking for a rust-proof and reliable indoor composting bin for your kitchen countertop, the Utopia Compost Bin is a top choice.

This bin is made from durable stainless steel and plastic materials that are easy to clean, ensuring it can withstand everyday use.

It features an airtight lid with an activated carbon filter to keep odors in check, making composting easy and convenient while preventing fruit flies.

How Do You Compost on a Kitchen Countertop

When composting on your kitchen countertop, you can rely on the Utopia Compost Bin for Kitchen Countertop as your rust-proof and best indoor composting bin.

This specialized indoor composter is designed to fit small spaces and provide a convenient solution for composting organic waste in your kitchen.

Simply add your food scraps, along with shredded newspaper or cardboard, into the bin filled with soil and worms. Regularly stir the mixture to ensure proper air circulation.

Once your compost has reached the desired level of decomposition, transfer it to an outdoor bin for further breakdown.

The Utopia Compost Bin for Kitchen Countertop also offers a convenient replacement filter made of activated charcoal to keep odors in check.

Changing the filter is easy and requires no special tools.

EPICA Countertop Compost Bin Kitchen | 1.3 Gallon

You’ll love the EPICA Countertop Compost Bin Kitchen | 1.3 Gallon for its compact size and effective odor control. This compost bin is designed to fit perfectly on your kitchen countertop, measuring 7.16″ in diameter and 11″ high. It strikes a balance between being compact and spacious enough to hold days’ worth of compostable organic waste.

Here are three reasons why the EPICA Countertop Compost Bin is a great choice for your kitchen:

  1. Effective Odor Control: The compost bin features an airtight lid and a replaceable activated-charcoal filter. This combination effectively eliminates unpleasant odors in your kitchen, providing a natural and convenient way to control kitchen smells.
  2. Easy to Clean: The one-piece molded design of the compost bin resists rust and leaks, making it easy to clean and maintain. Unlike welded bins that deteriorate over time, this bin is designed for long-lasting use.
  3. Durable Construction: Made of high-grade stainless steel, this countertop compost bin is not only durable but also scratch-resistant. It won’t leach toxic chemicals into your compost, ensuring a safe and environmentally friendly composting process.

Tiyafuro 2.4 Gallon Kitchen Compost Bin for Counter Top or Under Sin

You can consider the Tiyafuro 2.4 Gallon Kitchen Compost Bin for your countertop or under sink composting needs.

This compost bin offers several features that make it a convenient and efficient option for managing kitchen waste.

One notable feature is its odor prevention capability. The compost bin comes with a lid that effectively prevents odors from escaping, eliminating the need for charcoal filters. This ensures that your kitchen remains odorless even with organic waste inside.

Installation is also a breeze with the Tiyafuro compost bin. It can be hung, mounted, or placed under the sink, making it adaptable to various kitchen setups. The package includes mounting accessories like hooks and adhesive options for easy installation.

Made from high-density Polypropylene, this compost bin is durable and built to withstand everyday use. It’s designed without crevices or traps, making it easy to clean with just soap and water.

The Tiyafuro compost bin isn’t limited to kitchen use. It can be used in other areas of your home where you need a space-saving and environmentally friendly trash can, such as the bathroom, RV, or laundry room.

With a generous capacity of 2.4 gallons, this compost bin provides ample space for collecting kitchen scraps and organic waste. This means less frequent emptying and better convenience for you.

While the Tiyafuro compost bin offers great functionality, it’s important to consider the available installation space and color options to ensure it fits your specific needs and preferences.

Granrosi Compost Bin Kitchen (Kitchen Compost Bin Countertop)

Continuing from the previous subtopic, let’s now delve into the Granrosi Compost Bin Kitchen, a countertop option for your kitchen composting needs. This compost bin offers several features that make it a great addition to your kitchen:

  1. Odor-Free Composting: The Granrosi Compost Bin is designed to be an odorless storage container for organic and food waste. It includes an integrated charcoal filter that naturally and effectively blocks odors, ensuring your home smells fresh.
  2. High-Grade Charcoal Filters: This compost bin comes with 2 extra charcoal filters, each of which lasts approximately 3-4 months. These filters help maintain a fresh-smelling kitchen by trapping odors, even as you collect compostable materials.
  3. Premium Construction: The metal indoor compost bin is coated both inside and outside to resist rust, ensuring long-term durability and continuous use. It’s a top-quality kitchen tool designed to last.

With a capacity of 1.3 gallons, this compost bin offers ample space for collecting organic kitchen and food waste. Its vintage farmhouse design is attractive and stylish, making it a functional yet decorative addition to your kitchen that you won’t need to hide under the sink.

Cleaning the kitchen compost container is simple – just use warm soapy water and wipe the lid with a damp cloth after use. The sturdy handle makes it easy to empty the indoor compost into your outside food waste bin without hassle.

LALASTAR Food Waste Basket Bin for Kitchen (Best Kitchen Indoor Compost Bin)

To explore the best kitchen indoor compost bin option, let’s now focus on the LALASTAR Food Waste Basket Bin for Kitchen. This small trash can with a lid isn’t only versatile but also hangable and mountable. You can easily hang it on the doors of kitchen cabinets, office lockers, or bedroom drawers. If you prefer, you can also wall-mount it on cupboards, kitchen walls, or bathroom walls using adhesive pads.

The LALASTAR bin is designed for various applications, making it suitable for makeup tables, vanities, office desktops, countertops, and inside cabinets. It can be utilized in different rooms throughout the house, including the bathroom, laundry room, home office, craft room, and kids’ room.

One of the standout features of this trash can is its ability to function as a compost bin. It effectively blocks odors, thanks to its lid, which keeps fruit scraps, vegetable peelings, and other compostable materials contained. This prevents the attraction of flies or unpleasant smells in your kitchen.

Made from high-quality plastic, the LALASTAR kitchen trash can with a lid is both lightweight and sturdy. It even has a built-in handle, making it easy to carry, even when the bin is filled. With a capacity of 0.8 gallons (3 liters) and compact dimensions, this mini trash can is space-efficient. It can fit on a countertop, under the sink, or in the pantry, making it a practical choice for small living spaces like dorm rooms, apartments, condos, RVs, and cabins.

Joseph Joseph Compo 4 Easy-Fill Compost Bin Food Waste Caddy with Adjustable Air Vent

The Joseph Joseph Compo 4 Easy-Fill Compost Bin is a food waste caddy with an adjustable air vent that helps prevent fruit flies.

Here are three key features of this compost bin:

  1. Ventilated Design: The Compo 4 features a unique ventilated design that allows air to circulate inside the bin. This helps reduce moisture, which is a common cause of fruit flies. By keeping the compost properly aerated, the bin helps prevent the growth of these pesky insects.
  2. Replaceable Odor Filter: The bin is equipped with a replaceable odor filter in the lid. This filter works in conjunction with the ventilated design to trap and minimize any unpleasant smells that may occur during the composting process. With the odor filter in place, you can compost your food waste without worrying about attracting fruit flies.
  3. Easy Access and Cleaning: The Compo 4 has a flip-top lid that provides easy access to the interior, making it convenient to deposit food waste without hassle. The polypropylene body is easy to clean, ensuring proper hygiene and preventing any lingering odors.

With its adjustable air vent, replaceable odor filter, and easy access and cleaning features, the Joseph Joseph Compo 4 Easy-Fill Compost Bin is an excellent choice for preventing fruit flies and managing your kitchen waste effectively.

Eparé Kitchen Compost Bin Countertop (Best Kitchen Compost Bin No Fruit Flies)

For the best kitchen compost bin that effectively prevents fruit flies, choose the Eparé Kitchen Compost Bin Countertop.

This bin features an odorless design with a snug lid and a carbon filter that effectively locks in odors, ensuring that your kitchen remains fresh and pleasant.

The compact and functional design of this indoor compost bin makes it ideal for kitchens of all sizes, even those with limited space. It can be conveniently hung for added convenience.

With a spacious capacity of 4 liters, this bin reduces the need for frequent disposal trips, enhancing kitchen efficiency. Cleaning and emptying the bin is a breeze thanks to the removable inner bucket, which also helps maintain freshness and hygiene.

Constructed from durable stainless steel, this compost bin is built to last. It measures 8.7 x 6.1 x 7.9 inches, making it a perfect fit for your countertop.

While the Eparé Kitchen Compost Bin comes in limited color options, it includes compost bags for improved compost management.

Keep your kitchen free from fruit flies with the Eparé Kitchen Compost Bin Countertop.

How To Choose The Best Kitchen Compost Bin No Fruit Flies

When choosing the best kitchen compost bin to prevent fruit flies, it’s important to research different types of compost bins, materials used, ease of cleaning, type and design of the bin, and the lid.

Consider the size and capacity of the bin to ensure it meets your needs without taking up too much counter space. Look for bins with tight-fitting lids made of stainless steel or plastic with an airtight seal to prevent odors and pests.

Choose a bin with holes for air circulation while keeping fruit flies out.

Research Different Types of Compost Bins

To choose the best kitchen compost bin no fruit flies, consider researching different types of compost bins based on your kitchen size and storage needs.

Here are three important factors to consider:

  1. Size: Determine the available space in your kitchen and choose a compost bin that fits comfortably. If you have limited space, opt for a compact countertop bin. If you have more room, a larger bin with a higher capacity may be suitable.
  2. Design and Features: Look for a compost bin with a secure lid to prevent fruit flies and control odors. Consider features like a carbon filter or charcoal filter to further minimize odors. Some bins also have convenient handles or hanging options for easy transport.
  3. Material and Durability: Choose a compost bin made from durable materials that are easy to clean. Stainless steel or plastic bins are common options. Consider the bin’s construction and reviews from other users to ensure it will withstand regular use.

Materials

To choose the best kitchen compost bin, prioritize durability, cleanliness, and effectiveness in preventing odor.

Common materials used for compost bins include plastic, stainless steel, and ceramic.

Plastic bins are lightweight, affordable, and easy to clean, but they may not be as durable as stainless steel or ceramic options.

Stainless steel bins are more durable and resistant to odors, but they can be more expensive.

Ceramic bins offer a stylish and decorative option, but they may require more care and maintenance.

Consider your preferences and needs when choosing a material for your compost bin, ensuring that it’s durable, easy to clean, and effective in preventing fruit flies and odor.

Easy to Clean

To ensure that you choose the best kitchen compost bin no fruit flies, it’s essential to prioritize a bin that’s easy to clean. Here are three factors to consider when evaluating the ease of cleaning:

  1. Removable Inner Bucket: Look for a compost bin that has a removable inner bucket. This feature makes it much easier to empty and clean the bin without any hassle.
  2. Smooth Surface: Opt for a bin with a smooth surface that’s easy to wipe clean. Avoid bins with crevices or textured surfaces, as they can trap food residue and become difficult to clean thoroughly.
  3. Dishwasher Safe: Check if the compost bin is dishwasher safe. This feature allows for effortless cleaning and ensures that all parts of the bin, including the lid and filters, can be thoroughly sanitized.

Type and Design

When choosing the best kitchen compost bin that will prevent fruit flies, consider the type and design that will suit your needs and preferences.

Deciding between an open or closed compost bin is important. An open bin allows for airflow, which speeds up the decomposition process. However, it may attract fruit flies, so consider the placement of the bin.

Closed bins are a great option to prevent fruit flies as they’ve secure lids that keep pests out.

Consider the design of the compost bin. Look for bins that are easy to clean, have a large capacity, and are made from durable materials.

Some bins even have features like hanging or mounting options, vintage farmhouse designs, and odor control mechanisms.

Lid

When choosing the best kitchen compost bin that will prevent fruit flies, it’s important to consider the lid design. Here are three key factors to consider:

  1. Holes:
    Look for a lid with tiny holes that allow for proper aeration while keeping fruit flies out. These small holes prevent the entry of insects without compromising the airflow necessary for the composting process.
  2. Charcoal filter:
    Opt for a covered container with an attached charcoal filter. This filter traps odors inside the bin, preventing them from attracting fruit flies or other insects into your home. The charcoal filter effectively neutralizes odors, keeping your kitchen smelling fresh.
  3. Secure closure:
    Ensure that the lid has a secure closure mechanism to prevent any gaps or openings that can serve as entry points for fruit flies. A tightly sealed lid will keep the compost bin airtight, preventing the escape of odors and the intrusion of pests.

Other Features

To ensure that you choose the best kitchen compost bin that effectively prevents fruit flies, consider the following essential features.

  • First, think about whether you prefer an automated system or a manual one that requires turning the contents for proper aeration. A manual system allows for easy detection of emerging insect issues like fruit fly eggs.
  • Next, consider the airflow within the compost pile itself. Adequate airflow prevents odor problems. Look for a bin with a lid that provides good ventilation to reduce moisture and odors. Check if the bin has a replaceable odor filter in the lid for extra odor control.
  • Finally, consider the size and capacity of the bin to ensure it meets your composting needs.

Price

To choose the best kitchen compost bin that effectively prevents fruit flies, consider the price of the bin without sacrificing its quality. Here are three factors to keep in mind when considering the price of a kitchen compost bin:

  1. Budget-friendly options: Look for compost bins that offer good value for money without compromising on functionality. There are affordable options available that still provide excellent fruit fly prevention and durability.
  2. Long-term cost savings: Investing in a high-quality compost bin may have a higher upfront cost, but it can save you money in the long run. A well-made bin will last longer and require fewer replacements or repairs.
  3. Additional features: Some compost bins come with extra features like odor control mechanisms or filters. While these features may increase the price, they can greatly enhance the overall composting experience by keeping your kitchen odor-free and reducing the risk of fruit flies.

Are There Supposed to Be Fruit Flies in My Compost

If you have a compost pile in your kitchen, it’s normal to have fruit flies present. In fact, the presence of fruit flies in your compost is actually a good sign that the composting process is working as it should. Fruit flies lay their eggs in decaying organic matter, such as fruits, vegetables, and other food scraps that you add to your compost pile. The larvae and pupae of fruit flies feed on this organic matter, helping to break it down into rich soil amendments that will eventually become part of your finished compost.

Not only do fruit flies assist in the decomposition of organic waste, but they also serve as pollinators. As the adult fruit flies search for food sources, they spread beneficial microbes around your garden or yard area, contributing to the overall health of your plants.

While fruit flies may be a bit annoying, especially if they start to multiply, having some fruit fly activity in your compost pile is completely normal and nothing to worry about. It’s a natural part of the composting process and a sign that your compost is thriving.

Why is My Compost Bin Full of Flies

You may wonder why your compost bin is frequently full of flies. There are several reasons why this may be happening:

  1. Moisture: Flies are attracted to moist environments, and if your compost bin is too wet, it becomes an ideal breeding ground for them. Ensure that your compost pile is moist but not overly damp. You can add dry leaves or sawdust to absorb excess moisture and create a drier environment.
  2. Lack of Aeration: Flies thrive in environments with limited air circulation. If your compost is compacted and lacks proper aeration, it becomes a haven for flies. Regularly turning your compost with a pitchfork or shovel helps to introduce air and disrupt the fly habitat.
  3. Food Sources: Flies are drawn to organic matter, which serves as their food source. If you’re adding food scraps to your compost bin without burying them or covering them with dry materials, it creates an open invitation for flies. Make sure to bury food scraps in the compost pile or cover them with a layer of leaves or straw.

Do Indoor Compost Bins Attract Bugs or Fruit Flies

Indoor compost bins can attract bugs and fruit flies due to the heat and moisture produced by the organic materials in the bin. These insects are attracted to the decomposing matter and can quickly become a nuisance if not properly managed.

To prevent bug infestations, it’s important to keep your compost bin covered with a tight-fitting lid to contain any odors that might draw bugs. It’s recommended to store the bin away from windows or other sources of light, as this can reduce the possibility of attracting pests.

Another way to prevent bugs and fruit flies is to break down large chunks of food into smaller pieces before adding them to the bin. This will speed up the decomposition process and reduce the amount of time spent waiting for the finished compost.

Regularly turning over the contents of the bin will help aerate them, preventing them from becoming stagnant, and also allow you to check for signs of insect activity before adding more food scraps.

How To Get Rid Of Fruit Flies From Kitchen Compost Bin

To get rid of fruit flies from your kitchen compost bin, start by emptying the bin and cleaning it thoroughly to remove any remaining food scraps or residue that may attract the flies.

Place fruit fly traps in your kitchen near the compost bin to catch any remaining flies.

Consider changing your composting habits by ensuring that you bury food scraps deeper in the compost or freeze them before adding them to the bin.

Using apple cider vinegar as a natural trap can also help attract and eliminate fruit flies.

Empty the Compost Bin

Proper disposal of kitchen compost is essential in preventing the presence of fruit flies. To empty the compost bin and get rid of fruit flies, follow these steps:

  1. Remove any old fruits or vegetables that may have attracted fruit flies. Discard any rotting fruit or vegetable scraps that may have accumulated in the bin.
  2. Clean the compost bin thoroughly with warm soapy water to remove any remaining food residue. Make sure to scrub the lid, sides, and bottom of the bin to eliminate any potential breeding grounds for fruit flies.
  3. After cleaning, ensure that the compost bin is completely dry before adding fresh compost materials. Fruit flies are attracted to moisture, so keeping the bin dry will help deter them from returning.

Clean Out The Compost Bin

To eliminate fruit flies from your kitchen compost bin, thoroughly clean it using hot water and soap to remove any food particles, odors, or debris that may be attracting them.

Start by emptying out the compost bin and disposing of the contents properly. Then, rinse the bin with hot water to loosen any remaining residue.

Use a scrub brush and soap to thoroughly clean the inside and outside of the bin, paying close attention to any crevices or corners where food particles may be hiding.

Rinse the bin again with hot water to remove any soap residue. Finally, allow the bin to air dry completely before adding fresh compost materials.

Regularly cleaning your compost bin will help prevent fruit flies and maintain a clean and odor-free environment.

Place Fruit Fly Traps in The Kitchen

To effectively get rid of fruit flies from your kitchen compost bin, place fruit fly traps in strategic locations around your kitchen. Fruit fly traps are designed to attract and capture fruit flies, preventing them from breeding and multiplying.

Here are three effective fruit fly traps to consider:

  1. Sticky traps: These traps are coated with a sticky substance that fruit flies get stuck to when they land on them. Place them near your compost bin and other areas where fruit flies are commonly found.
  2. Vinegar traps: Fruit flies are attracted to the scent of vinegar. Fill a small bowl with apple cider vinegar or white vinegar and add a few drops of dish soap. Cover the bowl with plastic wrap and poke a few holes in it. The fruit flies will be lured in by the scent and get trapped in the liquid.
  3. DIY traps: You can also make your own fruit fly traps using household items. One popular method is to create a trap using a jar, apple cider vinegar, and a paper cone. Place the vinegar in the jar, roll a piece of paper into a cone shape, and place it in the jar with the narrow end pointing down. Fruit flies will be attracted to the vinegar and enter the jar through the cone, but they won’t be able to find their way out.

Change Your Composting Habits

If you’re still struggling with fruit flies in your kitchen compost bin, it’s time to make a change in your composting habits.

One way to do this is by adding more air-tight covers over food scraps when storing them in the refrigerator or freezer before adding them to the compost bin outside. This will reduce odors that attract fruit flies into your home in the first place.

Another tip is to make sure you’re properly maintaining your compost bin by regularly turning and aerating the compost to promote decomposition and discourage fruit flies.

Ensure that you’re not overloading the bin with food scraps and make sure to bury them well within the compost to further deter fruit flies.

Use Apple Cider Vinegar

If you’re still struggling with fruit flies in your kitchen compost bin, try using apple cider vinegar as a deterrent measure. Here are three reasons why apple cider vinegar can help get rid of fruit flies:

  1. Attracts fruit flies: Fruit flies are attracted to the smell of vinegar, especially apple cider vinegar. When you place a bowl filled with apple cider vinegar near your compost bin, the fruit flies will be drawn to it.
  2. Traps fruit flies: Adding a few drops of dish soap to the apple cider vinegar creates a surface tension that fruit flies can’t escape from. When they land on the liquid, they’ll sink and drown, effectively trapping them.
  3. Prevents new infestations: By using apple cider vinegar as a deterrent, you can prevent new fruit fly infestations from occurring in your home environment.

Using apple cider vinegar is a simple and effective way to get rid of fruit flies in your kitchen compost bin.

Use Fresh Leaves

One effective way to get rid of fruit flies from your kitchen compost bin is by using fresh leaves.

Fresh bay leaves, in particular, have a strong smell that repels insects like fruit flies naturally. By placing a few fresh bay leaves inside your compost pail, you can discourage fruit flies from infesting your bin without resorting to harsh chemical insecticides.

This method is safe for other beneficial organisms in your kitchen environment, such as ants, spiders, and moths, which play important roles in maintaining a balanced ecosystem.

Simply add the fresh leaves to your compost bin, and their strong scent will help keep fruit flies at bay, ensuring a clean and odor-free composting process.

Frequently Asked Questions

Are There Supposed to Be Fruit Flies in My Compost?

No, there are not supposed to be fruit flies in your compost. Fruit flies are attracted to decaying organic material, so it’s important to properly maintain your compost bin by sealing it tightly and avoiding adding any ripe or rotting fruits.

Why Is My Compost Bin Full of Flies?

Your compost bin may be full of flies due to improper maintenance or food waste attracting them. Ensure proper aeration, balance of green and brown materials, and cover food scraps with a layer of carbon-rich material to prevent flies.

Do Indoor Compost Bins Attract Bugs or Fruit Flies?

Indoor compost bins can attract bugs and fruit flies if not properly managed. Ensure the bin has a secure lid, regular stirring for air circulation, and proper disposal of food waste.

How to Get Rid of Fruit Flies From a Kitchen Compost Bin?

To get rid of fruit flies from your kitchen compost bin, start by removing any decaying or overripe fruits or vegetables. Clean the bin thoroughly with hot, soapy water, and keep it tightly sealed to prevent flies from entering.

How to Choose the Best Kitchen Compost Bin That Doesn’t Attract Fruit Flies?

To choose the best kitchen compost bin that doesn’t attract fruit flies, consider ones with secure lids, odor control features, and easy cleaning. Look for reputable brands like iTouchless and OXO Good Grips, known for their quality and functionality.

Conclusion

Finding the right kitchen compost bin can help keep fruit flies away and make composting a breeze. The iTouchless 13 Gallon Automatic Trash Can with Odor-Absorbing Filter and Lid Lock is our top pick for its features and effectiveness.

The OXO Good Grips Easy-Clean Compost Bin is also a great option with its easy-to-clean design.

Remember to regularly change the charcoal filter in your compost bin to maintain its odor-absorbing capabilities.

Using a kitchen compost bin, you can reduce food waste and contribute to a healthier environment.

Top 10 Best Tool for Digging Holes for Trees and Fence

Are you tired of struggling to dig holes for your tree planting or fence installation projects? Look no further! We’ve got you covered with the top 10 tools that will make your job a breeze.

Whether you’re a professional landscaper or a DIY enthusiast, these durable and versatile tools will help you dig with ease. From heavy-duty shovels to efficient manual post hole diggers, we’ve curated a list of the best options out there.

Get ready to take your tree planting or fence installation game to the next level!

Review of Best Tool for Digging Holes for Trees

If you’re looking for the best tool for digging holes for trees, the Ashman Heavy-Duty Digging Shovel is a top pick. This shovel is designed with a 41-inch length and a trenching blade, making it perfect for digging deep and narrow holes. The reinforced fiberglass handle provides durability and strength, while the lightweight design allows for easy maneuverability. The Ashman Heavy-Duty Digging Shovel is built to withstand heavy use and is a reliable choice for any tree planting project.

This shovel isn’t only efficient but also versatile. Its design allows for precise digging and the sharp blade easily cuts through soil and roots. The long handle provides leverage, making it easier to dig deeper holes without straining your back. The Ashman Heavy-Duty Digging Shovel is a tool that will last for years, making it a worthwhile investment for any gardener or landscaper.

Ashman Heavy-Duty Digging Shovel (1 Pack) 41-Inch with Trenching Blade (Top Pick)

Continuing the discussion from the previous subtopic, let’s delve into the top pick for the best tool for digging holes for trees and fences: the Ashman Heavy-Duty Digging Shovel (1 Pack) with a 41-Inch length and a trenching blade.

This shovel is designed to handle the toughest of digging tasks with ease. Its heavy-duty construction ensures durability and longevity, making it a reliable tool for years to come.

The 41-Inch length of the shovel provides extra leverage, allowing you to dig deep holes with minimal effort. The trenching blade is perfect for creating narrow, precise trenches for installing fences or irrigation systems. It cuts through the soil smoothly, making your digging tasks more efficient and less time-consuming.

The Ashman Heavy-Duty Digging Shovel is made with high-quality materials, ensuring its strength and stability. The handle is ergonomically designed for a comfortable grip, reducing strain on your hands and wrists during prolonged use. This shovel is also lightweight, making it easy to maneuver and transport.

Whether you’re a professional landscaper or a DIY enthusiast, the Ashman Heavy-Duty Digging Shovel is a must-have tool for any digging project. Its top-notch performance, durability, and versatility make it the perfect choice for digging holes for trees and fences.

Roamwild Multi-Digger Garden Spade – Reinforced Fibreglass Light Weight Gardening (Best Quality)

Now let’s move on to discussing the Roamwild Multi-Digger Garden Spade – a reinforced fiberglass lightweight gardening tool that offers the best quality for digging holes for trees and fences.

This versatile tool is designed to make your digging tasks easier and more efficient. Here are a few reasons why the Roamwild Multi-Digger Garden Spade stands out:

  • Reinforced Fiberglass: The spade is made from high-quality reinforced fiberglass, which makes it incredibly strong and durable. It can withstand the rigors of heavy digging without bending or breaking, ensuring that it will last for years to come.
  • Lightweight Design: Despite its strength, the Roamwild Multi-Digger Garden Spade is surprisingly lightweight. This makes it easier to maneuver and reduces the strain on your arms and back, allowing you to dig for longer periods without fatigue.
  • Ergonomic Handle: The spade features an ergonomic handle that provides a comfortable grip and reduces hand fatigue. It’s designed to fit the natural shape of your hand, allowing for better control and precision while digging.
  • Sharp Blade: The blade of the Roamwild Multi-Digger Garden Spade is sharp and efficient, making it easy to cut through soil and roots. This saves you time and effort, making your digging tasks faster and more efficient.
  • Versatility: In addition to digging holes for trees and fences, this garden spade can also be used for other gardening tasks such as planting, transplanting, and edging. Its versatility makes it a valuable tool for any gardener.

With its reinforced fiberglass construction, lightweight design, ergonomic handle, sharp blade, and versatility, the Roamwild Multi-Digger Garden Spade is the best quality tool for digging holes for trees and fences. It will make your gardening tasks easier, more efficient, and more enjoyable.

Auger Drill Bit for Planting,1.6X 9 inch Garden Auger, Bulb (Recommended)

The recommended tool for digging holes for trees and fences is the Auger Drill Bit for Planting, a 1.6X 9 inch garden auger specifically designed for efficient planting and bulb digging.

This auger drill bit is an essential tool for any gardener or landscaper looking to save time and effort when planting trees or installing fences. With its durable construction and sharp cutting edges, it effortlessly cuts through soil, making the hole digging process quick and easy.

The 1.6-inch diameter and 9-inch length of the auger drill bit are perfect for planting bulbs and small to medium-sized trees. Its efficient design allows you to dig precise holes without damaging the surrounding soil or roots.

Whether you’re a professional or a DIY enthusiast, this auger drill bit will help you achieve professional results with ease. So, if you’re looking for a reliable and efficient tool for digging holes for trees and fences, the Auger Drill Bit for Planting is the top choice.

XtremepowerUS 85060 Post Hole Digger w/6″ Bit Electric 1500W Auger

To discuss the XtremepowerUS 85060 Post Hole Digger w/6′ Bit Electric 1500W Auger, let’s begin with its impressive features and functionality.

This powerful electric auger is designed to make digging holes for trees and fence posts a breeze. With its 1500W motor, it provides enough power to tackle even the toughest soil conditions.

The 6-inch bit allows for a wide hole diameter, making it suitable for various applications.

Here are some key features that make the XtremepowerUS 85060 Post Hole Digger stand out:

  • Electric Power: The 1500W motor provides consistent and reliable power, eliminating the need for manual labor.
  • Lightweight Design: Weighing only 29 pounds, this post hole digger is easy to maneuver, reducing fatigue during extended use.
  • Safety Features: The XtremepowerUS 85060 comes with a safety lock to prevent accidental starts, ensuring your safety while operating the machine.
  • Versatility: This auger isn’t only suitable for digging holes for trees and fence posts, but it can also be used for projects like planting shrubs or installing signs.

ProPlugger 5-in-1 Lawn and Garden Tool, Bulb Planter, Weeder

You can use the ProPlugger 5-in-1 Lawn and Garden Tool for multiple purposes, including planting bulbs and weeds.

This versatile tool eliminates the need for several separate tools, saving you time and effort in your gardening tasks.

With its unique design, the ProPlugger allows you to dig perfect holes for bulbs, seedlings, and small plants effortlessly. The tool features depth rings that ensure consistent hole depth, resulting in uniform planting and optimal growth for your plants.

The ProPlugger can be used as a weed remover, making it easy to remove unwanted plants from your garden without damaging the surrounding soil.

Its compact size and lightweight construction make it easy to handle and maneuver in tight spaces.

The ProPlugger is a durable and reliable tool that will last for years, providing you with efficient and effective planting and weeding solutions.

Whether you’re a seasoned gardener or just starting out, the ProPlugger 5-in-1 Lawn and Garden Tool is a must-have addition to your gardening arsenal.

Edward Tools Bulb Planter – Bend Free Tool for Planting

Edward Tools Bulb Planter offers a bend-free solution for effortless planting. This innovative tool is designed to make your gardening experience easier and more enjoyable. With its sturdy construction and ergonomic handle, you can say goodbye to back pain and discomfort while planting bulbs.

Here are two reasons why the Edward Tools Bulb Planter is a must-have tool for any gardener:

  1. Easy to Use:
    The Edward Tools Bulb Planter features a unique design that allows you to effortlessly dig holes for planting bulbs. Simply position the planter over the desired location, push down firmly, and release the soil. The sharp cutting edge ensures clean and precise holes every time.
  2. Bend-Free Operation:
    Unlike traditional bulb planters that require you to bend over and strain your back, the Edward Tools Bulb Planter eliminates the need for bending. The long handle provides leverage and allows you to plant bulbs without putting unnecessary pressure on your back and knees.

With the Edward Tools Bulb Planter, you can plant bulbs with ease and precision. Say goodbye to back pain and hello to a more enjoyable gardening experience. Invest in this bend-free tool today and see the difference it can make in your planting process.

Radius Garden 203 PRO Ergonomic Stainless Steel Digging Fork, Original

The Radius Garden 203 PRO Ergonomic Stainless Steel Digging Fork, Original is perfect for efficiently digging holes for trees and fences. This high-quality tool is designed to make your digging tasks easier and more comfortable.

The stainless steel construction ensures durability and longevity, while the ergonomic design reduces strain on your hands and wrists. The fork features four tines that are sharp and strong, allowing you to penetrate the soil with ease. With a length of 42.5 inches, it provides excellent leverage and reach, making it ideal for digging deep holes.

The handle is made of non-latex, thermoplastic elastomer, which provides a comfortable grip and prevents slipping. The Radius Garden 203 PRO Digging Fork is also lightweight, weighing just 4.3 pounds, making it easy to maneuver and transport.

Whether you’re planting trees or installing fences, this digging fork is a reliable and efficient tool that will get the job done.

Edward Tools Bend-Proof Garden Trowel – Heavy Duty Polished Stainless

Continuing the discussion from the previous subtopic, we now move on to the Edward Tools Bend-Proof Garden Trowel – Heavy Duty Polished Stainless, a reliable tool for digging holes for trees and fences that’s designed to withstand bending.

This garden trowel is a must-have for any gardener or landscaper looking for a durable and long-lasting tool. Here are two reasons why the Edward Tools Bend-Proof Garden Trowel stands out among the rest:

  • Bend-Proof Design: The trowel is constructed with a heavy-duty polished stainless steel material that’s specifically designed to be bend-proof. This means that even when you encounter tough soil or rocks, the trowel won’t bend or break, ensuring that you can continue digging without any interruptions.
  • Comfortable Handle: The handle of the Edward Tools Bend-Proof Garden Trowel is ergonomically designed for maximum comfort during use. It features a soft rubber grip that provides a secure and comfortable hold, reducing hand fatigue and making it easier to dig for extended periods of time.

With its bend-proof design and comfortable handle, the Edward Tools Bend-Proof Garden Trowel is a reliable tool that will make digging holes for trees and fences a breeze. Whether you’re a professional landscaper or a gardening enthusiast, this trowel is sure to meet your needs and exceed your expectations.

Sun Joe TJ603E 16-Inch 12-Amp Electric Tiller and Cultivator

Moving on to the next tool for digging holes for trees and fences, let’s talk about the Sun Joe TJ603E 16-Inch 12-Amp Electric Tiller and Cultivator.

This powerful machine is designed to make your gardening tasks easier and more efficient. With its 12-amp motor and 16-inch tilling width, it can easily break up compacted soil and prepare it for planting.

The electric motor eliminates the need for gas or oil, making it environmentally friendly and easy to start. The tiller also features six durable steel tines that can be adjusted to three different positions, allowing you to customize the depth and width of your tilling.

It has a maximum tilling depth of 8 inches, which is perfect for digging holes for trees and fences. The Sun Joe TJ603E is lightweight and easy to maneuver, making it suitable for both small and large gardening projects.

Whether you’re planting trees or creating a new garden bed, this electric tiller and cultivator is a reliable and efficient tool that will help you get the job done quickly and effortlessly.

Rotoshovel 22 Inch Electronic Handheld Lithium Ion Battery Powered Digging

Now let’s dive into the Rotoshovel 22 Inch Electronic Handheld Lithium Ion Battery Powered Digging, a revolutionary tool for efficient and effortless hole digging. This innovative tool has been specifically designed to make your digging tasks easier and more convenient. Here are some key features that make the Rotoshovel a top choice:

  • Powerful Performance:
  • The Rotoshovel is equipped with a 22-inch electronic handheld design, allowing you to easily maneuver and dig holes with precision and control.
  • The lithium-ion battery provides long-lasting power, ensuring that you can complete your digging tasks without any interruptions.
  • Versatile Functionality:
  • The Rotoshovel is suitable for various digging applications, including planting trees, installing fence posts, and creating holes for gardening projects.
  • With its adjustable depth control, you can easily customize the depth of your holes, ensuring that they meet your specific requirements.

Not only does the Rotoshovel offer exceptional performance and versatility, but it also provides cost-effective benefits. By investing in this tool, you can save time and effort, making your digging tasks more efficient and enjoyable. With its user-friendly design and reliable performance, the Rotoshovel is a must-have tool for anyone looking to dig holes for trees and fences.

Frequently Asked Questions

What Are the Cost-Effective Benefits of Using the Rotoshovel for Digging Holes for Trees and Fences?

The cost-effective benefits of using the Rotoshovel for digging holes for trees and fences include its efficient digging power, time-saving capabilities, and durability. It’s a versatile tool that can handle various soil types with ease.

Can the Proplugger 5-In-1 Lawn and Garden Tool Be Used for Digging Holes for Both Trees and Fences?

Yes, the ProPlugger 5-in-1 lawn and garden tool can be used for digging holes for both trees and fences. It is a versatile tool that can handle various gardening tasks efficiently.

How Does the Edward Tools Bulb Planter Compare to Other Tools for Planting Bulbs When Digging Holes for Trees?

The Edward Tools Bulb Planter is a reliable tool for planting bulbs when digging holes for trees. It offers precision and ease of use compared to other tools. Its design ensures proper bulb placement and minimizes damage to surrounding plants.

Is the Xtremepowerus 85060 Post Hole Digger Suitable for Digging Holes in Hard Soil?

Yes, the XtremepowerUS 85060 post hole digger is suitable for digging holes in hard soil. Its powerful electric 1500W auger can easily penetrate tough ground, making your digging process more efficient.

What Are the Unique Features of the Sun Joe TJ603E 16-Inch 12-Amp Electric Tiller and Cultivator for Digging Holes for Trees and Fences?

The Sun Joe TJ603E 16-inch 12-amp electric tiller and cultivator has unique features for digging holes for trees and fences. Its powerful motor and adjustable tilling depth make it efficient and versatile.

Conclusion

These top 10 tools for digging holes for trees and fences are sure to make your landscaping or DIY projects a breeze.

From heavy-duty digging shovels to efficient manual post hole diggers, each tool on this list is known for its durability, versatility, and performance.

Whether you’re a professional landscaper or a DIY enthusiast, these tools will help you achieve outstanding results.

So, level up your tree planting or fence installation game with these top-notch tools.

Where to Buy Planting Pots: Exploring 7 Sources for Buying Planting Pots

Looking for new planting pots? Look no further! This guide will show you where to find the perfect pots for your plants.

Whether you prefer local shopping or online convenience, there are plenty of options available. Local garden centers, specialty shops, and farmers markets offer a wide selection of high-quality pots. Online retailers and discount stores also provide affordable choices.

For unique and artistic designs, specialty garden shops and farmers markets are the go-to places. Get ready to explore these seven sources and find the perfect pots for your green space!

Where to Buy Planting Pots: Exploring Various Sources for Buying Planting Pots with Pros and Cons

When it comes to buying planting pots, there are several sources you can explore.

Local garden centers and nurseries offer a wide range of options, allowing you to see and feel the pots in person before making a purchase.

Online retailers provide convenience and a vast selection, but you won’t be able to physically inspect the pots.

Home improvement stores and discount stores offer affordable options, while specialty garden shops provide unique and artistic designs.

Each source has its pros and cons, so consider your preferences and needs when making a decision.

1. Local Garden Centers and Nurseries

You can find a wide variety of planting pots at your local garden centers and nurseries. These are great places to explore when looking for the perfect pots for your plants.

Here are some reasons why you should consider shopping at local garden centers and nurseries for your planting pots:

  • Wide selection: Local garden centers and nurseries often have a diverse range of planting pots to choose from, including different sizes, materials, and styles.
  • Expert advice: The staff at these establishments are knowledgeable about gardening and can provide helpful guidance on selecting the right pots for your specific needs.
  • Supporting local businesses: By purchasing your planting pots from local garden centers and nurseries, you’re supporting your community and helping to sustain these small businesses.
  • Opportunity to see and touch: Shopping in person allows you to physically examine the pots, ensuring that they meet your expectations in terms of quality and aesthetics.

2. Online Retailers

Looking for convenient options? Where can you find a wide variety of planting pots without leaving your home? Online retailers are the answer! With just a few clicks, you can explore a vast selection of planting pots from the comfort of your own home.

Online retailers offer a wide range of options, from basic plastic pots to stylish ceramic ones. One of the biggest advantages of shopping online is the convenience. You can browse through different sizes, shapes, and colors, compare prices, and read customer reviews all in one place.

However, it’s important to consider shipping costs and delivery times when purchasing from online retailers. Make sure to check the retailer’s return policy in case you’re not satisfied with your purchase.

Online retailers provide a convenient and accessible option for purchasing planting pots, making it easier for you to find the perfect pots for your plants.

3. Home Improvement Stores

Home improvement stores offer a convenient and accessible option for purchasing planting pots. These stores typically have a wide selection of pots in various sizes, materials, and styles. Here are some advantages and considerations when buying planting pots from home improvement stores:

  • Variety: Home improvement stores usually have a vast range of planting pots, allowing you to choose from different designs and materials.
  • Affordability: These stores often offer competitive prices, making it budget-friendly to buy planting pots.
  • Convenience: With many locations and online options, home improvement stores make it easy to find and purchase the pots you need.
  • Accessibility: Home improvement stores are commonly found in most neighborhoods, making it convenient to visit and browse their selection.

When shopping at home improvement stores, it’s essential to check the quality of the pots and ensure they have adequate drainage holes. Consider the size and material that best suits your plants’ needs.

4. Discount Stores

When shopping at discount stores, keep in mind the advantages and considerations of buying planting pots.

Discount stores are a great option if you’re looking for affordable planting pots. These stores often offer a wide variety of options at lower prices compared to other retailers. You can find basic terra cotta pots, plastic pots, and even decorative pots at discounted prices.

However, there are a few things to consider when buying from discount stores. The quality of the pots may not be as high as those from specialty stores, so be sure to inspect them for any cracks or defects.

The selection may be limited, so you may not find the exact style or size you’re looking for.

Despite these considerations, discount stores can be a convenient and budget-friendly option for buying planting pots.

5. Specialty Garden Shops

Specialty garden shops offer a diverse selection of planting pots with unique designs and features. These shops cater specifically to gardening enthusiasts and provide a wide range of options to suit different preferences and needs. Here’s why specialty garden shops are a great source for buying planting pots:

  • Variety: Specialty garden shops offer a wide variety of planting pots, from traditional clay pots to modern and artistic designs. You’ll find pots in different shapes, sizes, and materials, allowing you to choose the perfect one for your plants.
  • Expertise: The staff at specialty garden shops are knowledgeable about plants and can provide expert advice on selecting the right pot for your specific plant species. They can guide you on factors such as drainage, insulation, and aesthetics.
  • Quality: Specialty garden shops often prioritize quality over quantity. You can expect to find well-crafted and durable pots that will last for years, ensuring the health and longevity of your plants.
  • Unique designs: These shops often collaborate with local artisans to offer unique and artistic pot designs that can add a touch of personality to your garden.

Whether you’re looking for a simple terracotta pot or a statement piece for your garden, specialty garden shops are an excellent choice for buying planting pots.

6. Online Plant Shops

To continue exploring various sources for buying planting pots, let’s now delve into the convenience and wide selection offered by online plant shops.

Online plant shops have become increasingly popular due to their ease of use and the ability to browse and purchase from the comfort of your own home. These shops offer a wide variety of planting pots in different sizes, shapes, and materials, catering to the needs of different plants and personal preferences.

One of the main advantages of online plant shops is the convenience of having the pots delivered directly to your doorstep. Online shops often have a larger selection compared to physical stores, allowing you to find unique and hard-to-find designs.

However, it’s important to carefully read product descriptions, reviews, and return policies before making a purchase to ensure you’re getting the right product for your needs.

7. Thrift Stores and Secondhand Markets

If you’re looking to find affordable and unique planting pots, thrift stores and secondhand markets are great options for you. Not only can you find pots at a fraction of the price compared to new ones, but you can also stumble upon one-of-a-kind designs that add character to your garden.

Here are some reasons why you should consider checking out thrift stores and secondhand markets for your planting pot needs:

  • Affordable prices: Thrift stores and secondhand markets often offer pots at significantly lower prices compared to buying new. This allows you to save money while still getting the pots you need for your plants.
  • Unique designs: These places are treasure troves for unique and artistic pots. You can find vintage pots, handmade ceramics, or even repurposed items that add a touch of personality to your garden.
  • Sustainability: By purchasing secondhand pots, you’re contributing to a more sustainable lifestyle. Reusing pots reduces waste and gives old items a new purpose.
  • Variety: Thrift stores and secondhand markets have a wide variety of pots available. From different sizes, shapes, colors, and materials, you can find the perfect pot that suits your plant’s needs and your personal style.

Why Online Retailers Are The Best Places To Buy Planting Pots

When it comes to buying planting pots, online retailers are the best places to go for several reasons.

They offer a vast selection of pots in various sizes, materials, and designs, allowing you to find the perfect one for your specific needs.

Online shopping is incredibly convenient, as you can browse and purchase pots from the comfort of your own home.

Online retailers provide customer reviews and ratings, which can help you make an informed decision, and you can easily compare prices and features to ensure you’re getting the best deal.

Online retailers offer the convenience of delivery right to your doorstep, saving you time and effort.

Vast Selection

You can find the best selection of planting pots by shopping online. Online retailers offer a vast range of options, making it easier for you to find the perfect pots for your plants.

Here are some reasons why online retailers are the best places to buy planting pots:

  • Variety: Online retailers have a wide selection of planting pots available in different sizes, shapes, colors, and materials. You can easily find pots that suit your specific needs and preferences.
  • Convenience: Shopping online allows you to browse through different options from the comfort of your home. You can compare prices, read customer reviews, and make an informed decision without the hassle of visiting multiple physical stores.
  • Accessibility: Online retailers ship their products nationwide, making it easier for you to access a greater variety of planting pots that may not be available in your local area.
  • Exclusive Designs: Many online retailers offer unique and artistic designs that you may not find in local stores. You can find pots that aren’t only functional but also add a touch of style to your indoor or outdoor space.

When it comes to finding the perfect planting pots, online retailers provide a vast selection that caters to different tastes and preferences.

Convenience

Shopping online for planting pots offers you unparalleled convenience.

Online retailers are the best places to buy planting pots because they provide a wide range of options, competitive prices, and the convenience of shopping from the comfort of your own home.

With just a few clicks, you can browse through a vast selection of pots in different sizes, materials, colors, and designs. Online retailers also offer detailed product descriptions, customer reviews, and high-quality images, allowing you to make informed purchasing decisions.

Many online retailers offer fast and reliable shipping options, ensuring that your pots are delivered right to your doorstep.

Online retailers often have excellent customer service, providing assistance and support whenever needed.

Customer Reviews and Ratings

For the best places to buy planting pots, look for online retailers that offer customer reviews and ratings. Online retailers provide a convenient platform for purchasing planting pots, and customer reviews and ratings can offer valuable insights into the quality and functionality of the pots.

Here are four reasons why online retailers with customer reviews and ratings are the best places to buy planting pots:

  • Transparency: Customer reviews and ratings provide transparency about the product’s quality, durability, and performance, helping you make an informed decision.
  • Trustworthiness: Reading reviews from other customers who’ve already purchased the pots can give you confidence in the retailer and the product.
  • Variety: Online retailers usually offer a wide range of planting pots, allowing you to choose from different sizes, materials, and designs.
  • Convenience: You can browse and compare different pots from the comfort of your home, and easily find the best option based on customer feedback.

Comparison Shopping

When comparing options for buying planting pots, it’s essential to consider why online retailers are the best places to make your purchase.

Online retailers offer several advantages that make them the top choice for comparison shopping. Firstly, online retailers provide a wide variety of options, allowing you to choose from a vast selection of planting pots in different sizes, styles, and materials. You can easily browse through different websites to compare prices, features, and customer reviews to find the best deal.

Online retailers often offer discounted prices and promotions, making it more cost-effective to buy planting pots online. With the convenience of online shopping, you can make your purchase from the comfort of your own home and have the pots delivered right to your doorstep.

Delivery to Your Doorstep

To experience the convenience and efficiency of having planting pots delivered right to your doorstep, look no further than online retailers. With just a few clicks, you can browse through a wide range of options and have them delivered right to your door.

Here are four reasons why online retailers are the best places to buy planting pots:

  • Vast Selection: Online retailers offer a vast selection of planting pots, ranging from traditional terracotta pots to modern and unique designs. You can easily find the perfect pot that matches your style and plant’s needs.
  • Competitive Prices: Online retailers often offer competitive prices due to their lower overhead costs. You can find great deals and discounts, allowing you to get more for your money.
  • Convenience: Shopping for planting pots online is incredibly convenient. You can shop at any time, from the comfort of your own home. No need to spend time traveling to different stores or carrying heavy pots back home.
  • Customer Reviews: Online retailers provide customer reviews and ratings, giving you valuable insights into the quality and durability of the pots. You can make informed decisions based on the experiences of other customers.

With these benefits, online retailers are the go-to option for buying planting pots and having them delivered straight to your doorstep.

Ease of Research

Online retailers offer unparalleled convenience and accessibility, making them the optimal choice for conducting thorough research when searching for the best places to buy planting pots.

With just a few clicks, you can explore a wide range of options from the comfort of your own home. Online retailers provide detailed product descriptions, customer reviews, and ratings, allowing you to make informed decisions based on the experiences of others.

Many online retailers offer filtering options that allow you to narrow down your search based on specific criteria such as size, material, and price range. This saves you time and effort compared to physically visiting multiple stores.

Online retailers often provide a larger selection of planting pots compared to brick-and-mortar stores, giving you access to a wider variety of styles, colors, and designs.

Specialized Retailers

For the best places to buy planting pots, look no further than specialized online retailers. These online retailers offer a wide selection of planting pots, catering to various styles, sizes, and materials.

Here are some reasons why online retailers are the best places to buy planting pots:

  • Convenience: Online shopping allows you to browse and purchase planting pots from the comfort of your own home. No need to visit multiple physical stores to find the perfect pot.
  • Variety: Online retailers offer a vast range of planting pots, including unique and hard-to-find designs. Whether you’re looking for modern, rustic, or artistic pots, you’re sure to find something that suits your style.
  • Competitive prices: Online retailers often offer competitive prices, allowing you to find great deals on high-quality planting pots.
  • Customer reviews: Online retailers provide customer reviews and ratings, giving you valuable insights into the quality and durability of the pots before making a purchase.

With these advantages, specialized online retailers are the go-to option for buying planting pots.

Availability

With the convenience and wide variety offered by specialized online retailers, you can easily find the perfect planting pots for your needs.

Online retailers have become the best places to buy planting pots due to their availability and accessibility. Unlike physical stores, online retailers are open 24/7, allowing you to shop for planting pots at any time that suits you.

Moreover, online retailers offer a vast selection of pots in different sizes, shapes, and materials. Whether you’re looking for terracotta pots, ceramic pots, or modern geometric designs, you can find them all online.

Additionally, online retailers often provide detailed product descriptions, customer reviews, and high-quality images, giving you all the information you need to make an informed decision. With just a few clicks, you can compare prices, read reviews, and have your chosen planting pots delivered right to your doorstep.

Global Reach

To expand on the convenience and wide variety of options offered by online retailers, you can easily find the perfect planting pots for your needs. Online retailers have a global reach, allowing you to access a vast selection of planting pots from all over the world. Here are four reasons why online retailers are the best places to buy planting pots:

  • Extensive Selection: Online retailers offer a wide range of styles, sizes, and materials to choose from. You can find everything from traditional terracotta pots to modern and unique designs.
  • Competitive Prices: Online retailers often offer competitive prices and discounts, allowing you to find affordable options that suit your budget.
  • Convenience: Shopping online allows you to browse and purchase planting pots from the comfort of your own home. You don’t have to worry about transportation or store hours.
  • Customer Reviews: Online retailers provide customer reviews and ratings, giving you valuable insights into the quality and performance of the planting pots before making a purchase.

With the global reach of online retailers, you can easily find the perfect planting pots that meet your style, budget, and gardening needs.

Easy Returns and Customer Support

When shopping for planting pots, you can take advantage of easy returns and reliable customer support by choosing online retailers. Online retailers offer convenient return policies that allow you to easily return or exchange pots if they don’t meet your expectations. Most online stores have a dedicated customer support team that can assist you with any queries or concerns you may have. They’re available through various channels such as phone, email, or live chat, ensuring that you receive prompt assistance.

Additionally, online retailers often provide detailed product descriptions, images, and customer reviews, giving you a better understanding of the pots before making a purchase. This information helps you make informed decisions and find the perfect pots for your gardening needs.

Frequently Asked Questions

Are There Any Environmentally-Friendly Options for Buying Planting Pots?

There are environmentally-friendly options for buying planting pots. Look for biodegradable pots made from materials like coconut coir or peat. You can also repurpose old containers or make your own pots using recycled materials.

What Factors Should I Consider When Choosing a Planting Pot for Indoor Plants?

When choosing a planting pot for indoor plants, consider the size, drainage, material, and aesthetic appeal. The pot should be large enough for the plant’s roots, have proper drainage holes, be made of suitable material, and match your personal style.

Can I Find Unique and Decorative Planting Pots at Local Garden Centers?

Yes, you can find unique and decorative planting pots at local garden centers. They often have a wide selection of pots in various designs and materials to add a stylish touch to your indoor plants.

Are There Any Affordable Options for Buying Planting Pots?

Yes, there are affordable options for buying planting pots. You can check out local garden centers, specialty garden shops, farmers markets, or even online retailers and plant shops for budget-friendly options.

Are There Any Specialized Planting Pots Available for Specific Types of Plants?

Yes, there are specialized planting pots available for specific types of plants. Local garden centers, online plant shops, and specialty garden shops offer a variety of pots designed for different plants’ needs.

Conclusion

Whether you prefer to shop locally or online, there are plenty of options available when it comes to buying planting pots.

Local garden centers, nurseries, specialty garden shops, farmers markets, online retailers, and even home improvement stores all offer a wide variety of pots to suit your needs.

DIY and upcycling projects can provide a fun and eco-friendly way to create your own unique pots.

So, no matter your preference or budget, you’re sure to find the perfect planting pots for your green space.

Happy pot shopping!

Best 11 Easy Fruits to Grow in Pots And Provide You Good Harvest

Looking to grow your own fruits but don’t have a big garden? No worries! We’ve got you covered.

Discover the top 11 easy fruits to grow in pots and enjoy a bountiful harvest right at your doorstep. Whether you’re short on space or simply prefer container gardening, growing fruits in pots is a fantastic option.

From strawberries and blueberries to figs and grapes, we’ll guide you through selecting the right pots, soil mix, and care techniques for maximum fruit production.

Get ready to pluck homegrown fruits from your very own pots!

11 Easiest Fruit to Grow in a Pot

If you’re looking for the easiest fruits to grow in pots, consider starting with strawberries, blueberries, raspberries, cherry trees, and fig trees.

These fruits are relatively low-maintenance and can thrive in a container environment.

With proper care and attention, you can enjoy a bountiful harvest of delicious fruits right from your own patio or balcony.

1. Strawberries

Growing strawberries in a pot is a breeze and will provide you with a bountiful harvest. Here are four tips to help you successfully grow strawberries in pots:

  1. Choose the right pot: Use a pot at least 12 inches deep with drainage holes to ensure proper water drainage and prevent root rot.
  2. Select the right soil: Fill the pot with a soilless mixture like peat moss or perlite to provide good drainage and aeration for the strawberry plants.
  3. Proper planting spacing: Plant strawberries 18 inches apart to allow enough room for the plants to grow and spread out.
  4. Watering and protection: Water the strawberries deeply and regularly to keep the soil consistently moist. Protect the plants from birds by using netting.

2. Blueberries

To successfully cultivate blueberries in pots, the key is proper care and maintenance. Blueberries are one of the easiest fruits to grow in a pot, making them a great choice for beginner gardeners.

Start by choosing a pot that’s at least 12 inches deep and has drainage holes. Fill the pot with a soilless mixture such as peat moss or perlite.

Plant the blueberry bushes about 18 inches apart and water them deeply and regularly. Blueberries thrive in acidic soil, so it’s important to monitor the pH levels and adjust if necessary.

Protect the blueberries from birds by covering the pot with netting.

With the right care, you can enjoy a bountiful harvest of delicious blueberries right from your own potted garden.

3. Raspberries

If you’re looking to grow raspberries in a pot, the size of the pot is an important consideration. Raspberries have shallow roots, so a pot that’s at least 18 inches wide and 12 inches deep is recommended to provide enough space for the roots to grow.

Choosing the right size pot will help ensure healthy growth and a good harvest of raspberries.

How Big of a Pot Do You Need for Raspberries

For growing raspberries, you’ll need a pot that’s at least 12 inches wide and deep.

Here are four important considerations:

  1. Choose a pot with good drainage to prevent waterlogging.
  2. Use well-draining soil mix, such as a mixture of peat moss and perlite.
  3. Plant the raspberry plants at least 18 inches apart to give them room to grow.
  4. Provide regular watering and fertilizing to ensure healthy growth and fruit production.

4. Cherry Trees

Growing cherry trees in pots is a simple and rewarding experience. Cherries are one of the easiest fruits to grow in a pot.

To get started, choose a pot that’s at least 12 inches deep with drainage holes. Fill the pot with a soilless mixture like peat moss or perlite.

Plant your cherry tree in the pot, making sure to space multiple trees at least 18 inches apart. Water your cherry tree deeply and regularly, making sure to protect it from birds with netting.

Cherries thrive in a sunny location, so place your pot in an area that receives full sun. With proper care and maintenance, you can enjoy a bountiful harvest of delicious cherries right from your own potted tree.

5. Fig Tree

Now let’s move on to the easiest fruit to grow in a pot, the Fig Tree.

Here are four reasons why you should consider growing a Fig Tree in a pot:

  1. Low maintenance: Fig Trees are known for their easy care requirements. They’re drought-tolerant and don’t require frequent watering.
  2. Compact size: Fig Trees are naturally compact and can be easily accommodated in a pot. This makes them suitable for small spaces like balconies or patios.
  3. Abundant harvest: With proper care, Fig Trees can provide a bountiful harvest of sweet and delicious figs. You can enjoy fresh figs right from your own pot.
  4. Versatility: Fig Trees can be grown in both warm and cold climates. They can be kept indoors during winters or placed outdoors in warmer months.

6. Grapes

To successfully grow grapes in a pot, you’ll need to choose a large pot with good drainage. Grapes are the easiest fruit to grow in a pot because they’re hardy and adaptable. Start by selecting a suitable variety for container gardening, such as a dwarf grapevine.

Use well-draining soil mix and provide support for the vines to climb, such as a trellis or stake. Water the grape plant regularly, ensuring that the soil is evenly moist but not waterlogged. Fertilize with a balanced fertilizer to promote healthy growth and fruit production.

Prune the vines regularly to maintain their size and shape. With proper care, you can enjoy a bountiful harvest of delicious grapes from your potted plant.

7. Pomegranates

Pomegranates are an excellent choice for growing in pots, as they’re one of the easiest fruits to cultivate and provide a bountiful harvest. Here are four tips to successfully grow pomegranates in pots:

  1. Choose a pot that’s at least 18 inches wide and deep to provide enough space for the roots to grow.
  2. Use a well-draining potting mix to prevent waterlogged roots and ensure good drainage.
  3. Place the potted pomegranate in a sunny location to allow for optimal growth and fruit production.
  4. Water the plant regularly, keeping the soil moist but not overly saturated, and fertilize with a balanced fertilizer to provide essential nutrients.

8. Dwarf Citrus Trees

If you’re looking to grow citrus trees in pots, the best option is to choose a dwarf variety.

Dwarf citrus trees are the easiest fruit trees to grow in pots due to their size and adaptability.

They can thrive in containers as long as they’re provided with good drainage, a sunny location, regular watering, and citrus-specific fertilizer.

What is the Best Citrus Tree to Grow in the Pot

The easiest citrus tree to grow in a pot is a dwarf citrus tree.

Here are 4 popular dwarf citrus trees that are perfect for pot cultivation:

  1. Dwarf Meyer Lemon: This variety is known for its sweet and tangy flavor, and it produces abundant fruit year-round.
  2. Dwarf Key Lime: With its small size and fragrant blossoms, this tree is perfect for small spaces and produces juicy, acidic limes.
  3. Dwarf Calamondin Orange: This tree produces small, sour oranges that are perfect for making marmalades and flavoring dishes.
  4. Dwarf Satsuma Mandarin: This variety is easy to peel and has a sweet, juicy flavor, making it a favorite for snacking.

These dwarf citrus trees aren’t only easy to grow in pots, but they also provide a bountiful harvest of delicious fruits.

9. Dwarf Apple Trees

If you’re planning to grow dwarf apple trees in pots, one important consideration is the size of the pot you’ll need.

Dwarf apple trees have shallow root systems, so a pot that’s at least 18 inches wide and deep is recommended.

This size will provide enough room for the roots to spread out and allow the tree to grow and thrive.

What Size Pot Do I Need for a Dwarf Fruit Tree

To successfully grow a dwarf apple tree in a pot, you’ll need a pot that’s at least 12 inches wide and has good drainage. Here are four important considerations for choosing the right pot size for your dwarf fruit tree:

  1. Provide enough space for the roots to grow and establish in the pot.
  2. Ensure proper drainage to prevent waterlogging and root rot.
  3. Allow room for the tree to grow and develop its branches.
  4. Consider the weight of the pot when filled with soil and the tree, as it may need to be moved occasionally.

10. Peaches

Successfully growing peaches in a pot requires regular watering and diligent care. Peaches are the easiest fruit to grow in a pot because they adapt well to container gardening. Start by choosing a dwarf variety of peach tree and a large pot with drainage holes. Fill the pot with high-quality potting mix and water well to ensure proper moisture levels.

It’s important to maintain consistent moisture, so water the peach tree regularly and apply mulch to conserve moisture. Place the pot in a sunny location to provide the peach tree with enough sunlight for optimal growth. Prune the tree as needed to maintain its size and shape.

With proper care, you can enjoy a bountiful harvest of delicious peaches from your potted tree.

11. Plum Tree

Taking care of a potted plum tree is relatively easy.

Make sure to choose a large pot with drainage holes and fill it with high-quality potting mix.

Water regularly, keep the soil moist but not soggy, and provide full sun for at least 6 hours a day.

Fertilize with an all-purpose fertilizer for fruit trees and allow the top inch or two of soil to dry out between watering.

How Do You Care for a Potted Plum Tree?

When caring for a potted plum tree, provide full sun for at least 6 hours per day.

To care for your potted plum tree effectively, follow these tips:

  1. Choose a large pot with drainage holes to ensure proper water drainage.
  2. Water regularly, keeping the soil moist but not soggy.
  3. Fertilize with an all-purpose fertilizer specifically formulated for fruit trees.
  4. Allow the top inch or two of soil to dry out between watering to prevent overwatering.

Frequently Asked Questions

Can I Grow Multiple Types of Fruit Trees in the Same Pot?

Yes, you can grow multiple types of fruit trees in the same pot. However, it’s important to consider the size and compatibility of the trees, as well as their watering and sunlight requirements. Proper care and maintenance are key to successful growth.

How Often Should I Prune Fruit Trees in Pots?

Prune fruit trees in pots annually during their dormant season. Remove dead, damaged, or diseased branches, and shape the tree by trimming back excessive growth. This promotes healthy growth and maximizes fruit production.

Can I Grow Fruit Trees in Pots Indoors?

Yes, you can grow fruit trees in pots indoors. Choose dwarf varieties, use large pots with drainage holes, provide adequate sunlight, water regularly, and fertilize as needed. Enjoy the convenience of indoor fruit growing!

What Are Some Common Pests and Diseases That Affect Fruit Trees in Pots?

Common pests and diseases that affect fruit trees in pots include aphids, mealybugs, scale insects, and fungal diseases like powdery mildew. Regular inspection, proper watering, and organic pest control methods can help prevent and manage these issues.

How Do I Know if My Fruit Tree in a Pot Is Getting Enough Nutrients?

To know if your fruit tree in a pot is getting enough nutrients, look for signs of healthy growth such as vibrant leaves and strong branches. Regularly fertilize with a balanced fertilizer to ensure the tree’s nutritional needs are met.

Conclusion

Growing fruits in pots is a great option for those with limited space or who simply enjoy the convenience of container gardening.

With the right pots, soil mix, and care, you can easily grow delicious fruits right at your doorstep.

From strawberries and blueberries to figs and grapes, there are plenty of options to choose from.

So why not give it a try and enjoy the satisfaction of picking fresh, homegrown fruits from your very own pots?

Can You Grow a Fruit Tree in a Pot – These 5 Tips Will Make You Successful

Interested in growing your own fruit trees but lack space for a traditional orchard? You’re in luck! Growing fruit trees in pots is popular among gardening enthusiasts with limited space. Almost any type of fruit tree can be successfully grown in a pot, as long as you provide the right conditions.

In this article, we’ll share five essential tips for growing a fruitful tree in a pot. From choosing the right pot size and potting mix to providing sunlight and proper care, we’ve got you covered.

Get ready to learn how to grow fruit trees in pots and enjoy homegrown produce at your fingertips.

Can Fruit Trees Bear Fruit in Pots?

Yes, fruit trees can bear fruit in pots if the right conditions are provided. Growing fruit trees in pots is a popular option for those with limited space. With the right care and provisions, almost any type of fruit tree can be successfully grown in a pot.

To ensure proper growth and fruit production, it’s important to choose a pot that’s at least 2 feet wide and 2 feet deep, allowing the roots enough space to spread. Using a high-quality potting mix that drains well and contains necessary nutrients is crucial. Providing at least 6 hours of sunlight per day is also essential for the tree to thrive.

Proper pot size and care are key factors in the successful growth of fruit trees.

Dwarf or miniature fruit trees require at least a 12-inch wide and deep pot, while standard-sized fruit trees need a pot that’s at least 18 inches wide and deep. Semi-dwarf fruit trees should be planted in a pot that’s at least 24 inches wide and deep.

It’s important to choose a fruit tree suitable for pot culture, such as dwarf citrus, fig, or apple trees.

When planting, use a pot that’s at least 18 inches wide with drainage holes at the bottom. Adding rocks or gravel at the bottom of the pot can help improve drainage. Fill the pot with high-quality potting soil, leaving some space at the top. Follow specific care instructions for different types of fruit trees, including watering and fertilizing.

The lifespan of a fruit tree in a pot depends on its size and type.

Small apple or pear trees may need to be transplanted after 3-5 years, while larger citrus trees can stay in a pot for 10 years or more. Dwarf citrus trees like Meyer lemons and Satsuma oranges are ideal for pots, as they offer fresh fruits in a limited space. Fig trees can also be grown in pots and produce fruits within 2-3 years. Pomegranates are hardy plants suitable for hotter climates. Strawberries and blueberries can be grown in pots, but they’ve specific care requirements.

During winter, it’s important to use well-draining soil and ensure the pot has drainage holes. Water the tree only when the soil is dry to prevent root rot. Provide bright sunlight by placing the tree near a south-facing window. Extra protection may be needed in colder climates, such as using grow lights. Overwatering should be avoided, as it can lead to root rot.

What Size Pot Do I Need for a Fruit Tree

To determine the appropriate pot size for a fruit tree, consider the specific needs and growth potential of the tree. The size of the pot plays a crucial role in the tree’s growth and fruit production.

  • Dwarf or miniature fruit trees, such as dwarf citrus, fig, or apple trees, require at least a 12-inch wide and deep pot.
  • Standard-sized fruit trees, on the other hand, need a pot that’s at least 18 inches wide and deep.
  • For semi-dwarf fruit trees, a pot that’s at least 24 inches wide and deep is recommended.

When choosing a pot, opt for one that’s at least 18 inches wide and has drainage holes at the bottom. It’s also beneficial to add rocks or gravel at the bottom of the pot for better drainage. Fill the pot with a high-quality potting soil, leaving some space at the top for watering. It’s important to follow specific care instructions for different types of fruit trees, including watering and fertilizing.

In terms of lifespan, small apple or pear trees may need to be transplanted after 3-5 years, while larger citrus trees can stay in a pot for 10 years or more. Dwarf citrus trees like Meyer lemons and Satsuma oranges are ideal for pots, as they offer fresh fruits in a limited space. Fig trees can also be grown in pots and produce fruits within 2-3 years. Pomegranates, strawberries, and blueberries are other fruit trees that can be successfully grown in pots, with specific care requirements.

During winter, ensure that the pot has drainage holes and use well-draining soil. Water the tree only when the soil is dry to prevent root rot. Provide bright sunlight by placing the tree near a south-facing window, and consider extra protection for colder climates, such as using grow lights. Be cautious of overwatering, as it can lead to root rot.

Tips That You Must Know Before Planting Fruit Tree In a Pot

Before planting a fruit tree in a pot, there are a few important tips that you should know to ensure successful growth and fruit production.

First, choose a pot that’s appropriate for the size of your fruit tree. Dwarf or miniature fruit trees require at least a 12-inch wide and deep pot, while standard-sized fruit trees need a pot that’s at least 18 inches wide and deep. Semi-dwarf fruit trees should be planted in a pot that’s at least 24 inches wide and deep. Ensure that the pot has drainage holes at the bottom and consider adding rocks or gravel to improve drainage.

Next, use a high-quality potting mix that drains well and contains nutrients. Fill the pot with the potting mix, leaving some space at the top. Place the pot in a location that receives at least 6 hours of sunlight per day to ensure the tree thrives. Water the tree only when the soil is dry to prevent root rot, and be cautious of overwatering.

Different types of fruit trees have specific care instructions, so make sure to follow them. For example, citrus trees can be grown in pots indefinitely, but it isn’t recommended for extended periods. Dwarf citrus trees like Meyer lemons and Satsuma oranges are ideal for pots and can start bearing fruit within two to three years. Fig trees can also be grown in pots and produce fruits within 2-3 years.

In colder climates, consider providing extra protection for your potted fruit trees. Use well-draining soil, ensure the pot has drainage holes, and place the tree near a south-facing window for bright sunlight. Grow lights can also be used for added protection.

How Long Does A Fruit Tree Need To Grow In A Pot

Growing a fruit tree in a pot offers the advantage of flexibility, but you may be wondering how long it takes for a fruit tree to reach maturity in a container. The length of time it takes for a fruit tree to grow and reach maturity in a pot depends on several factors, including the type of tree, its size, and the specific care it receives.

Generally, small fruit trees like fig trees can start producing fruits within 2-3 years. Dwarf citrus trees, such as Meyer lemons or Satsuma oranges, are also known to bear fruit within a few years. On the other hand, larger fruit trees like apple or pear trees may take 3-5 years before they start producing fruits.

It’s important to note that the lifespan of a fruit tree in a pot can vary. Small apple or pear trees may need to be transplanted after 3-5 years, while larger citrus trees can stay in a pot for 10 years or more. However, keeping a fruit tree in a pot for an extended period isn’t recommended for most tree types.

To ensure the successful growth and maturity of a fruit tree in a pot, it’s essential to provide proper care, including choosing the right pot size, using high-quality potting soil, providing adequate sunlight, and following specific watering and fertilizing instructions for the specific fruit tree variety. By providing the necessary conditions and care, you can enjoy the fruits of your labor from a potted fruit tree in a reasonable timeframe.

List of Fruit Trees that Grow Well in a Pots

Now let’s discuss the fruit trees that grow well in pots.

Consider the dwarf citrus tree. This variety, such as Meyer lemons and Satsuma oranges, is ideal for pot culture and can thrive in limited spaces.

The dwarf apple tree is a great choice for fresh apples in a small area.

The fig tree can be grown in pots and can start producing fruits within 2-3 years.

Pomegranates are hardy plants suitable for hotter climates, and strawberries can also be successfully grown in pots with proper care.

1. Dwarf Citrus Tree

With the right conditions and care, you can successfully grow a dwarf citrus tree in a pot. Dwarf citrus trees, such as Meyer lemons and Satsuma oranges, are ideal for pot cultivation. Here are some important tips to consider:

  1. Pot Size: Choose a pot that’s at least 18 inches wide with drainage holes at the bottom. This allows the roots to spread and prevents waterlogging.
  2. Potting Mix: Use a high-quality potting mix that drains well and contains essential nutrients. This ensures proper growth and fruit production.
  3. Sunlight: Provide your dwarf citrus tree with at least 6 hours of sunlight per day. Place it near a south-facing window or use grow lights for additional brightness.

2. Dwarf Apple Tree

You can successfully cultivate a dwarf apple tree in a pot by choosing the right variety and providing proper care.

Dwarf apple trees are a great option for those with limited space, as they can thrive in a pot and still produce fresh apples. When selecting a dwarf apple tree, look for varieties that are specifically bred for pot culture, such as ‘Dorsett Golden’ or ‘Anna’. These varieties have compact growth habits and are well-suited for container gardening.

Ensure that the pot you choose is at least 18 inches wide, with drainage holes at the bottom to prevent waterlogging. Use a high-quality potting mix that drains well and contains nutrients.

Place the pot in a location that receives at least 6 hours of sunlight per day, as this is crucial for the tree’s growth and fruit production. Water the tree regularly, keeping the soil moist but not soggy. Fertilize the tree according to the specific instructions for apple trees, usually in early spring and late summer.

Prune the tree annually to maintain its size and shape, and to promote healthy growth. With proper care, your dwarf apple tree will thrive in a pot and reward you with fresh, homegrown apples.

3. Fig Tree

When cultivating a fig tree in a pot, you can enjoy the benefits of fresh figs while maximizing limited space. Fig trees are a great option for container gardening because they have a compact root system and can adapt well to pot culture.

Here are some key points to consider when growing a fig tree in a pot:

  1. Pot Size: Choose a pot that’s at least 18 inches wide with drainage holes at the bottom. This size allows the roots to spread and prevents waterlogging.
  2. Soil and Drainage: Use a high-quality potting mix that drains well. You can add rocks or gravel at the bottom of the pot to improve drainage.
  3. Care: Provide your fig tree with at least 6 hours of sunlight per day. Water the tree regularly, keeping the soil moist but not waterlogged. Fertilize with a balanced fertilizer during the growing season.

4. Pomegranates

Pomegranates are one of the fruit trees that thrive well in pots, making them an excellent choice for limited space gardening. When choosing a pot for pomegranate trees, opt for one that’s at least 2 feet wide and 2 feet deep to allow the roots to spread. Use a high-quality potting mix that drains well and contains nutrients to ensure proper growth.

Pomegranate trees require at least 6 hours of sunlight per day to thrive, so place them in a sunny location. Regular watering is essential, ensuring that the soil is moist but not waterlogged.

In terms of care, prune the tree in late winter to promote airflow and remove dead or diseased branches. Fertilize the tree with a balanced fertilizer during the growing season to provide necessary nutrients.

5. Strawberries

Growing strawberries in pots is a great option for those with limited space, allowing you to enjoy fresh, delicious berries right at your fingertips. Here are some tips to help you successfully grow strawberries in pots:

  1. Choose the right variety: Select a strawberry variety that’s suitable for container gardening, such as everbearing or day-neutral varieties.
  2. Select the right pot: Use a pot that’s at least 12 inches wide and deep to accommodate the strawberry plants’ root system. Ensure that the pot has drainage holes to prevent waterlogging.
  3. Provide the right growing conditions: Place the pot in a location that receives full sun for at least 6 hours a day. Strawberries prefer slightly acidic soil with a pH level of 5.5 to 6.5.
  4. Use quality potting mix: Fill the pot with a well-draining potting mix that’s rich in organic matter. This will provide the necessary nutrients and ensure good drainage.
  5. Water and fertilize properly: Keep the soil consistently moist but not waterlogged. Water the plants at the base to avoid wetting the foliage, which can lead to disease. Fertilize regularly with a balanced fertilizer formulated for strawberries.

6. Blueberries

To successfully grow blueberries in pots, you’ll need to choose the right variety and provide the proper growing conditions. Blueberries are well-suited for container gardening due to their compact size and shallow root system. Select a dwarf or compact variety, such as ‘Top Hat’ or ‘Sunshine Blue’, as they’re ideal for pot cultivation.

When it comes to pot size, opt for a container that’s at least 18 inches wide and deep. Ensure that the pot has adequate drainage holes to prevent waterlogging. Use a well-draining potting mix that’s specifically formulated for acid-loving plants. Blueberries thrive in acidic soil with a pH range of 4.5 to 5.5.

Place your potted blueberry plant in a location that receives full sun for at least 6 hours a day. Regularly water the plant to keep the soil moist but not waterlogged. Fertilize with a balanced, slow-release fertilizer designed for acid-loving plants.

With the right care, your blueberry plant will reward you with a bountiful harvest of delicious berries.

7. Cherries

One popular fruit tree that can be successfully grown in a pot is cherries. Cherries are a delicious and versatile fruit that can be enjoyed fresh or used in a variety of recipes. When growing cherries in a pot, there are several important factors to consider:

  • Choose a dwarf or miniature variety of cherry tree that’s suitable for pot culture.
  • Select a pot that’s at least 18 inches wide and deep to provide ample space for the roots to grow.
  • Use a high-quality potting mix that drains well and contains nutrients to support the tree’s growth.
  • Place the pot in a location that receives at least 6 hours of sunlight per day to ensure optimal fruit production.
  • Provide regular watering and fertilizing according to the specific care instructions for cherry trees.

How to Care for Fruit Trees in A Pot (5 Tips)

Take proper care of your potted fruit tree with these 5 essential tips.

First, choose a pot that’s appropriate for the size of your fruit tree. Dwarf or miniature fruit trees need at least a 12-inch wide and deep pot, while standard-sized trees require a pot that’s at least 18 inches wide and deep. Semi-dwarf trees should be planted in a pot that’s at least 24 inches wide and deep. Make sure the pot has drainage holes at the bottom and add rocks or gravel for better drainage. Fill the pot with high-quality potting soil, leaving some space at the top.

Second, provide your potted fruit tree with enough sunlight. Place it near a south-facing window or in a spot where it can receive at least 6 hours of sunlight per day. This is crucial for the tree to thrive and produce fruit.

Third, water your tree properly. Check the soil moisture regularly and water the tree only when the soil is dry. Overwatering can lead to root rot, so be cautious. Use well-draining soil and ensure that the pot has proper drainage.

Fourth, follow specific care instructions for your type of fruit tree. Different trees have different watering and fertilizing needs. Research and understand the specific requirements of your tree to ensure its health and productivity.

Finally, consider winter care for your potted fruit tree. Use well-draining soil and provide bright sunlight during the winter months by placing the tree near a south-facing window. If you live in a colder climate, you may need to provide extra protection, such as using grow lights or bringing the tree indoors.

How Do You Take Care of a Potted Fruit Tree in the Winter

During the winter months, you need to ensure proper care for your potted fruit tree to help it survive and thrive. Here are some tips to take care of your potted fruit tree in the winter:

  • Protect from freezing temperatures:
  • Move your potted fruit tree indoors or to a sheltered location to protect it from freezing temperatures.
  • Place the tree near a south-facing window to provide adequate sunlight.
  • Consider using grow lights if the tree doesn’t receive enough sunlight.
  • Water sparingly:
  • Reduce the frequency of watering during winter as the tree’s growth slows down.
  • Check the soil moisture level before watering and only water when the soil feels dry to the touch.
  • Overwatering can lead to root rot, so be cautious and avoid excessive watering.
  • Prune and fertilize:
  • Prune any dead or diseased branches to promote healthy growth.
  • Avoid heavy pruning during winter as it can stimulate new growth, which is susceptible to frost damage.
  • Fertilize the tree sparingly with a balanced fertilizer to provide essential nutrients.

How Long Can Citrus Trees Live in Pots

If you’re wondering how long citrus trees can live in pots, it’s important to consider their specific needs and care requirements.

Citrus trees, such as dwarf lemon or orange trees, can live in pots for an extended period, but it isn’t recommended for indefinite periods. With proper care, a dwarf citrus tree can thrive in a pot for 10 years or more.

It’s crucial to choose the right pot size for the tree’s growth and stability. A pot that’s at least 2 feet wide and 3 feet deep is recommended to allow for root growth and stability against winds.

Using a high-quality potting mix that drains well and contains nutrients is essential for the tree’s overall health.

Providing the tree with at least 6 hours of sunlight per day is crucial for its growth and fruit production.

Following specific care instructions for watering, fertilizing, and protecting the tree during colder climates will help ensure its longevity in a pot.

You Must Need Large Pots for Fruit Trees

To successfully grow fruit trees in pots, it’s essential that you use large pots. The size of the pot plays a crucial role in the tree’s growth and fruit production. Here are three key reasons why large pots are necessary:

  • Root Development:
  • Large pots provide ample space for the roots to spread and grow.
  • The roots need room to access water and nutrients in the soil.
  • Insufficient space can lead to stunted root growth and poor tree health.
  • Stability:
  • Large pots offer better stability against winds and external forces.
  • This is especially important for taller fruit trees that can be top-heavy.
  • A stable pot reduces the risk of the tree toppling over and getting damaged.
  • Moisture Retention:
  • Larger pots retain moisture better than smaller ones.
  • The increased volume of soil holds more water, reducing the frequency of watering.
  • This is particularly advantageous during hot and dry periods when the tree needs consistent moisture.

When selecting a pot for your fruit tree, opt for a size that accommodates the specific tree’s growth habits. Dwarf or miniature fruit trees generally require a pot that’s at least 12 inches wide and deep, while standard-sized trees need a pot that’s at least 18 inches wide and deep. Semi-dwarf trees should be planted in a pot that’s a minimum of 24 inches wide and deep.

Frequently Asked Questions

Can I Grow a Fruit Tree in a Small Pot?

Yes, you can grow a fruit tree in a small pot. However, the pot should be at least 12 inches wide and deep for dwarf trees, and 18 inches wide and deep for standard-sized trees.

How Often Should I Water a Fruit Tree in a Pot?

Water your fruit tree in a pot when the soil is dry, ensuring not to overwater and cause root rot. Provide bright sunlight and consider extra protection for colder climates. Follow specific care instructions for optimal growth.

Can I Bring a Potted Fruit Tree Indoors During the Winter?

Yes, you can bring a potted fruit tree indoors during the winter. It’s important to choose a suitable tree and provide the right care. Consider factors like temperature, light, and humidity for successful indoor cultivation.

What Are the Best Fruit Tree Varieties for Pot Culture?

Choose dwarf citrus, fig, or apple trees for pot culture. Use a pot at least 18 inches wide with good drainage. Fill with high-quality potting soil. Follow care instructions for watering and fertilizing.

Do I Need to Prune a Fruit Tree in a Pot?

Yes, you should prune a fruit tree in a pot. Pruning helps maintain the tree’s size and shape, promotes healthy growth, and increases fruit production. Follow proper pruning techniques and timing for your specific fruit tree variety.

Conclusion

Growing fruit trees in pots is a practical and enjoyable way to have your own fresh produce, even with limited space. By following the tips provided in this article, such as choosing the right pot size, providing adequate sunlight, and proper care, you can successfully grow a fruitful tree in a pot.

With a little effort and attention, you can enjoy the benefits of homegrown fruit right at your fingertips. Start your own mini orchard today and experience the joy of harvesting your own delicious fruits.

Optimal Timing for Pruning Fruit Trees in California for Enhancing Growth

Are you a fruit tree enthusiast in California? Want to enhance the growth and health of your trees? Understanding the optimal timing for pruning is key.

Pruning plays a crucial role in maintaining form, health, and fruitfulness. By making strategic cuts during the dormant season, you can maximize its benefits.

But when is the best time to prune your fruit trees in California? This article guides you through the optimal timing based on different regions and tree varieties.

Discover the secrets to enhancing growth in your California orchard.

When to Prune Fruit Trees California) Optimal Timing for Pruning Fruit Trees in California

When it comes to pruning fruit trees in California, understanding the optimal timing is crucial for enhancing growth.

The dormant season, typically from late fall to early spring, provides a window of opportunity for strategic pruning cuts.

In Southern California, the Mediterranean climate influences the timing, while coastal regions offer a slightly extended window.

Inland and mountainous areas require a nuanced approach due to colder winters and the risk of frost damage.

The Dormant Season: A Window of Opportunity

During the dormant season in California, you have a prime opportunity to enhance the growth of your fruit trees by pruning them at the optimal time. Here are three key considerations to keep in mind:

  1. Tree Health and Fruitfulness: Pruning during the dormant season is crucial for maintaining the overall health and fruitfulness of your trees. By removing damaged or diseased branches, you can improve the tree’s structure and promote new growth.
  2. Timing in Different Regions: The timing of pruning varies across different regions of California. In Southern California, pruning is typically done between late December and early February, while in coastal areas, the window extends from November to February. Inland and mountainous regions should schedule pruning for late February to early March to minimize the risk of frost damage.
  3. Fruit Tree Variety: Different fruit tree varieties have specific pruning requirements. It’s important to research and understand the needs of your specific tree before pruning. Consulting with local horticultural experts or resources can provide valuable guidance.

Southern California’s Mediterranean Climate: A Tale of Timing

To optimize the growth and productivity of your fruit trees in Southern California’s Mediterranean climate, it’s essential to carefully consider the timing of pruning while taking advantage of the dormant season.

In Southern California, the dormant season for fruit tree pruning typically falls between late December and early February. This timing aligns with the region’s mild, wet winters and hot, dry summers. Pruning during this period ensures that the trees receive essential shaping and maintenance before the onset of spring growth. It stimulates the growth of new branches and spurs, enhancing fruit production in the upcoming season.

However, it’s crucial to note that pruning considerations may vary based on the specific variety of the tree and the desired goals for growth and health. Consulting with local horticultural experts or resources can provide valuable guidance on pruning specific fruit tree varieties in California.

Coastal California: A Modified Approach

For optimal timing in pruning fruit trees in Coastal California, consider a modified approach that takes into account the region’s temperate climates and marine influences. The extended window for pruning in this area allows for greater flexibility and adjustment based on specific tree varieties and growth patterns.

Here are three key considerations for pruning fruit trees in Coastal California:

  1. Timing: Pruning can be done from late fall to early spring, typically spanning November to February. The gradual transition between seasons in coastal areas allows for a longer pruning period compared to other regions in California.
  2. Tree Health: Pruning during this period helps maintain tree structure, sunlight exposure, and air circulation, critical for disease prevention and fruit development. It’s essential to assess the tree’s health and identify any damaged or diseased branches for removal.
  3. Variety-Specific Pruning: Different fruit tree varieties may have specific pruning requirements and preferences. Research and understand the needs of each tree variety before pruning. Consulting with local horticultural experts or resources can provide valuable guidance on pruning specific fruit tree varieties in Coastal California.

Inland and Mountainous Regions: Navigating Extremes

Inland and mountainous regions of California present unique challenges when determining the optimal timing for pruning fruit trees.

These areas experience colder winters and are at a higher risk of late frost, which can be detrimental to newly pruned branches.

To navigate these extremes, it’s recommended to schedule pruning for late February to early March. This timing strikes a balance between taking advantage of the dormant period and avoiding potential weather-related setbacks.

By pruning during this time, you can support the overall health of your fruit trees and enhance fruit production in inland and mountainous regions.

It’s important to consider the specific variety of your fruit trees and their growth habits when planning the pruning techniques.

Consulting with local horticultural experts or resources can provide valuable guidance for pruning fruit trees in these challenging regions of California.

Depending On the Variety of Fruit Trees, How And When to Prune Fruit Trees California

When it comes to pruning fruit trees in California, the timing and technique will vary depending on the specific variety of the tree.

Pomegranate trees, for example, should be pruned in late winter or early spring to remove dead or diseased wood and promote new growth.

Plum trees, on the other hand, are best pruned in late spring or early summer to maintain their shape and encourage fruit production.

Fig trees benefit from pruning in late winter or early spring to remove dead or damaged branches and shape the tree for optimal growth.

Apple trees should be pruned in late winter to early spring, while persimmon trees should be pruned in late winter or early spring to remove dead wood and promote new growth.

Understanding the specific needs of each fruit tree variety is crucial for successful pruning in California.

Pomegranate Trees

Prune your pomegranate trees in California based on the specific variety and desired outcomes for growth and health. To ensure optimal pruning practices for your pomegranate trees, consider the following:

  1. Timing: Prune your pomegranate trees during the dormant season, which typically occurs from late fall to early spring. This period allows for easier assessment of the tree’s structure and identification of damaged or diseased branches. Pruning during the dormant season promotes the growth of new branches and spurs that will bear fruit in the upcoming season.
  2. Technique: Use thinning cuts to remove overcrowded branches and improve air circulation within the tree canopy. Prune to remove any dead or diseased branches. Maintain an open center structure to allow sunlight penetration and promote fruit development.
  3. Considerations: Different pomegranate varieties may have specific pruning requirements. Research the growth habits and characteristics of your specific variety to determine the best pruning techniques and timing for optimal growth and fruit production.

Plum Trees

To optimize growth and health of plum trees in California, it’s important to consider the specific variety of fruit tree and adhere to the recommended timing and pruning techniques.

Pruning plum trees is essential for maintaining their structure, promoting fruit production, and preventing disease. The ideal time to prune plum trees in California is during the dormant season, which typically occurs from late fall to early spring. During this period, the reduced growth activity and leafless branches make it easier to assess the tree’s structure and identify damaged or diseased branches.

Pruning cuts made during the dormant season enhance the overall form and health of the tree, while also stimulating the growth of new branches and spurs that will bear fruit in the upcoming season.

It’s important to research and understand the specific pruning requirements of different plum tree varieties to ensure optimal growth and fruitfulness. Consulting with local horticultural experts or resources can provide valuable guidance on pruning plum trees in California.

Fig Tree

Enhance the growth of your fig tree in California by strategically pruning it during the dormant season, optimizing its health and fruitfulness.

  1. Timing of Pruning: Prune your fig tree during the winter months when it’s dormant. The ideal time is from late December to early February in Southern California, and from November to February in Coastal California. Inland and mountainous regions should schedule pruning for late February to early March to minimize the risk of frost damage.
  2. Considerations for Pruning: Different varieties of fig trees may have specific pruning requirements. Research and understand the growth habit and desired outcomes of your specific fig tree variety before pruning. Thinning, shaping, and heading back techniques can be employed based on the tree’s needs.
  3. Benefits of Pruning: Pruning during the dormant season helps maintain the overall form and health of the fig tree. It promotes the growth of new branches and spurs that will bear fruit in the upcoming season. Pruning also enhances sunlight exposure, air circulation, and disease prevention, resulting in improved fruit development.

Apple Tree

Improve the growth and health of your apple tree in California by strategically timing your pruning during the dormant season.

The optimal timing for pruning apple trees depends on the variety and the region in California. In Southern California, where the dormant season typically falls between late December and early February, it’s essential to prune before the onset of spring growth.

Coastal California offers a slightly extended window, with pruning possible from November to February. Inland and mountainous regions require a nuanced approach, with pruning scheduled for late February to early March to minimize the risk of frost damage.

When pruning apple trees, it’s crucial to consider the specific variety and desired goals for growth and health. Thinning, shaping, and heading back techniques can be employed based on the tree’s growth habit and desired outcomes.

Consulting with local horticultural experts or resources can provide valuable guidance on pruning apple trees in California.

Persimmon Tree

When pruning persimmon trees in California, it’s important to consider the specific variety of the tree and the optimal timing for enhancing growth and maintaining tree health. Persimmon trees are deciduous fruit trees that require pruning to maintain their overall form and encourage fruit production.

Here are three key points to keep in mind when pruning persimmon trees in California:

  1. Timing: Pruning persimmon trees is best done during the dormant season, which typically occurs from late fall to early spring. This period allows for easy assessment of the tree’s structure and identification of damaged or diseased branches.
  2. Pruning Techniques: Persimmon trees benefit from techniques such as thinning, shaping, and heading back. Thinning involves removing overcrowded branches to improve air circulation and sunlight penetration. Shaping helps maintain a balanced tree structure, while heading back stimulates the growth of new branches and spurs.
  3. Variety-specific Considerations: Different persimmon tree varieties may have specific pruning requirements. It’s essential to research and understand the specific needs of each variety before pruning. Consulting with local horticultural experts or resources can provide valuable guidance on pruning persimmon trees in California.

Grapefruit Tree

To properly prune grapefruit trees in California and maximize their growth and health, it’s crucial to consider the specific variety of the tree and follow the recommended timing and techniques. Grapefruit trees belong to the citrus family and require specific pruning techniques to ensure optimal growth and fruit production.

In California, the ideal time for pruning grapefruit trees is during the dormant season, which typically falls between late December and early February in Southern California and spans from late fall to early spring in coastal regions. During pruning, it’s important to remove any dead, damaged, or diseased branches, as well as thin out overcrowded areas to improve air circulation and sunlight exposure.

Shaping the tree by selectively cutting back branches can help maintain a desirable form and size. Proper pruning of grapefruit trees in California is essential for promoting healthy growth and maximizing fruit yields.

Lemon Tree

For lemon trees in California, understanding the specific variety and following the recommended timing and techniques for pruning is crucial to promote optimal growth and fruit production. Here are three key considerations for pruning lemon trees:

  • Timing:
    Lemon trees should be pruned during the dormant season, which typically occurs from late fall to early spring. Pruning during this period allows for easier assessment of the tree’s structure and identification of damaged or diseased branches. It also stimulates the growth of new branches and spurs that will bear fruit in the upcoming season.
  • Shaping and maintenance:
    When pruning lemon trees, focus on shaping the tree to maintain a balanced structure and promote sunlight penetration and air circulation. Remove any dead, weak, or crossing branches to prevent overcrowding and potential disease issues.
  • Pruning techniques:
    Use thinning cuts to remove excess foliage and thin out the canopy, allowing for better light penetration. Heading back cuts can be employed to control the height and shape of the tree. Prune to an outward-facing bud to encourage outward growth and avoid inward-facing branches that can obstruct airflow.

Loquat Tree

As you continue to explore the optimal timing for pruning fruit trees in California for enhancing growth, it’s important to consider the specific needs and techniques for pruning the Loquat tree.

Loquat trees, also known as Eriobotrya japonica, are evergreen trees that are primarily grown for their delicious fruit. When it comes to pruning Loquat trees, it’s best to do so during the late winter or early spring, before new growth begins. This timing allows for the removal of dead, damaged, or crossing branches, as well as the shaping of the tree to maintain its desired form and size.

Thinning out the canopy can help improve air circulation and sunlight penetration, promoting overall tree health and fruit production. It’s important to note that Loquat trees have a tendency to produce fruit on long-lived spurs, so care should be taken not to remove too many of these spurs during pruning.

Peach Tree

When pruning a Peach tree in California, consider the specific variety of the fruit tree and its pruning needs to enhance growth and productivity. Different varieties of Peach trees may require pruning at specific times and in specific ways to optimize their growth and fruit production.

Here are three key points to keep in mind when pruning Peach trees in California:

  1. Timing: Prune Peach trees during the dormant season, which typically falls between late December and early February in Southern California and spans November to February in coastal regions. In inland and mountainous areas, schedule pruning for late February to early March to minimize the risk of frost damage.
  2. Method: Employ pruning techniques such as thinning, shaping, and heading back based on the Peach tree’s growth habit and desired outcomes. Thin out overcrowded branches, shape the tree’s structure, and head back long branches to encourage new growth and improve fruit quality.
  3. Research: It’s crucial to research and understand the specific pruning requirements and preferences of the Peach tree variety you have. Consult with local horticultural experts or resources to gain valuable guidance on the optimal pruning methods for your particular Peach tree variety in California.

Citrus Trees

To optimize the growth and productivity of your citrus trees in California, it’s important to understand the specific pruning needs and preferences of the different varieties.

Citrus trees, including oranges, lemons, and grapefruits, require regular pruning to maintain their shape, promote air circulation, and remove any dead or diseased branches.

The best time to prune citrus trees in California is during the late winter or early spring, preferably in February or March. Pruning during this time allows the trees to recover quickly and minimizes the risk of frost damage.

When pruning citrus trees, it’s important to avoid excessive pruning, as this can lead to excessive vegetative growth and reduced fruit production. Instead, focus on removing dead or damaged branches, thinning out crowded areas, and shaping the tree for optimal sunlight penetration.

Regular pruning will help keep your citrus trees healthy and productive.

Orange Tree

Now let’s delve into the specific pruning needs for orange trees in California, depending on the variety of fruit trees and how and when to prune them.

  • Timing of pruning orange trees:
  • In Southern California, where the climate is mild, prune orange trees during the dormant season between late December and early February.
  • In coastal regions, pruning can be done from late fall to early spring, typically spanning November to February.
  • In inland and mountainous areas, schedule pruning for late February to early March to avoid frost damage.
  • Pruning techniques for orange trees:
  • Thinning: Remove overcrowded branches to improve sunlight penetration and air circulation within the tree canopy.
  • Shaping: Trim branches to achieve a balanced and open canopy structure, allowing for better light distribution and fruit development.
  • Heading back: Cut back long, leggy branches to encourage branching and stimulate new growth.

Consult local horticultural experts or resources to understand the specific pruning requirements for different orange tree varieties, such as Valencia, Navel, or Blood oranges. Proper pruning techniques and timing will help enhance tree health, fruit production, and overall growth.

Mango Tree

Prune your mango tree in California during the optimal timing to enhance its growth and fruit production.

The timing for pruning mango trees varies depending on the specific variety and the prevailing climate conditions. In general, it’s recommended to prune mango trees in late winter or early spring, before the onset of new growth. This timing allows the tree to recover from any pruning wounds before the active growing season.

It’s important to remove any dead, diseased, or damaged branches during pruning to maintain the health of the tree. Thinning out overcrowded branches and shaping the tree can help improve sunlight penetration and air circulation, which are essential for fruit development.

Consulting with local horticultural experts or resources can provide valuable guidance on the specific pruning needs of different mango tree varieties in California.

Jujube Tree

When it comes to pruning Jujube trees in California, the timing and method depend on whether the tree is young (1-3 years old) or mature (4+ years old).

For young Jujube trees, pruning should focus on promoting a strong framework and removing any damaged or crossing branches. This should be done during the dormant season, between late fall and early spring.

Mature Jujube trees, on the other hand, require more maintenance pruning to control their size and shape, while still promoting fruit production. Pruning should be done in late winter or early spring, before new growth begins.

1. Young Jujube Trees (1-3 Years Old)

During the first three years of growth, you should consider pruning your young jujube trees in California based on the variety of fruit trees and their specific needs.

1) Prune young jujube trees during the dormant season to promote overall tree health and fruitfulness.

2) Assess the tree’s structure and remove any damaged or diseased branches.

3) Shape the tree by strategically pruning to enhance its form and encourage new branch growth for future fruit production.

2. Mature Jujube Trees (4+ Years Old)

To enhance the growth of mature jujube trees in California, you can optimize the timing for pruning based on the specific variety of fruit trees and their needs.

Mature jujube trees, typically 4 or more years old, require regular pruning to maintain their shape and productivity.

The best time to prune mature jujube trees is during the dormant season, which generally lasts from late fall to early spring.

During this period, you can assess the tree’s structure, remove damaged or diseased branches, and stimulate the growth of new branches and spurs for future fruit production.

Pear Tree

Prune your pear trees in California based on the variety and specific pruning requirements for optimal growth. Different pear tree varieties may have unique growth habits and pruning preferences. Here are three important considerations to keep in mind when pruning your pear trees:

  1. Timing: Prune pear trees during the dormant season, which typically falls between late December and early February in Southern California. In coastal regions, pruning can be done from November to February, while in inland and mountainous areas, late February to early March is recommended. Pruning during the dormant season promotes new branch and spur growth, enhancing fruit production in the upcoming season.
  2. Shaping: When pruning pear trees, consider their growth habit and desired outcomes. Techniques like thinning, shaping, and heading back can be employed to maintain a desired tree structure and form. Pruning for proper shaping ensures adequate sunlight exposure and air circulation, which are crucial for disease prevention and fruit development.
  3. Consultation: To make informed pruning decisions, consult with local horticultural experts or resources. They can provide valuable guidance on the specific pruning requirements for different pear tree varieties in California. Understanding the unique needs of your pear trees will help you achieve optimal growth and fruitfulness.

Quince Tree

When considering the pruning of your Quince tree in California, it’s important to take into account the specific variety of fruit trees and their unique pruning requirements for optimal growth.

Quince trees belong to the Rosaceae family and are known for their fragrant flowers and edible fruit.

The ideal time to prune Quince trees in California is during the dormant season, which typically falls between late fall and early spring. During this period, you should focus on removing any dead, damaged, or diseased branches to improve the overall health of the tree.

Thinning out crowded branches will promote better air circulation and sunlight penetration, which are crucial for fruit development.

It’s recommended to consult with local horticultural experts or resources to learn more about the specific pruning techniques and timing for your Quince tree variety.

Guava Tree

When considering the pruning of your Guava tree in California, it’s important to understand the specific variety of fruit trees and their unique pruning requirements for optimal growth. Guava trees belong to the tropical fruit tree category and have specific pruning needs.

Here are three key points to consider when pruning Guava trees in California:

  1. Timing: Guava trees should be pruned during the late winter or early spring when the tree is dormant. This period allows for better visibility of the tree’s structure and facilitates the removal of damaged or diseased branches.
  2. Pruning Techniques: Guava trees benefit from light pruning to maintain their shape and encourage new growth. Remove any crossed or crowded branches to improve airflow and sunlight penetration. Trim the branches back by one-third to promote the growth of new shoots and increase fruit production.
  3. Maintenance Pruning: Regularly inspect your Guava tree for any signs of pests, diseases, or deadwood. Remove these elements promptly to prevent further damage or spread of pathogens. Thin out the canopy to maintain good air circulation and reduce the risk of fungal infections.

When to Prune Fruit Trees in Northern California

The optimal timing for pruning fruit trees in Northern California revolves around the region’s unique climatic conditions. In this area, the dormant season typically occurs from late fall to early spring, providing an ideal window for pruning.

Pruning during the dormant season allows for easier assessment of the tree’s structure and identification of damaged or diseased branches, as the reduced growth activity and leafless branches make it easier to spot issues. By making strategic pruning cuts during this time, you can enhance the overall form and health of the tree. Pruning during the dormant season promotes the growth of new branches and spurs that will bear fruit in the coming season.

For fruit tree pruning in Northern California, it’s recommended to schedule the pruning in late winter or early spring, specifically from February to March. This timing aligns with the end of the dormant season and minimizes the risk of frost damage to newly pruned branches. By waiting until late winter or early spring, you can take advantage of the dormant period while avoiding weather-related setbacks.

Pruning during this time supports tree health and fruit production in Northern California’s unique climatic conditions. It’s important to note that the specific timing for pruning may vary depending on the type of fruit tree and its specific requirements. Therefore, it’s advisable to consult with local horticultural experts or resources for guidance on pruning fruit trees in Northern California.

When to Prune Fruit Trees in Southern California

To optimize the growth of your fruit trees in Southern California, it’s best to prune them during the dormant season. Pruning during this time offers several advantages:

  • Maximizing Tree Health and Fruitfulness:
    Pruning during the dormant season allows for the assessment of the tree’s structure and identification of damaged or diseased branches. By strategically removing these branches, you enhance the overall form and health of the tree. This promotes the growth of new branches and spurs that will bear fruit in the coming season.
  • Timing Aligned with Southern California’s Climate:
    In Southern California, the dormant season for fruit tree pruning typically falls between late December and early February. The region’s Mediterranean climate, characterized by mild, wet winters and hot, dry summers, influences the timing of pruning. By pruning during this period, you ensure that your trees receive essential shaping and maintenance before the onset of spring growth.
  • Enhanced Fruit Production:
    Deciduous fruit trees like apples, pears, and stone fruits greatly benefit from pruning during the dormant season. This stimulates the growth of new branches and spurs, ultimately leading to increased fruit production in the upcoming season.

Frequently Asked Questions

Can You Prune Fruit Trees in California During the Summer Months?

No, pruning fruit trees in California during the summer months is not recommended. Pruning during the dormant season, from late fall to early spring, is ideal for enhancing growth, maintaining tree health, and promoting fruitfulness.

What Are the Risks of Pruning Fruit Trees Too Late in the Dormant Season?

Pruning fruit trees too late in the dormant season can lead to delayed healing of pruning wounds, increased susceptibility to disease and pests, and potential damage to new growth. It is important to prune within the recommended timeframe to optimize tree health and growth.

Are There Any Specific Pruning Techniques That Should Be Used for Citrus Fruit Trees in Coastal California?

For citrus fruit trees in coastal California, specific pruning techniques can enhance growth. Thinning out crowded branches improves air circulation and sunlight exposure. Heading back long branches promotes new growth. Consult local experts for guidance on citrus tree pruning.

How Long Does It Typically Take for Newly Pruned Branches to Start Bearing Fruit?

Newly pruned branches on fruit trees typically take one to three years to start bearing fruit. This timeline can vary based on factors like tree variety, health, growing conditions, and pruning techniques used.

Are There Any Fruit Tree Varieties in California That Should Not Be Pruned During the Dormant Season?

No, there aren’t any fruit tree varieties in California that should not be pruned during the dormant season. Pruning during this period benefits all fruit tree varieties by enhancing growth, maintaining tree health, and promoting fruit production.

Conclusion

Understanding the optimal timing for pruning fruit trees in California is crucial for enhancing growth and overall tree health. By considering the different regions and fruit tree varieties found in the state, you can make strategic pruning cuts during the dormant season to maximize the benefits.

Whether you’re in Northern or Southern California, following the recommended pruning timelines will ensure effective results and yield desired growth outcomes in your orchard.

So, start planning your pruning schedule and enjoy the benefits of a thriving fruit tree garden.

The Secret of Prune Fruit Trees in Spring for Maximum Yields

Are you a fruit tree enthusiast looking to maximize your yields this spring? Well, you’re in luck!

Pruning fruit trees in spring is the secret to achieving healthier growth, more fruit, and better quality. It also prevents diseases, improves sunlight and airflow, and promotes proper maintenance.

In this article, we’ll explore the benefits, timing, and tools for successful pruning, along with tips for making the right cuts.

Get ready to unlock the secret to prune fruit trees in spring for maximum yields!

The Benefits and Importance of Pruning Fruit Trees in Spring

Pruning fruit trees in spring offers several key benefits and is essential for maximum yields. By removing dead, damaged, or diseased branches, you promote healthier growth and prevent the spread of diseases.

Pruning improves tree structure and aesthetics, enhances fruit quality, and aids in pest control.

Increased Fruit Production and Quality

To achieve increased fruit production and quality, you need to take advantage of the benefits and importance of pruning fruit trees in spring.

Pruning plays a crucial role in enhancing the overall health and productivity of fruit trees. By removing dead, damaged, or diseased branches, you promote healthier growth and prevent the spread of diseases. Pruning also improves sunlight and airflow, which are essential for optimal fruit development.

It stimulates new growth and fruit production, ensuring a bountiful harvest. Pruning helps maintain the tree’s shape and size, making it easier to manage pests and diseases.

Improves Tree Structure and Aesthetics

Improving the tree’s structure and aesthetics is a key benefit and importance of pruning fruit trees in spring. By selectively removing branches, you can shape the tree and encourage desirable growth. This not only enhances the overall appearance of the tree but also improves its stability and resistance to adverse weather conditions.

Pruning allows you to create a balanced and pleasing form, which adds to the aesthetic appeal of your garden or orchard. By removing dead, damaged, or diseased branches, you can improve the overall structure of the tree, promoting healthier growth and preventing the spread of diseases.

Pruning in spring ensures that the tree has enough time to recover and produce new growth, resulting in a more visually appealing and productive tree.

Disease Prevention and Pest Control

Selectively removing branches in spring, you can effectively prevent diseases and control pests, ensuring the health and productivity of your fruit trees. Pruning plays a crucial role in disease prevention and pest control by removing potential breeding grounds and reducing the spread of pathogens. Here are five key benefits of pruning for disease prevention and pest control:

  • Removal of diseased branches: Pruning allows you to identify and remove branches that are infected or showing signs of disease, preventing the spread to other parts of the tree.
  • Increased airflow: Pruning promotes better airflow and reduces humidity, creating an unfavorable environment for fungal diseases and pests.
  • Enhanced sunlight penetration: By thinning out the canopy, pruning increases sunlight exposure to the inner branches, inhibiting the growth of shade-loving pests and diseases.
  • Early pest detection: Regular pruning allows you to closely inspect your trees for signs of pests, enabling early intervention and control measures.
  • Stimulated tree vigor: Pruning stimulates new growth, which is often more resistant to diseases and pests, improving the overall resilience and health of the tree.

Pruning, when done correctly and at the right time, is an essential tool in disease prevention and pest control, contributing to the long-term success of your fruit trees.

Understanding the Optimal Timing for Pruning Fruit Trees

To understand the optimal timing for pruning fruit trees, you need to consider factors such as the type of tree, climate, and growth stage.

Different fruit trees have different pruning requirements, so it’s important to know when to prune specific varieties.

Factors to Consider: Tree Type, Climate, and Growth Stage

When pruning fruit trees in spring for maximum yields, it’s important to consider factors such as tree type, climate, and growth stage. Proper timing and understanding these factors can greatly influence the success of your pruning efforts. Here are five key considerations to keep in mind:

  • Tree type: Different fruit tree varieties have unique growth habits and pruning requirements. Understanding the specific needs of your tree type will help you make informed pruning decisions.
  • Climate: Climate plays a crucial role in determining the optimal timing for pruning. Consider the average last frost date in your area, as pruning too early can expose the tree to potential frost damage.
  • Growth stage: Assessing the growth stage of your fruit tree is essential for effective pruning. Pruning before bud break but after the frost risk has passed is generally recommended.
  • Health and vigor: Take into account the overall health and vigor of the tree. Pruning can be more beneficial for trees that are in good health and have adequate energy reserves.
  • Previous year’s performance: Evaluate the previous year’s performance of the tree. Trees that had a heavy fruiting year may benefit from more aggressive pruning to encourage new growth and maximize yields.

Considering these factors will help ensure that your pruning efforts are targeted and yield the desired results in terms of fruit production and tree health.

Commonly Pruned Fruit Trees in Spring

Now let’s delve into understanding the optimal timing for pruning commonly pruned fruit trees in spring so that you can maximize yields.

Different fruit trees have different pruning requirements, and assessing the growth stage before pruning is crucial for optimal results.

For apple and pear trees, pruning should be done before bud break but after the risk of frost has passed.

Peach and nectarine trees, on the other hand, are best pruned when they’re in bloom.

Plum and cherry trees should be pruned after fruiting has occurred.

It’s important to note that pruning too late in the season can result in weaker growth.

Best Practices for Timing Pruning

Timing is crucial when it comes to pruning fruit trees for maximum yields. Understanding the optimal timing for pruning is essential to ensure the health and productivity of your trees.

Here are the best practices for timing pruning:

  • Prune before bud break but after the frost risk has passed.
  • Avoid pruning too late in the season to prevent weaker growth.
  • Different fruit trees have different pruning requirements, so assess the growth stage before pruning for optimal results.
  • Consider the specific needs of each fruit tree variety and adapt pruning techniques accordingly.
  • Avoid disrupting the growth cycle by pruning at the right time.

By following these best practices, you can maximize the benefits of pruning and promote healthier growth, increased fruit production, and improved fruit quality.

Necessary Equipment for Successful Tree Pruning

To successfully prune fruit trees, you’ll need a set of essential tools:

  • Pruning shears and loppers for smaller branches
  • A hand saw or pruning saw for thicker branches
  • A pole pruner for taller trees

It’s crucial to keep your tools clean and sharp to ensure precise cuts and prevent the spread of diseases.

Pruning Shears and Loppers

For successful tree pruning, you’ll need essential equipment such as pruning shears and loppers. These tools are crucial for properly cutting and removing branches from your fruit trees.

Here are five important things to know about pruning shears and loppers:

  • Pruning shears are handheld tools with sharp blades that are used for cutting small branches and stems.
  • Loppers are larger tools with long handles and larger cutting blades, designed for cutting thicker branches.
  • Look for pruning shears and loppers with sharp blades to ensure clean and precise cuts.
  • It’s important to choose the right size and type of pruning shears and loppers for the branches you’ll be cutting.
  • Before pruning, make sure your pruning shears and loppers are clean and sanitized to prevent the spread of diseases.

Having the right pruning shears and loppers will make your tree pruning tasks more efficient and effective, promoting the health and productivity of your fruit trees.

Hand Saw or Pruning Saw

Now, let’s move on to the necessary equipment for successful tree pruning, specifically the hand saw or pruning saw, which plays a crucial role in effectively cutting and removing branches from your fruit trees.

When it comes to pruning fruit trees, having the right tools is essential for achieving clean and precise cuts. A hand saw or pruning saw is designed with a sharp, toothed blade that easily cuts through branches of various sizes.

The saw’s teeth are specifically designed to cut on both the push and pull strokes, allowing for efficient and effortless pruning. With a comfortable grip and a sturdy construction, the hand saw or pruning saw provides the necessary control and stability needed to safely prune your fruit trees.

Whether you’re removing dead or diseased branches or thinning out crowded areas, the hand saw or pruning saw is an indispensable tool for maintaining the health and productivity of your fruit trees.

Pole Pruner for Taller Trees

When using a pole pruner for taller trees, you can easily reach and trim branches that are out of your normal reach. A pole pruner is a necessary tool for successful tree pruning, especially when dealing with trees that are too tall to be pruned from ground level.

Here are five key benefits of using a pole pruner for taller trees:

  • Increased safety: By using a pole pruner, you can avoid the need for climbing ladders or unstable structures, reducing the risk of falls or accidents.
  • Precise pruning: The pole pruner allows you to make accurate cuts, ensuring that you remove the right branches without damaging the tree’s structure.
  • Time and energy-saving: With a pole pruner, you can prune taller trees more efficiently, saving time and effort compared to using other pruning methods.
  • Versatility: Many pole pruners come with adjustable or extendable poles, allowing you to reach different heights and angles, adapting to various tree sizes and shapes.
  • Enhanced reach: The pole pruner’s extended reach enables you to access and prune branches that would otherwise be inaccessible, improving the overall health and appearance of the tree.

Clean and Sharp Tools for Precision Cuts

To achieve precise cuts and ensure successful tree pruning, it’s crucial to have clean and sharp tools.

Clean tools prevent the spread of diseases and maintain the health of the tree. Sanitize the blades with a disinfectant before and after each use.

Sharp tools are essential for making clean cuts that heal quickly. Dull blades can crush and damage the branches, leading to slower healing and increased risk of infection. Regularly sharpen the blades of your pruning shears, loppers, hand saw, pruning saw, and pole pruner to maintain their effectiveness.

It’s also important to make cuts at an angle that allows water to flow away from the bud, position the cuts just above a bud or branch collar, and remove the right amount of plant material with each cut.

Step-By-Step Guide to Prune Fruit Trees in Spring

Now it’s time to take a step-by-step approach to pruning your fruit trees in spring. By following these instructions, you can ensure proper growth, maximize fruit production, and maintain the overall health of your trees.

Let’s get started with the process of pruning for maximum yields.

Step-By-Step Guide to Prune Fruit Trees in Spring

Start by gathering the necessary tools for pruning your fruit trees in spring. Here are five essential items you’ll need:

  • Pruning shears: These handheld tools are perfect for cutting small branches and twigs.
  • Loppers: Use loppers for thicker branches that pruning shears can’t handle.
  • Hand saw: A hand saw is useful for cutting larger branches.
  • Pruning saw: This specialized saw is designed for cutting through thick branches with ease.
  • Pole pruner: A pole pruner is ideal for reaching high branches without the need for a ladder.

These tools will ensure that you have everything you need to effectively prune your fruit trees in spring.

Remember to sanitize your tools before and after use to prevent the spread of diseases. Make sure your blades are sharp for precise cuts, and always cut at an angle that allows water to flow away from the bud.

Best Practices for Making Clean and Precise Pruning Cuts

When it comes to making clean and precise pruning cuts on fruit trees, there are several key points to keep in mind.

First, consider the angle of the cut, ensuring that water will flow away from the bud.

Second, carefully choose the location of the cut, positioning it just above a bud or branch collar.

Lastly, be mindful of the size of the cut, removing the right amount of plant material to promote healthy growth.

Angle, Location, and Size of Pruning Cuts

To make clean and precise pruning cuts on your fruit trees in spring, it’s crucial to carefully consider the angle, location, and size of each cut. Follow these best practices to ensure optimal results:

  • Angle of the cut: Make cuts at a slight angle, approximately 45 degrees, to allow water to flow away from the bud. This helps prevent water accumulation and potential disease issues.
  • Location of the cut: Position cuts just above a bud or branch collar. The branch collar is the slightly swollen area where the branch attaches to the trunk or another branch. Cutting at this location promotes proper healing and reduces the risk of infection.
  • Size of the cut: Remove the right amount of plant material with each cut. Avoid leaving stubs or cutting too close to the bud. Aim for a clean and precise cut that removes the desired branch or bud without causing unnecessary damage.
  • Use sharp pruning tools: Ensure your pruning tools have sharp blades to make clean cuts. Dull blades can cause tearing and damage to the tree.
  • Sanitize tools: Before making cuts, sanitize your pruning tools with a disinfectant to prevent the spread of diseases.

Avoiding Common Pruning Mistakes that Can Harm the Tree

To avoid common pruning mistakes that can harm your fruit tree, focus on making clean and precise pruning cuts with these best practices.

  • First and foremost, always use sharp and clean pruning tools to ensure clean cuts and prevent the spread of diseases. Make sure to sanitize the blades with a disinfectant before and after each use.
  • When making cuts, position them just above a bud or branch collar to promote healing and growth. Cut at an angle that allows water to flow away from the bud, reducing the risk of infection.
  • Be mindful of the size of each cut, removing the right amount of plant material to prevent excessive stress on the tree.

How to Properly Dispose of Pruned Branches and Debris

You can properly dispose of pruned branches and debris by following these best practices for making clean and precise pruning cuts:

  • Composting: Create a compost pile for organic waste from fruit trees. This allows the branches and debris to decompose naturally and enrich the soil with nutrients.
  • Mulching: Use pruned branches as mulch in garden beds. This helps retain moisture, suppresses weed growth, and adds organic matter to the soil.
  • Recycling: Check with your local recycling center if they accept woody debris for chipping or shredding. This can be repurposed for mulch or compost.
  • Yard Waste Collection: If available in your area, place the pruned branches and debris in designated yard waste bins for collection and disposal.
  • Professional Tree Removal: If you have a large amount of pruned branches and debris, consider hiring a professional tree removal service to safely remove and dispose of them.

Additional Insights for Mastering the Art of Tree Pruning

Now let’s delve into some additional insights to help you master the art of tree pruning.

One consideration is whether to use pruning sealants or not, as there are pros and cons to this practice.

Applying dormant oil sprays during the tree’s dormant period can help prevent pests and ensure healthier growth.

We’ll discuss special considerations for pruning fruit trees in pots or containers, as their growth and maintenance requirements may differ.

Using Pruning Sealants or Not: Pros and Cons

Using pruning sealants on fruit trees in spring has both advantages and disadvantages. It’s important to weigh the pros and cons before deciding whether to use them.

Advantages of using pruning sealants:

  • Protection against pests and diseases: Sealants create a barrier that prevents insects and pathogens from entering the tree through pruning wounds.
  • Faster healing: Sealants can promote faster healing of pruning cuts by sealing the exposed wood, reducing the risk of infection and decay.
  • Aesthetic appeal: Sealants can give a neat and tidy appearance to the pruned tree, enhancing its overall visual appeal.

Disadvantages of using pruning sealants:

  • Trapping moisture and pathogens: Sealants can trap moisture and create a favorable environment for fungal and bacterial growth.
  • Ineffective against major pests and diseases: Sealants may not provide sufficient protection against major pests and diseases that can enter the tree through other means.

Ultimately, the decision to use pruning sealants should be based on the specific circumstances and goals of the pruning process.

Applying Dormant Oil Sprays for Pest Prevention

After considering the advantages and disadvantages of using pruning sealants, it’s important to explore another aspect of tree pruning – applying dormant oil sprays for pest prevention.

Dormant oil sprays are an effective tool in controlling pests and diseases during the tree’s dormant period. These sprays work by suffocating overwintering pests such as mites, aphids, and scale insects, as well as preventing the spread of fungal spores.

It’s crucial to apply dormant oil sprays before the tree buds break, as this ensures maximum coverage and effectiveness. To apply the spray, thoroughly coat the entire tree, paying particular attention to the branches, trunk, and any crevices where pests may hide.

Remember to read and follow the instructions on the product label, as different formulations may have specific application rates and timing requirements.

Promoting Strong Regrowth and Future Fruiting

To further enhance your mastery of tree pruning, let’s delve into the importance of promoting strong regrowth and future fruiting. Here are five key insights to help you in this endeavor:

  • Prune for vigor: By selectively removing branches, you stimulate the growth of new shoots, resulting in a stronger and more productive tree.
  • Encourage fruiting wood: Focus on retaining branches that have previously borne fruits, as they’re more likely to produce again in the future.
  • Manage canopy density: Thinning out crowded areas allows for better airflow and sunlight penetration, reducing the risk of disease and improving fruit quality.
  • Maintain a balanced structure: By shaping the tree and removing excess growth, you ensure that the weight of future fruit is evenly distributed, preventing branch breakage.
  • Time your pruning carefully: Perform your pruning before bud break, but after the risk of frost has passed. This allows the tree to recover and maximize regrowth for the upcoming season.

Pruning Fruit Trees in Pots or Containers: Special Considerations

When pruning fruit trees in pots or containers, consider the specific needs and challenges of managing their growth.

Pruning these trees requires careful attention, as their limited root space affects their overall size and fruit production.

Start by removing dead, damaged, or diseased branches to maintain tree health.

Thin out crowded areas to improve airflow and light penetration, ensuring that each branch has enough space to grow.

Cut back vigorous branches to promote new growth and maintain a balanced shape.

Avoid over-pruning, as it can weaken the tree.

Consider the variety of fruit tree you’re pruning, as each may have specific requirements.

Frequently Asked Questions

Can Pruning Fruit Trees in Spring Harm the Tree or Hinder Its Growth?

Pruning fruit trees in spring, when done correctly, does not harm the tree or hinder its growth. It promotes healthier growth, increases fruit production, prevents disease, and improves sunlight and airflow.

How Often Should Fruit Trees Be Pruned in Spring?

You should prune fruit trees in spring annually. Pruning promotes healthier growth, increases fruit production, prevents disease, and improves sunlight and airflow. It’s important to follow proper techniques and timing for optimal results.

Are There Any Specific Techniques for Pruning Fruit Trees in Pots or Containers?

When pruning fruit trees in pots or containers, consider their specific needs. Thin out crowded branches for better fruit production and shape the tree for desirable growth. Adapt techniques accordingly for each variety.

What Should I Do With the Pruned Branches and Debris After Pruning?

After pruning, you should properly dispose of pruned branches and debris. Composting is ideal for organic waste, while using pruned branches as mulch in garden beds is another option. Maintain a clean and healthy environment.

Are There Any Special Considerations for Pruning Fruit Trees That Have Been Recently Planted?

When pruning recently planted fruit trees, consider their young age and delicate root systems. Focus on removing damaged or diseased branches and shaping the tree’s structure. Avoid excessive pruning to allow for healthy growth and establishment.

Conclusion

Pruning fruit trees in spring is a crucial step for maximizing yields and maintaining the health of your trees. By understanding the benefits, timing, and techniques involved, you can promote healthier growth, increased fruit production, and enhanced fruit quality.

With the right equipment and knowledge, you can make clean and precise pruning cuts, ensuring optimal shape and size for your trees. Remember to dispose of pruned branches and debris properly to maintain a clean and healthy environment for your trees.

Happy pruning!

How to Get Rid of Grass without Digging – 5 Easiest Methods

Are you tired of spending hours digging up grass from your yard? Well, look no further! In this article, we will explore five of the easiest methods to remove grass without the need for digging.

Whether you have a small patch or a large area to tackle, we’ve got you covered. From natural options like mulching and using organic herbicides to chemical solutions and mechanical methods, we’ll provide step-by-step instructions on how to effectively eliminate grass from your landscape.

Get ready to reclaim your yard without the hassle of digging!

5 Methods of Removing Grass without Digging

Now let’s explore the different methods you can use to remove grass without digging.

The first method is smothering the grass with a thick layer of mulch, blocking sunlight and preventing water and nutrient absorption.

Another option is using organic herbicides like vinegar or lemon juice to kill the grass without harming other plants or animals.

You can also consider pulling the grass manually or mowing it repeatedly to weaken and eventually kill it.

1. Smothering

To effectively smother grass without digging, apply a thick layer of mulch to completely block sunlight and prevent water and nutrient absorption. Start by clearing the area of any existing grass or weeds.

Then, spread a layer of mulch, such as wood chips, straw, or newspaper, about 4 to 6 inches thick over the entire grassy area. Make sure the mulch extends beyond the edges of the grass to prevent any regrowth.

Water the mulch thoroughly to help it settle and stay in place. Over time, the lack of sunlight will cause the grass to die and decompose, enriching the soil in the process.

Smothering is an effective method for removing grass without the need for digging, making it a practical option for those looking to transform their lawn or garden.

2. Herbicides

You can easily remove grass without digging by using herbicides regularly. Herbicides are chemical substances that are specifically designed to kill unwanted grass and weeds. They’re an effective method for grass removal because they target the plants’ growth and reproductive systems.

When using herbicides, it’s important to follow the label instructions carefully to ensure safe and effective application. One popular herbicide is Roundup, which contains glyphosate, a chemical that kills plants and grasses. To use herbicides, simply spray them directly onto the grass according to the package instructions.

Keep in mind that herbicides may take some time to fully eradicate the grass, so patience is key. Be cautious when using herbicides near desirable plants, as they can also be harmed by these chemicals.

3. Pulling

To remove grass without digging, start by using a sturdy garden tool to pull the grass out from the roots. A good option is a garden hoe or a pitchfork. Make sure the soil is moist, as it will be easier to remove the grass.

Begin by carefully digging around the perimeter of the grass, being cautious not to damage nearby plants. Once you have loosened the soil, grip the grass firmly at the base and pull it out, making sure to remove as much of the root system as possible.

Dispose of the grass in a compost bin or a garbage can. This manual method is effective for removing small patches of grass, especially when done while the soil is moist.

4. Mowing

One effective method of removing grass without digging is through mowing, which can weaken and eventually kill the grass. Mowing involves cutting the grass at a low height to weaken its root system and inhibit its growth. Here are three key points to keep in mind when using mowing as a grass removal method:

  • Set your lawnmower to the lowest cutting height possible to ensure that the grass is cut as short as possible.
  • Regularly mow over the grass to continuously weaken it over time. This method is particularly suitable for larger areas that require ongoing maintenance.
  • Consider covering the area with plastic after mowing to utilize the sun’s heat and further kill the grass over a few weeks.

5. Solarization

To effectively remove grass without digging, try using solarization as one of the easiest methods. Solarization utilizes the sun’s heat to kill grass and other unwanted plants. Here’s how it works:

  1. First, mow the grass as low as possible to expose the soil.
  2. Then, water the area thoroughly to ensure the soil is moist.
  3. Next, cover the area with clear plastic, making sure it’s tightly secured around the edges.
  4. The plastic will trap the heat from the sun, creating a greenhouse effect that will raise the soil temperature and kill the grass.
  5. Leave the plastic in place for at least six weeks during the hottest part of the year.
  6. Afterward, remove the plastic and you’ll find the grass has withered and died.

Solarization is an effective method for grass removal without the need for digging, making it a convenient option for those looking for a low-maintenance solution.

Tips on How to Get Rid of Grass without Digging

If you want to get rid of grass without digging, there are several tips you can follow:

  • Smother the grass with a thick layer of mulch: This will block sunlight and prevent water and nutrient absorption, effectively killing the grass.
  • Use organic herbicides like vinegar or lemon juice: These natural alternatives can be sprayed on the grass to kill it without harming other plants or animals.
  • Apply boiling water: Pouring boiling water on the grass will scorch and kill it effectively.

By utilizing these tips, you can effectively eliminate grass without the need for extensive digging.

Smothering the grass with mulch deprives it of the necessary resources for survival, while organic herbicides and boiling water provide chemical-free alternatives for killing the grass. These methods are practical and can be easily implemented in your lawn care routine.

It’s important to note that while these methods are effective, they may not provide a permanent solution, and regrowth is possible. Therefore, it’s essential to monitor and maintain your lawn regularly to prevent the grass from coming back.

How to Remove Grass with A Shovel

To remove grass with a shovel, you can effectively eliminate unwanted grass from your lawn by following these steps.

First, wet the grassy area to loosen the soil and make it easier to dig.

Then, select an appropriate shovel, such as a garden hoe or pitchfork, depending on the size and depth of the grass.

Carefully dig around the perimeter of the grass, being cautious not to damage any nearby plants.

Once you have loosened the soil around the grass, lift the sod in one piece using the shovel.

You can either transplant it to another area or dispose of it. If you choose to dispose of the grass, consider using a compost bin or a garbage can.

Removing grass with a shovel requires some physical effort, but it can be a practical method for small patches of grass or when you want to preserve the surrounding plants.

It’s important to take your time and be patient while digging to avoid any accidental damage.

Make sure to keep the shovel sharp to make the process easier and more efficient.

Remember to properly dispose of the grass to prevent any regrowth or spreading of the unwanted grass.

How Do You Temporarily Remove Grass

When temporarily removing grass, you can use various methods to effectively eliminate it without digging. Here are three options to consider:

  • Smother the grass with a thick layer of mulch: This method blocks sunlight, preventing the grass from photosynthesizing and receiving the nutrients it needs to survive. Use organic mulch, such as wood chips or straw, and apply it generously to completely cover the grass.
  • Use organic herbicides: Vinegar or lemon juice can be effective in killing grass without harming other plants or animals. Simply spray the herbicide directly onto the grass, making sure to cover all the foliage. Be aware that multiple applications may be necessary for stubborn grass.
  • Apply boiling water: Boiling water can scorch and kill grass effectively. Carefully pour the boiling water directly onto the grass, focusing on the areas you want to remove. Take precautions to avoid burns and be mindful not to harm nearby plants.

These methods offer temporary grass removal without the need for digging. Choose the one that suits your needs and preferences, keeping in mind that regrowth is possible, especially with natural methods.

How Do I Permanently Remove Grass

For a permanent solution, you can effectively eliminate grass without digging by using a combination of methods.

One natural method is to smother the grass with a thick layer of mulch, blocking sunlight and preventing water and nutrient absorption. Organic herbicides like vinegar or lemon juice can also be used to kill the grass without harming other plants or animals. Another option is to apply boiling water or use a propane torch to scorch and kill the grass.

If you prefer chemical methods, you can apply an herbicide according to the label instructions to quickly kill the grass. Roundup herbicide is a popular choice for spraying and causing the grass to die. Herbicides containing glyphosate, a chemical that kills plants and grasses, can also be effective. Remember to follow the instructions on the herbicide package for optimal results.

Mechanical methods include mowing the grass as low as possible to weaken its root system. Repeatedly mowing over the grass can also weaken and eventually kill it, which is suitable for larger areas. Another option is to cover the area with plastic to utilize the sun’s heat and kill the grass over a few weeks. For larger-scale grass removal, consider using a grass cutter or sod cutter.

If you prefer manual methods, you can remove small patches of grass by hand, especially when the soil is moist. Wetting the grassy area can help loosen the soil and facilitate digging. Carefully dig around the perimeter of the grass, avoiding damage to nearby plants. Lift the sod in one piece and either transplant it or dispose of it. You can also physically remove grass by digging it up with a shovel or trowel.

When removing grass without digging, there are a few tips and considerations to keep in mind. Thoroughly water the area after applying an herbicide to enhance its effectiveness. Removing grass with a shovel is feasible with the right tools and technique. Temporary grass removal methods may not be permanent, and regrowth is possible. Removing grass without causing extensive damage requires careful planning. Vinegar can be used as a natural option, either diluted or full strength, to kill grass. Dead grass can be raked up or left in place, depending on preference. Renting a Sod Cutter can make grass removal easier for larger areas. Dispose of the grass in a compost bin or garbage can. Choose the most suitable method based on the size and extent of the grass removal project.

Cheapest Way to Kill Grass

The most cost-effective way to eliminate grass is by smothering it with a thick layer of mulch. This method not only kills the grass but also prevents it from regrowing. Here are three reasons why smothering with mulch is the cheapest way to kill grass:

  • Mulch is readily available and affordable. You can find mulch at garden centers, landscaping stores, or even by contacting local tree services. Some municipalities even offer free mulch made from recycled yard waste. By using mulch, you can save money compared to other methods that require the purchase of herbicides or equipment.
  • Mulch is a natural and safe option. Unlike chemical herbicides, smothering with mulch doesn’t pose a risk to the environment, pets, or children. It’s a non-toxic method that allows you to eliminate grass without any harmful effects.
  • Mulch improves soil fertility. As the mulch decomposes, it enriches the soil with organic matter, nutrients, and beneficial microorganisms. This not only kills the grass but also enhances the overall health of your garden or landscape.

Frequently Asked Questions

Can I Use Vinegar or Lemon Juice as a Natural Herbicide to Kill Grass Without Harming Other Plants?

Yes, you can use vinegar or lemon juice as natural herbicides to kill grass without harming other plants. They are effective options that won’t cause harm to the environment or other living organisms.

Is It Necessary to Water the Area After Applying an Herbicide to Enhance Its Effectiveness?

Yes, it is necessary to water the area after applying an herbicide to enhance its effectiveness. This helps the herbicide penetrate the grass and ensures that it reaches the roots for more efficient killing.

How Long Does It Typically Take for Grass to Die After Applying a Chemical Herbicide?

It typically takes a few days to a couple of weeks for grass to die after applying a chemical herbicide. Follow the instructions on the herbicide package for optimal results and ensure safety precautions are followed.

What Precautions Should Be Taken When Using a Propane Torch to Burn Grass?

To safely burn grass with a propane torch, always wear protective clothing and keep a fire extinguisher nearby. Avoid using the torch on windy days and make sure to follow all safety instructions provided by the manufacturer.

Can I Remove Small Patches of Grass by Hand or Do I Need to Use a Shovel?

Yes, you can remove small patches of grass by hand. Wet the area to loosen the soil, select an appropriate shovel, carefully dig around the perimeter, and lift the sod. Dispose or transplant it as desired.

Conclusion

Removing grass without digging can be a simple and efficient task when utilizing the right methods. Whether you choose natural options like mulching or organic herbicides, chemical solutions such as herbicides or a propane torch, mechanical approaches like mowing or covering with plastic, or manual methods like removing patches by hand or using a shovel, there’s a method that suits your needs.

Following the step-by-step instructions provided, you can easily reclaim your yard without the hassle of digging.