How to Permanently Kill Grass in Gravel Driveway – 3 Effective Methods

Are you tired of dealing with unsightly grass in your gravel driveway? Want a permanent solution to keep your driveway weed-free? Look no further!

We’ll guide you through three effective methods to permanently kill grass in your gravel driveway. Whether you prefer herbicides, manual removal, or physical barriers, we have you covered.

Say goodbye to constant battles with grass and enjoy a beautiful, low-maintenance driveway. Let’s get started!

How to Permanently Kill Grass in Gravel Driveway (3 Effective Methods)

To permanently kill grass in your gravel driveway, you have three effective methods at your disposal.

First, you can use herbicides, such as glyphosate, to kill the grass without harming the gravel.

Second, manual removal of grass by hand or with tools like a hoe or trowel can be effective, although it requires more labor.

Use Herbicides

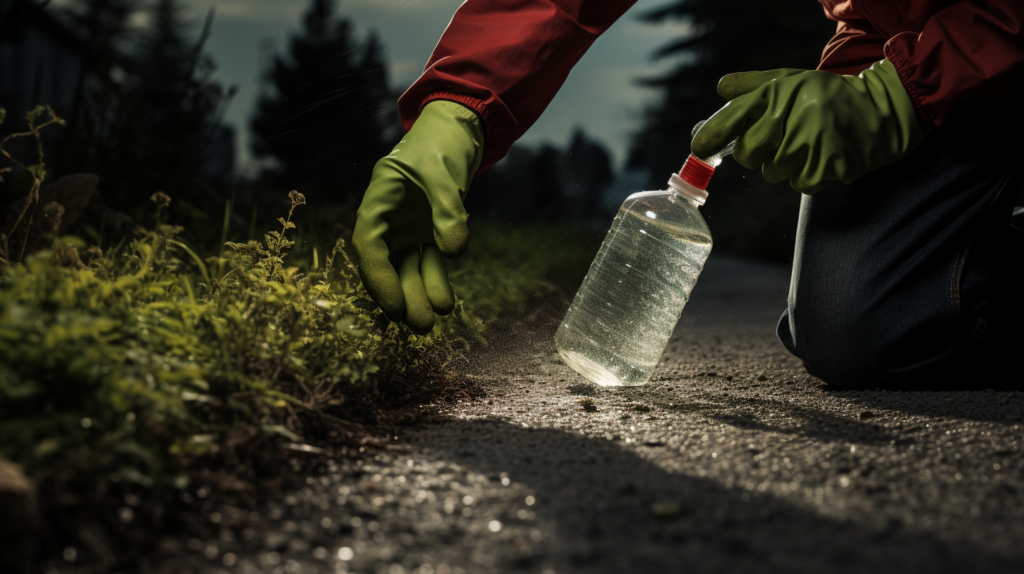
To effectively kill grass in a gravel driveway, you can use herbicides. One effective option is to apply a glyphosate herbicide evenly across the entire surface of the driveway. Glyphosate herbicides effectively kill grass without harming the gravel. It’s recommended to reapply the herbicide every few weeks or months, depending on the product and rainfall.

Be sure to read and follow all directions carefully to avoid damaging the concrete or asphalt. There are many products available on the market that can quickly and effectively kill grass in a gravel driveway. Using herbicides is a convenient and efficient method to permanently get rid of grass in your driveway.

Manually Removing Grass

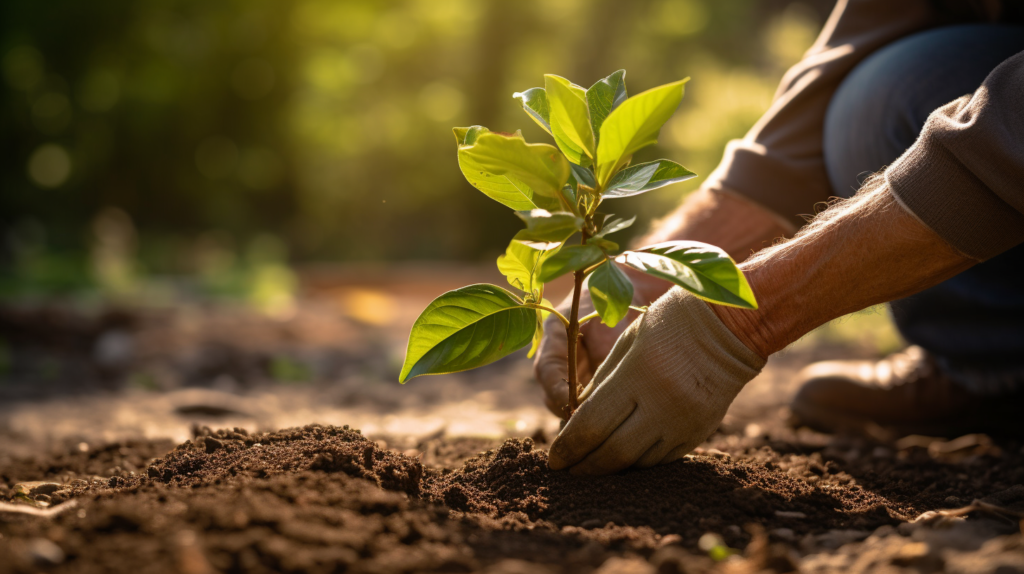
Continuing the discussion on how to permanently kill grass in a gravel driveway, one effective method is manually removing the grass. Regularly pull up weeds or grass by hand or with a tool like a hoe or trowel. Ensure to remove as much of the root system as possible to prevent regrowth.

Although this method is more labor-intensive, it can help control new growth. Consider adding fresh gravel after removing the weeds to fill any holes. Manual removal is effective for small patches of grass in a gravel driveway.

It’s important to stay vigilant and regularly monitor the area for any new growth. By manually removing the grass, you can maintain a weed-free gravel driveway without the use of chemicals or herbicides.

Covering the Area with A Tarp

Cover the area with a tarp to effectively kill grass in a gravel driveway. This method is a non-chemical approach that prevents sunlight from reaching the grass, ultimately leading to its demise. Secure the edges of the tarp to prevent it from blowing away during windy weather.

Lack of sunlight will eventually kill any vegetation trying to grow, including grass. For better effectiveness, use a tarp during periods of hot weather when the sun’s rays are stronger.

Another option is to lay landscape fabric on the gravel, creating a barrier between the soil and stones. Ensure good drainage to prevent water pooling on the gravel, as grass seeds need sunlight and water to germinate. Keeping the gravel dry discourages growth.

If needed, consult with a professional to improve drainage or install drains.

Tips to Permanently Kill Grass in A Gravel Driveway

For effectively killing grass in your gravel driveway, consider implementing these tips.

First, using herbicides and chemicals can be an effective method. Apply a glyphosate herbicide evenly across the entire surface of the driveway, following all directions carefully to avoid damaging the concrete or asphalt. Reapply the herbicide every few weeks or months as needed. Glyphosate herbicides are known to kill grass without harming the gravel. There are many products available on the market that can quickly and effectively eliminate grass in your gravel driveway.

Another option is manual removal. Regularly pull up weeds or grass by hand or with tools like a hoe or trowel, making sure to remove as much of the root system as possible to prevent regrowth. This method may be more labor-intensive, but it can help control new growth. Consider adding fresh gravel after removing the weeds to fill any holes.

Non-chemical methods can be used. Covering the area with a tarp or heavy material can block sunlight and prevent growth. Ensure the edges of the tarp are secured to prevent it from blowing away. Lack of sunlight will eventually kill any vegetation trying to grow. Another option is laying landscape fabric to create a barrier between the soil and stones, ensuring good drainage to prevent water pooling on the gravel. Keeping the gravel dry discourages grass growth. If needed, consult with a professional for improving drainage or installing drains.

How to Permanently Get Rid of Weeds in Gravel Driveway Naturally

To permanently get rid of weeds in your gravel driveway naturally, you can implement a few simple methods. Here are two effective ways to achieve a weed-free driveway without the use of chemicals:

  • Manual Removal:
  • Regularly pull up weeds or grass by hand or with a tool like a hoe or trowel.
  • Ensure to remove as much of the root system as possible to prevent regrowth.
  • This method is more labor-intensive but can help control new growth.
  • Consider adding fresh gravel after removing the weeds to fill any holes.
  • Manual removal is effective for small patches of grass in a gravel driveway.
  • Non-Chemical Methods:
  • Cover the area with a tarp or heavy material to block sunlight and prevent growth.
  • Secure the edges of the tarp to prevent it from blowing away in windy weather.
  • Lack of sunlight will eventually kill any vegetation trying to grow.
  • Use a tarp during periods of hot weather for better effectiveness.
  • Lay landscape fabric to create a barrier between soil and stones.
  • Ensure good drainage to prevent water pooling on the gravel.
  • Grass seeds need sunlight and water to germinate, keeping gravel dry discourages growth.
  • Consult with a professional for improving drainage or installing drains.

How Do You Kill Grass to Lay Gravel

To effectively kill grass and prepare the area for laying gravel, you can use a combination of manual removal and non-chemical methods.

For manual removal, regularly pull up weeds or grass by hand or with a tool like a hoe or trowel. Be sure to remove as much of the root system as possible to prevent regrowth. This method is more labor-intensive but can help control new growth. Consider adding fresh gravel after removing the weeds to fill any holes.

Non-chemical methods can also be effective. Cover the area with a tarp or heavy material to block sunlight and prevent growth. Secure the edges of the tarp to prevent it from blowing away in windy weather. Lack of sunlight will eventually kill any vegetation trying to grow. Use a tarp during periods of hot weather for better effectiveness.

Another option is to lay landscape fabric to create a barrier between the soil and stones. Ensure good drainage to prevent water pooling on the gravel, as grass seeds need sunlight and water to germinate. Keeping the gravel dry discourages growth. If needed, consult with a professional for improving drainage or installing drains.

Safety Tips While Removing Grass Permanently

When permanently removing grass from your gravel driveway, it’s important to prioritize safety throughout the process. Here are some safety tips to consider:

  • Personal Protective Equipment (PPE):
    • Wear gloves to protect your hands from sharp objects and potential chemical exposure.
    • Use safety goggles to shield your eyes from debris or splashes when using herbicides or chemicals.
    • Wear long sleeves and pants to protect your skin from contact with herbicides and sharp objects.
  • Proper Handling of Herbicides and Chemicals:
    • Read and follow all instructions and safety precautions provided by the manufacturer.
    • Store herbicides and chemicals in a secure place away from children and pets.
    • Avoid inhaling or ingesting the herbicides or chemicals and wash hands thoroughly after use.
  • Safe Manual Removal:
    • Use appropriate tools such as a hoe or trowel to remove grass manually.
    • Be cautious of your body posture and avoid overexertion to prevent strain or injury.
    • Dispose of removed grass and weeds properly to avoid recontamination.

Is a Weed Barrier Works to Permanently Get Rid of Weeds in A Gravel Driveway

A weed barrier effectively prevents weed growth in a gravel driveway. It acts as a physical barrier that blocks sunlight and prevents weed seeds from germinating and taking root in the gravel. A weed barrier is typically made of a durable material like landscape fabric or geotextile. It’s installed directly under the layer of gravel, providing an extra layer of protection against weed growth.

To install a weed barrier, first, remove any existing weeds or grass from the driveway. Then, lay the barrier over the entire surface, ensuring that it covers every inch of the gravel. Secure the edges of the barrier with landscape staples or pins to keep it in place.

A weed barrier is an effective long-term solution for preventing weed growth in a gravel driveway. However, it’s important to note that it may not completely eliminate all weeds. Some determined weeds may find a way to penetrate the barrier over time. In such cases, regular maintenance and spot treatments may be necessary to keep your driveway weed-free.

How Do You Kill Grass and Cover with Gravel

If you want to permanently kill grass and cover it with gravel, you can achieve this by following these steps:

  • Kill the Grass:
  • Use Herbicides: Apply a glyphosate herbicide evenly across the entire surface of the driveway. Make sure to follow the instructions carefully to avoid damaging the gravel or any surrounding structures. Reapply the herbicide as needed.
  • Manual Removal: Regularly pull up weeds or grass by hand or with a tool like a hoe or trowel. Be sure to remove as much of the root system as possible to prevent regrowth. This method is more labor-intensive but can be effective for small patches of grass.
  • Non-Chemical Methods: Cover the area with a tarp or heavy material to block sunlight and prevent growth. Alternatively, lay landscape fabric to create a barrier between the soil and stones. Ensure good drainage to discourage grass growth.
  • Cover with Gravel:
  • Prepare the Surface: Remove any remaining grass, weeds, or debris from the area. Level the surface if necessary.
  • Choose the Right Gravel: Select a type of gravel that’s suitable for your driveway. Ensure it’s the right size and shape for stability and proper drainage.
  • Spread the Gravel: Evenly distribute the gravel across the entire driveway. Use a rake or shovel to spread it out and create an even surface.
  • Compact the Gravel: Use a compactor or tamper to compact the gravel and ensure a firm and stable surface.

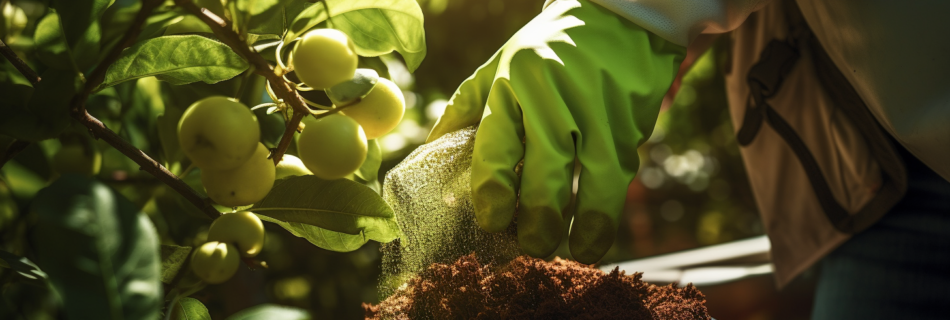
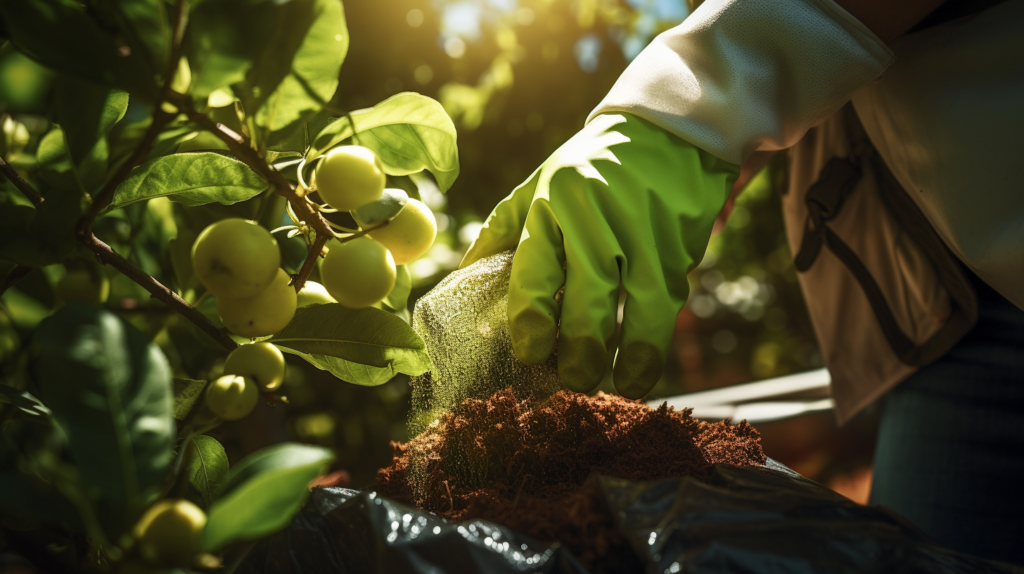
Soil Sterilant for Gravel Driveway

To effectively kill grass in a gravel driveway, consider using a soil sterilant. Soil sterilants are effective in killing existing vegetation and preventing new seeds from germinating. There are different types of soil sterilants available, so choose one that’s suitable for the weeds in your driveway.

Mix the sterilant with water and spray it evenly on the gravel driveway. Results can be seen within a week or two, and regular treatment will help keep the driveway weed-free.

Soil sterilants work by inhibiting the growth of plants and disrupting their metabolic processes. They’re designed to target and kill unwanted vegetation while leaving the gravel unharmed. Using a soil sterilant is a convenient and long-lasting solution for eliminating grass and weeds in your gravel driveway.

It is important to follow the instructions provided by the manufacturer when using a soil sterilant. Make sure to wear protective clothing and gloves, and avoid spraying on windy days to prevent the sterilant from drifting onto desirable plants. It’s advisable to test the sterilant on a small area of the driveway first to ensure compatibility and effectiveness.

Using a soil sterilant can be an efficient method for permanently killing grass in a gravel driveway, providing a clean and weed-free surface.

How to Stop Grass from Growing in Gravel

To prevent grass from growing in your gravel, there are two main methods you can use: the herbicide method and the non-chemical method.

  • Herbicide Method:
    • Apply a glyphosate herbicide evenly across the entire surface of the driveway.
    • Read and follow all directions carefully to avoid damaging concrete or asphalt.
    • Reapply the herbicide every few weeks or months depending on the product and rainfall.
    • Glyphosate herbicides effectively kill grass without harming the gravel.
    • Many products on the market can quickly and effectively kill grass in a gravel driveway.
    • Use soil sterilant to kill existing vegetation and prevent new seeds from germinating.
    • Different types of soil sterilants are available, choose one suitable for the weeds in your driveway.
    • Mix the sterilant with water and spray it evenly on the gravel driveway.
    • Results can be seen within a week or two, regular treatment keeps the driveway weed-free.
  • Non-Chemical Method:
    • Cover the area with a tarp or heavy material to block sunlight and prevent growth.
    • Secure the edges of the tarp to prevent it from blowing away in windy weather.
    • Lack of sunlight will eventually kill any vegetation trying to grow.
    • Use a tarp during periods of hot weather for better effectiveness.
    • Lay landscape fabric to create a barrier between soil and stones.
    • Ensure good drainage to prevent water pooling on the gravel.
    • Grass seeds need sunlight and water to germinate, keeping gravel dry discourages growth.
    • Consult with a professional for improving drainage or installing drains.

Frequently Asked Questions

Can I Use a Weed Barrier to Permanently Get Rid of Weeds in My Gravel Driveway?

Yes, you can use a weed barrier to permanently get rid of weeds in your gravel driveway. Lay landscape fabric to create a barrier between the soil and stones, ensuring good drainage to discourage weed growth.

How Do I Stop Grass From Growing in My Gravel Driveway?

To prevent grass from growing in your gravel driveway, you can use herbicides like glyphosate, manually remove the grass, or use non-chemical methods like covering the area with a tarp or laying landscape fabric.

Is It Safe to Use Soil Sterilant on a Gravel Driveway?

Yes, it is safe to use a soil sterilant on a gravel driveway. Choose a suitable sterilant for the weeds in your driveway, mix it with water, and spray it evenly. Regular treatment keeps the driveway weed-free.

How Do I Kill Grass and Cover It With Gravel?

To kill grass and cover it with gravel, first remove any existing grass manually by pulling it up. Then, you can use herbicides or chemicals to permanently kill the grass. Another option is to use non-chemical methods like covering the area with a tarp or laying landscape fabric.

What Safety Precautions Should I Take When Removing Grass Permanently From My Gravel Driveway?

When removing grass permanently from your gravel driveway, take safety precautions. Use herbicides evenly, following directions to avoid concrete or asphalt damage. Pull up weeds manually, removing roots. Cover with tarp to block sunlight.

Conclusion

Utilizing herbicides, manual removal, and physical barriers, you can permanently kill grass in your gravel driveway.

Whether you prefer chemical or non-chemical methods, these three effective techniques will help you maintain a weed-free and low-maintenance driveway.

Say goodbye to unsightly grass growth and enjoy the beauty of a pristine gravel driveway.

When to Prune Fruit Trees – 4 Significant Times for Optimal Results

Are you a fruit tree enthusiast looking to maximize the health and productivity of your trees? Discover the four significant times for pruning fruit trees to achieve optimal results.

From dormant season pruning to late winter, summer, and immediate pruning of diseased or damaged branches, each season offers unique benefits. Enhance air circulation, improve structural integrity, and manage pests and diseases with proper pruning.

Find out the essential tools and consult experts for tailored guidance. Ensure the health, vigor, and bountiful harvest of your fruit trees.

When to Prune Fruit Trees for Optimal Results (4 Best Times)

When it comes to pruning fruit trees for optimal results, there are four best times to consider.

The first is dormant season pruning, which should be done in late winter to early spring before bud break. Late winter pruning is recommended for trees susceptible to diseases.

Summer pruning is useful for managing tree size and shaping the canopy.

Lastly, immediate pruning of diseased or damaged branches should be done as soon as detected, regardless of the season, to prevent further spread of diseases and promote overall tree health.

1. Dormant Season Pruning

Pruning fruit trees during the dormant season offers optimal results for their overall health and productivity. Late winter to early spring, before bud break, is the best time for dormant season pruning. This timing provides better visibility for identifying and removing dead or damaged branches. It also stimulates vigorous regrowth and enhances fruit production.

Pruning during the dormant season minimizes the risk of disease transmission. Late winter pruning is recommended for fruit trees susceptible to diseases like fire blight, as it reduces the risk of disease spread. By pruning just before spring growth, you can rejuvenate the tree and increase fruit production.

2. Late Winter Pruning

During late winter, you should consider pruning your fruit trees for optimal results in terms of health and productivity. This is a crucial time for pruning, especially for fruit trees that are susceptible to diseases like fire blight. By pruning just before spring growth, you can reduce the risk of disease spread and promote rejuvenation, leading to increased fruit production.

Late winter pruning is also beneficial for managing tree size and shaping the canopy. It’s best performed after fruit harvest, allowing for faster wound healing and reducing the risk of disease transmission. Focus on thinning overcrowded branches, maintaining airflow, and ensuring proper sunlight penetration for the best results.

3. Summer Pruning

For optimal results in pruning your fruit trees during the summer, it’s important to focus on managing tree size and shaping the canopy using techniques that promote airflow and sunlight penetration.

Summer pruning is best performed after the fruit harvest. By thinning overcrowded branches and maintaining airflow and sunlight penetration, you can improve the overall health of your fruit trees. This type of pruning promotes faster wound healing and reduces the risk of disease transmission.

Summer pruning allows you to shape the canopy and manage the size of your trees, ensuring they stay within manageable limits. By following these techniques, you can maintain the health and vigor of your fruit trees throughout the summer season.

4. Immediate Pruning of Diseased or Damaged Branches

To maintain the health and vigor of your fruit trees, it’s crucial to promptly prune any diseased or damaged branches as soon as they’re detected. Immediate pruning of these branches offers several important benefits:

  • Disease Prevention: Pruning diseased branches prevents the spread of diseases and creates a less conducive environment for pathogens.
  • Overall Tree Health: Removing damaged branches mitigates further damage and promotes faster recovery, allowing the tree to allocate resources towards healthy growth.
  • Hazard Mitigation: Pruning damaged branches reduces the risk of breakage during heavy fruit loads or adverse weather conditions, maintaining the tree’s structural integrity.
  • Faster Healing: By pruning diseased or damaged branches promptly, you promote faster wound healing and minimize the risk of infection.

Why Pruning Fruit Trees Is Significant for Their Growth

Pruning fruit trees is significant for their growth because it enhances air circulation and sunlight penetration, which reduces the risk of fungal diseases and promotes healthier growth.

It also maintains the structural integrity of the tree, preventing breakage during heavy fruit loads or adverse weather conditions.

Pruning improves fruit quality and size by allocating energy efficiently and creating a less conducive environment for pests and diseases.

Enhanced Air Circulation and Sunlight Penetration

Improving air circulation and sunlight penetration is crucial for the growth of fruit trees. By enhancing these factors, you can promote healthier growth and increase fruit production. Here are four reasons why pruning fruit trees is significant for enhancing air circulation and sunlight penetration:

  • Reducing overcrowded branches: Pruning helps thin out overcrowded areas in the canopy, allowing for better airflow and sunlight penetration. This reduces the risk of fungal diseases and promotes faster drying of foliage.
  • Shaping the canopy: Proper pruning techniques can help shape the canopy of the fruit tree, ensuring that sunlight reaches all parts of the tree. This stimulates photosynthesis, leading to healthier growth and better fruit production.
  • Removing dead or diseased branches: Pruning allows you to identify and remove dead or diseased branches, which can hinder air circulation and sunlight penetration. By removing these branches, you create a more favorable environment for the tree to thrive.
  • Promoting new growth: Pruning fruit trees stimulates new growth and encourages the development of fruitful branches. This helps maintain a balance between vegetative growth and fruit production, ensuring optimal tree health and productivity.

Structural Integrity and Tree Strength

Pruning fruit trees, you can ensure their structural integrity and strength, which is crucial for their growth and productivity. Pruning helps maintain the overall framework of the tree, reducing the risk of breakage during heavy fruit loads or adverse weather conditions. It promotes a balanced and sturdy structure, ensuring the long-term health of the tree.

Removing weak or crossing branches, pruning allows for better air circulation and sunlight penetration, reducing the risk of fungal diseases and promoting faster drying of foliage. This stimulates photosynthesis, leading to healthier growth and improved fruit production.

Pruning plays a crucial role in pest and disease management by facilitating early detection and intervention. It also creates a less conducive environment for pathogens, reducing the spread of diseases.

Fruit Quality and Size

To maximize the growth of your fruit trees, pruning plays a significant role in enhancing fruit quality and size. Proper pruning techniques promote efficient energy allocation towards fewer fruits, resulting in larger and more flavorful produce. Here are four reasons why pruning fruit trees is crucial for their growth:

  • Efficient energy allocation: By pruning, you encourage the tree to focus its energy on fewer fruits, allowing them to receive more nutrients and grow to their full potential.
  • Enhanced fruit color: Pruning helps increase sunlight penetration and airflow, leading to better fruit color development and reducing the chances of infection.
  • Reduced disease risk: Pruning promotes airflow and sunlight penetration, creating a less conducive environment for pathogens and reducing the spread of diseases.
  • Pest management: Pruning allows for early detection of pests and diseases, facilitating intervention before they cause significant damage.

Pest and Disease Management

Pruning fruit trees significantly reduces the risk of pests and diseases affecting their growth. By removing dead or diseased branches, you create a less conducive environment for pathogens, reducing the spread of diseases. Pruning allows for early detection and intervention, enabling you to address pest issues promptly.

Proper pruning also improves air circulation and sunlight penetration in the canopy, which reduces the risk of fungal diseases and promotes faster drying of foliage. This stimulation of photosynthesis leads to healthier growth and better fruit production.

Regulating Tree Size and Encouraging New Growth

Regulating tree size and encouraging new growth is essential for the growth of your fruit trees. By pruning your fruit trees, you can control their size, stimulate new growth, and promote the development of fruitful branches. This helps maintain a balance between vegetative growth and fruit production, ensuring optimal tree health and productivity.

Here are four reasons why pruning fruit trees is significant for their growth:

  • Size Management: Pruning allows you to control the size of your fruit trees, making them easier to manage and harvest.
  • New Growth Stimulation: Pruning stimulates the growth of new branches, which leads to increased fruit production in the following seasons.
  • Canopy Shaping: By shaping the canopy through pruning, you can create a well-structured tree that allows for better airflow and sunlight penetration.
  • Fruit Quality Improvement: Pruning helps redirect the tree’s energy towards fewer fruits, resulting in larger, more flavorful produce.

Pruning fruit trees is a crucial practice that contributes to their overall health and productivity.

Tools that You Need to Prune Fruit Tree

To effectively prune fruit trees, you’ll need a set of essential tools. These include:

  • Pruning shears (hand pruners) for precise cuts on small branches
  • Loppers for cutting thicker branches
  • A pruning saw for larger branches or removing entire limbs
  • A pole pruner for reaching high branches without a ladder
  • Sharpening tools to keep the pruning tools sharp for clean cuts

Having the right tools will ensure that you can make accurate and efficient cuts while maintaining the health and vigor of your fruit trees.

Pruning Shears (Hand Pruners)

You’ll need a pair of pruning shears (hand pruners) when it’s time to prune your fruit trees. These tools are essential for making precise cuts on small branches, allowing you to shape and maintain the health of your trees effectively.

Here are four key features to consider when choosing pruning shears:

  • Quality and Sharpness: Look for shears made from high-quality materials that will stay sharp for clean cuts.
  • Comfort and Ergonomics: Consider shears with comfortable handles and a design that reduces hand fatigue during prolonged use.
  • Cutting Capacity: Ensure the shears can handle the size of branches you typically encounter in your fruit trees.
  • Safety Features: Opt for shears with safety locks or blades that can be easily secured when not in use to prevent accidents.

Loppers

For optimal results, equip yourself with loppers, the essential tool for pruning fruit trees effectively. Loppers are designed to cut thicker branches with precision and ease. They’ve long handles that provide leverage and allow you to reach higher branches without the need for a ladder.

Loppers have a bypass or anvil cutting mechanism, which enables clean cuts and minimizes damage to the tree. When using loppers, it’s important to choose the right size for the job. Smaller loppers are suitable for branches up to 1 inch in diameter, while larger ones can handle branches up to 2 inches in diameter.

Remember to keep your loppers sharp for optimal cutting performance. By using loppers correctly, you can promote healthy growth, improve fruit production, and maintain the overall structure of your fruit trees.

Pruning Saw

When pruning fruit trees, a pruning saw is an essential tool that allows you to make clean and precise cuts on larger branches or remove entire limbs, ensuring the overall health and structure of your trees. A pruning saw offers several advantages for effective fruit tree pruning:

  • Longer Blade: The long, curved blade of a pruning saw provides the necessary reach and leverage to safely and efficiently cut through thicker branches.
  • Aggressive Teeth: The saw’s sharp, aggressive teeth enable it to cut through tough wood with ease, minimizing the risk of splintering or tearing.
  • Clean Cuts: The fine teeth of a pruning saw create clean cuts, promoting faster healing and reducing the chances of disease or infection.
  • Versatility: A pruning saw is versatile and can handle a wide range of pruning tasks, from removing large branches to shaping the tree’s overall structure.

Investing in a high-quality pruning saw will ensure that you have the right tool for maintaining the health, vigor, and productivity of your fruit trees.

Pole Pruner

To effectively prune your fruit trees, one tool that you’ll need is a pole pruner, which allows you to reach high branches without the need for a ladder. A pole pruner consists of a long pole with a cutting blade or saw attached to the end. It’s designed to provide you with the necessary reach and leverage to safely prune branches that are out of your reach.

The pole pruner allows you to make clean and precise cuts, promoting the health and growth of your fruit trees. When using a pole pruner, ensure that the blade is sharp and properly maintained to achieve optimal pruning results. Remember to follow safety precautions and wear protective gear while using this tool.

Hedge Shears (optional)

You can consider using hedge shears as an optional tool when pruning your fruit trees. Hedge shears have long, straight blades that can make clean, straight cuts on small to medium-sized branches. They’re particularly useful for shaping the canopy and maintaining a neat appearance for ornamental fruit trees.

However, it’s important to note that hedge shears shouldn’t be used for heavy pruning or cutting thick branches, as they aren’t designed for that purpose. If you decide to use hedge shears, make sure they’re sharp to ensure clean cuts and minimize the risk of damage to the tree.

Remember to always follow proper pruning techniques and consult an expert if you’re unsure about the best approach for your specific fruit tree.

Ladder

To safely and effectively prune your fruit trees, you’ll need a sturdy ladder to reach the higher branches. A ladder is an essential tool that allows you to access the upper parts of the tree and make accurate cuts.

When choosing a ladder, ensure it’s stable and capable of supporting your weight. A step ladder or an extension ladder with adjustable height can be suitable options.

It’s crucial to position the ladder securely on a level surface and have someone hold it for added stability. Remember to always follow safety precautions, such as wearing non-slip footwear and using both hands while climbing.

Gardening Gloves

As you continue pruning your fruit trees, a pair of gardening gloves becomes an essential tool for protecting your hands and ensuring a comfortable grip while handling the pruning tools. Here are four reasons why gardening gloves are crucial for pruning fruit trees:

  • Protection from cuts and scratches: Gardening gloves provide a barrier between your hands and the sharp branches or thorns, preventing injuries and keeping your hands safe.
  • Enhanced grip: The textured surface of gardening gloves allows for a better grip on the pruning tools, reducing the risk of accidents and improving your control while pruning.
  • Shield against allergens: Wearing gloves can help protect your skin from potential allergens, such as tree sap or pollen, which may cause irritation or allergic reactions.
  • Comfort and hygiene: Gardening gloves provide a layer of comfort, especially during long pruning sessions. They also help maintain good hygiene by preventing the transfer of dirt, bacteria, or fungi onto your hands.

Disinfectant or Rubbing Alcohol

Proper sanitation is crucial when pruning fruit trees to prevent the spread of diseases and ensure the health of your trees. Disinfectant or rubbing alcohol is an essential tool that you need to have when pruning fruit trees.

Before you start pruning, it’s important to clean and disinfect your pruning tools to prevent the transmission of diseases from one tree to another. Disinfectant or rubbing alcohol can be used to clean the blades of your pruning shears, loppers, pruning saw, and other tools. Simply soak a cloth or sponge in the disinfectant or rubbing alcohol and wipe down the blades before and after each cut.

This will help to kill any pathogens that may be present on the tools and minimize the risk of disease transmission. By practicing proper sanitation and using disinfectant or rubbing alcohol, you can ensure the health and longevity of your fruit trees.

Pruning Sealant (optional)

You will need a pruning sealant, if desired, along with the necessary tools to prune your fruit tree. The pruning sealant is an optional product that can be used to seal the wounds created during pruning. It’s typically applied to larger cuts or wounds to help prevent disease and promote faster healing.

While some arborists argue that pruning sealants are unnecessary, others believe that they can be beneficial in certain situations. If you choose to use a pruning sealant, make sure to follow the manufacturer’s instructions for application.

Remember that the most important aspect of pruning is using the proper tools and techniques to promote the health and productivity of your fruit tree.

When Is It Too Late to Prune Fruit Trees

Pruning fruit trees too late in the season can negatively impact their growth and fruit production. It’s important to understand the optimal timing for pruning to ensure the best results.

Pruning too late into the growing season can disrupt the tree’s natural growth cycle and may lead to reduced fruit production. Late pruning can also leave the tree vulnerable to diseases and pests.

It’s generally recommended to prune fruit trees during the dormant season, late winter to early spring, before bud break. This allows for better visibility of dead or damaged branches and stimulates vigorous regrowth. Pruning during this time minimizes the risk of disease transmission and promotes overall tree health.

If you’re unsure about the appropriate timing for pruning, it’s advisable to consult with local nurseries or arborists who can provide expert guidance specific to your fruit tree and regional conditions.

When to Prune Fruit Trees Near San Antonio, TX

If you’re in the San Antonio, Tx area, the ideal time for pruning fruit trees can vary depending on the specific type of tree and regional conditions. To ensure optimal results, consider the following factors:

  • Climate: Take into account the local climate and temperature fluctuations throughout the year. This will help determine the best time to prune your fruit trees.
  • Tree Type: Different fruit trees have specific pruning requirements. Research the specific needs of your tree species to determine the appropriate pruning time.
  • Dormancy: Pruning during the dormant season, typically in late winter or early spring, is often recommended. This allows for better visibility, stimulates regrowth, and minimizes disease transmission.
  • Disease and Pest Management: Consider timing your pruning to coincide with disease and pest management practices. This can help prevent the spread of diseases and create a less conducive environment for pathogens.

When to Prune Fruit Trees near Austin, TX

First, determine the ideal time to prune fruit trees near Austin, Tx by considering local conditions and the specific needs of your tree species.

In general, the best time to prune fruit trees in this region is during the dormant season, which typically occurs in late winter to early spring before bud break. This allows for better visibility in identifying and removing dead or damaged branches. Pruning during this time stimulates vigorous regrowth and enhances fruit production. Late winter pruning is recommended for fruit trees susceptible to diseases like fire blight, as it reduces the risk of disease spread.

Summer pruning can be useful for managing tree size and shaping the canopy, especially after fruit harvest.

Lastly, immediate pruning of diseased or damaged branches should be done as soon as they’re detected, regardless of the season, to prevent the spread of diseases and promote overall tree health.

When to Prune Fruit Trees in Northern California

To achieve optimal results, prune your fruit trees in Northern California during the late fall to early spring, which is the best time for most fruit trees in this region. Pruning during this dormant season allows the tree to heal quickly and reduces the risk of infection or disease.

Here are four key considerations for pruning fruit trees in Northern California:

  • Assess the overall health of the tree and remove any dead or diseased branches.
  • Thin out overcrowded branches to improve air circulation and promote better fruit production.
  • Prune in late winter or early spring to improve future yields and stimulate new growth.
  • Consult local nurseries or arborists for specific guidance on pruning timing and best practices for different types of fruit trees.

Pruning Fruit Trees in Autumn

During autumn, you should assess the overall health of your fruit trees and remove any dead or diseased branches to ensure optimal growth and fruit production. Pruning in autumn encourages new growth and shapes the tree for the next season.

It’s important to thin out overcrowded branches to improve air circulation and promote better fruit production. Before making cuts, assess the fruiting patterns of your trees to determine the necessary pruning. Late winter or early spring pruning can improve future yields. Thinning out overcrowded areas and reducing the overall size of the tree can be done during this time.

Summertime is suitable for light trimming or selective removal of problem limbs without affecting fruiting patterns. If unsure about pruning timing, consult with a local nursery or arborist to ensure optimal results. Their expertise can provide guidance specific to each type of fruit tree and help maintain the health and vigor of your trees.

Conclusion

Knowing the best times to prune your fruit trees is essential for their health and productivity.

Following the guidelines mentioned in this article, such as pruning during the dormant season, late winter, summer, and immediately for diseased or damaged branches, you can maximize the benefits of pruning.

Remember to consult experts for tailored guidance and use the necessary tools for effective pruning.

By doing so, you can ensure the vitality and abundant harvest of your fruit trees.

How to Prune Fruit Trees in Winter – 10 Easy Steps to Follow

Are you ready to learn how to prune your fruit trees like a pro? In this article, we’ll guide you through 10 simple steps to successfully prune your fruit trees during the winter season.

You’ll discover the essential tools you’ll need, when to prune, and how to assess your tree for any issues.

We’ll also show you how to remove dead or diseased branches, thin out crowded areas, and maintain the tree’s shape.

Get ready to ensure the health, productivity, and longevity of your fruit trees this winter.

10 Step-By-Step Instructions on How to Prune Fruit Trees in Winter

Now that you have gathered the necessary tools and chosen the right time to prune, it’s time to dive into the step-by-step instructions on how to prune fruit trees in winter.

The first step is to assess the tree and start by removing dead and diseased branches.

Then, you’ll need to remove crossing and rubbing branches to promote a healthier tree structure.

Step 1: Gather the Necessary Tools

To gather the necessary tools for pruning fruit trees in winter, you’ll need pruning shears, loppers, a pruning saw, gloves, and disinfectant spray or rubbing alcohol. These tools are essential for effectively and safely pruning your fruit trees.

Pruning shears are used for cutting small branches up to ¾ inch in diameter, while loppers are ideal for branches between ¾ inch and 2 inches in diameter. A pruning saw is necessary for thicker branches, and gloves provide protection for your hands. Lastly, disinfectant spray or rubbing alcohol is crucial for sanitizing your tools to prevent the spread of diseases.

Step 2: Choose the Right Time

When pruning fruit trees in winter, it’s important to choose the right time for optimal results. Late winter or early spring, before the buds break, is the ideal time to prune.

During this period, the tree is still dormant, which reduces the risk of disease transmission and allows for quick healing. Pruning at this time also provides better visibility and access to branches, making it easier to identify and remove dead or diseased wood.

Step 3: Assess the Tree

To assess the tree before pruning, you’ll need to observe its overall health and structure, checking for any dead, damaged, or diseased branches, as well as any crossing or rubbing branches.

  • Look for signs of dead, damaged, or diseased branches:
  • Remove branches above the branch collar to prevent further spreading of diseases.
  • Identify crossing or rubbing branches:
  • Select the weaker branch and cut above the branch collar to maintain tree health and structure.

Step 4: Start with Dead and Diseased Branches

Remove any dead or diseased branches from your fruit tree to promote its overall health and vitality. These branches can serve as breeding grounds for pests and diseases, so it’s essential to eliminate them.

Use pruning shears or a pruning saw, depending on the thickness of the branch. Make sure to cut just above the branch collar, which is the swollen area at the base of the branch. This will help prevent any unnecessary damage to the tree.

Step 5: Remove Crossing and Rubbing Branches

How can you effectively address branches that are crossing or rubbing against each other during the winter pruning process?

Identify the crossing or rubbing branches and select the weaker or less desirable one to remove completely.

Make sure to cut just above the branch collar to promote proper healing and prevent infections.

Taking these steps will help maintain the tree’s overall health and prevent future issues.

Step 6: Thin out Crowded Areas

To improve air circulation and promote healthy fruit development, thin out crowded areas in your fruit tree during the winter pruning process.

Dense clusters of branches can hinder the flow of air and light, increasing the risk of fungal diseases. Remove inward-growing branches and any areas where branches are too close together.

This will help create an open and balanced structure, allowing for better air circulation and light penetration throughout the canopy.

Step 7: Maintain the Tree’s Shape

Maintain the shape of your fruit tree by selectively pruning branches that deviate from the desired structure, ensuring a balanced and aesthetically pleasing canopy. To achieve this, follow these steps:

  • Remove branches that cross or rub against each other to prevent damage and promote healthy growth.
  • Eliminate inward-growing branches that can crowd the canopy and hinder air circulation.
  • Trim branches that compete for sunlight to ensure proper light distribution and fruit development.
  • Prune branches that pose safety hazards or hinder the overall growth of the tree.

Step 8: Prune for Fruit Production

To promote optimal fruit production, selectively prune your fruit tree during the winter by focusing on shaping and retaining branches that will bear fruit in the upcoming season.

Remove excessive growth and thin out crowded areas to allow adequate light and airflow to reach the fruiting wood.

By pruning for fruit production, you stimulate new growth and encourage the development of fruiting wood, resulting in larger, higher-quality fruits.

This selective pruning technique helps maintain the health and productivity of your fruit tree.

Step 9: Step Back and Evaluate

Now, take a step back and evaluate the shape and structure of your pruned fruit tree to ensure it’s visually balanced and appealing.

Consider the following:

  • Balance:
    • Assess if the branches are evenly distributed on both sides of the tree.
    • Look for any areas that may appear too heavy or sparse.
  • Structure:
    • Check for strong, well-spaced scaffold branches.
    • Ensure there are no branches crossing or rubbing against each other.

Make any final adjustments necessary to achieve the desired outcome.

Step 10: Clean and Sanitize

Once you have completed evaluating the shape and structure of your pruned fruit tree, it’s time to move on to the final step: cleaning and sanitizing your tools.

To prevent the spread of diseases, use disinfectant spray or wipe down your tools with rubbing alcohol before moving on to another tree or storing them.

Properly cleaning and sanitizing your tools ensures the health and longevity of your fruit trees.

What Tools Should You Need to Prune Fruit Trees in Winter

To effectively prune fruit trees in winter, you’ll need a set of essential tools. These include:

  • Pruning shears for small branches
  • Loppers for thicker branches
  • A pruning saw for even thicker branches
  • A pole pruner for higher branches
  • A pruning knife for precision cuts and shaping

Having the right tools will ensure that you can make clean and accurate cuts, promoting the health and productivity of your fruit trees.

1. Pruning Shears

To effectively prune fruit trees in winter, you’ll need pruning shears, an essential tool for cutting small branches up to ¾ inch in diameter.

Pruning shears come in two types: bypass pruners and anvil pruners. Bypass pruners, with a curved blade that slides past a hook, are generally preferred for their clean cuts.

Anvil pruners, on the other hand, have a straight blade that cuts against a flat surface.

2. Loppers

You will need a pair of loppers, which are longer-handled pruning tools designed for cutting branches with a diameter ranging from ¾ inch to 2 inches (2-5 cm), to effectively prune fruit trees in winter.

Loppers provide more leverage and reach compared to pruning shears, making them suitable for thicker branches that are out of hand pruners’ reach.

With their larger blades and extended handles, loppers ensure precise and efficient pruning of fruit trees during the dormant stage.

3. Pruning Saw

First, you’ll need a pruning saw, an essential tool for pruning fruit trees in winter. A pruning saw has a long, sharp-toothed blade designed for cutting thicker branches and removing larger sections of wood. It’s useful for branches over 2 inches in diameter. Pruning saws come in different sizes and tooth configurations, such as curved or straight blades, and some are foldable for easy storage and portability.

  • Features of a Pruning Saw:
    • Long, sharp-toothed blade
    • Designed for cutting thicker branches
    • Available in different sizes and tooth configurations
    • Some models are foldable for easy storage and portability

4. Pole Pruner

When using a pole pruner to prune fruit trees in winter, it’s important to have a tool that allows you to reach and trim higher branches without the need for a ladder.

A pole pruner, also known as a pole saw, consists of a pruning saw attached to an extendable pole. This specialized tool is especially useful for larger trees or when you need to access branches at a considerable height.

Using a pole pruner ensures efficient and safe pruning of fruit trees during the winter season.

5. Pruning Knife

To effectively prune fruit trees in winter, you’ll need a reliable and sharp pruning knife. A pruning knife is essential for making precise cuts, removing suckers or buds, and shaping the tree’s structure.

It can also be used to remove bark or small protrusions hindering the tree’s growth. When choosing a pruning knife, look for one with a sharp, sturdy blade and a comfortable grip.

Keep the knife clean and sharp to ensure clean cuts and minimize damage to the tree.

6. Protective Gear

For the necessary protection when pruning fruit trees in winter, it’s important to have the right protective gear.

Wear gloves to safeguard your hands from cuts and scratches, especially when dealing with thorny branches.

Use safety glasses or goggles to shield your eyes from flying debris.

Consider wearing long sleeves, pants, and sturdy shoes or boots for added protection.

Ensure your tools are clean, sharp, and in good working condition, and sanitize them with a disinfectant spray or rubbing alcohol to prevent the spread of infections.

Benefits of Pruning Fruit Trees in The Winter

Pruning fruit trees in the winter provides numerous benefits. During the dormant stage, you can easily identify and remove dead or diseased wood, promoting overall tree health.

Winter pruning also enhances air circulation and sunlight penetration, leading to better fruit development and ripening.

Shaping and structuring the tree during this time helps maintain its desired form and stimulates growth for increased fruit production.

Dormant Stage

Taking advantage of the dormant stage of fruit trees in winter, pruning promotes overall health, productivity, and longevity of your fruit trees.

Pruning during this period provides better visibility and access to branches, minimizing the risk of causing damage or stress. It allows for easier shaping and maintenance, as well as the identification of dead or diseased wood.

Winter pruning also helps control and prevent the spread of diseases, enhances air circulation and sunlight penetration, and maintains the desired shape and structure of fruit trees.

Disease Prevention

To prevent the spread of diseases, you should prune your fruit trees in winter.

Winter pruning helps control and prevent the spread of diseases by removing dead, damaged, or diseased wood, which reduces the presence of pathogens and pests that may have taken hold during the growing season.

It also allows for the identification and removal of any cankers or infected areas before they’ve a chance to spread further.

Pruning in winter is a crucial step in maintaining the health and longevity of your fruit trees.

Enhanced Air Circulation and Sunlight Penetration

By selectively thinning out branches and removing overcrowded areas, you can greatly enhance the air circulation and sunlight penetration in your fruit tree’s canopy during winter pruning. This promotes better overall health and productivity of the tree.

Benefits include reduced risk of fungal diseases, improved fruit development and ripening, and better light distribution for fruit production.

Winter pruning allows the remaining branches to have more space to grow and develop, ensuring a balanced and structurally sound tree.

Shape and Structure

To achieve an aesthetically pleasing and functional tree structure, prune your fruit trees in winter to maintain their desired shape and structure.

By removing crossing, rubbing, or inward-growing branches, you can achieve a more open and balanced canopy. This allows for better light distribution, which is crucial for fruit production.

Well-shaped trees are also easier to manage, harvest, and maintain in the long run.

Winter pruning ensures a well-balanced and structurally sound tree.

Stimulates Growth and Fruit Production

Pruning fruit trees in winter stimulates growth and encourages the development of fruiting wood, resulting in stronger, healthier shoots and larger, higher-quality fruits. This is achieved through the following benefits:

  • Redirects tree’s energy: Selectively removing branches directs the tree’s energy to the remaining branches, promoting new growth and fruiting wood development.
  • Balances growth and fruit production: Pruning helps maintain a balance between vegetative growth and fruit production, leading to larger and higher-quality fruits.

Rejuvenation

Revitalize your older or neglected fruit trees in winter by removing a significant portion of older wood, allowing for the production of new, vigorous shoots.

Rejuvenation pruning improves the tree’s overall vigor and increases fruit production. By stimulating the growth of fresh branches, winter pruning revitalizes the tree and extends its productive lifespan.

This practice is especially valuable for maintaining the health and productivity of older fruit trees, ensuring their continued success in future seasons.

Corrective Measures

If you have older or neglected fruit trees, winter pruning allows you to take corrective measures and address any structural issues that may have arisen, ensuring the continued health and success of your trees.

Winter pruning offers the following benefits:

  • Safety and Growth: Remove branches that pose safety hazards or hinder tree growth.
  • Corrective Pruning: Address poor past pruning practices and maintain a well-balanced and structurally sound tree.

Winter pruning provides easy access for other maintenance tasks and promotes the overall health and longevity of your fruit trees.

Easy Access for Maintenance

To easily maintain your fruit trees and access them for other maintenance tasks, winter pruning provides a convenient opportunity. Pruning during the dormant stage allows for better visibility and easier shaping of the tree. It also helps control and prevent the spread of diseases, enhances air circulation and sunlight penetration, and maintains the desired shape and structure of the tree.

Winter pruning stimulates growth and fruit production, and it offers a chance for corrective measures and rejuvenation.

Fundamental Principles of Winter Pruning

When it comes to winter pruning, there are several fundamental principles to keep in mind.

First, take advantage of the tree’s dormant stage to assess and remove dead and diseased wood. This helps maintain the tree’s structural integrity and promotes overall health.

Thinning out crowded areas and selectively pruning for fruit production are essential for achieving optimal growth and productivity.

Dormancy

During dormancy, you can take advantage of better visibility and access to branches, making winter the ideal time for pruning fruit trees.

Pruning during this period provides easier shaping and maintenance, minimizing the risk of causing damage or stress to the tree.

The absence of leaves makes it easier to identify dead or diseased wood.

Pruning during dormancy also helps control and prevent the spread of diseases, while enhancing air circulation and sunlight penetration.

Remove Dead and Diseased Wood

Start by identifying and cutting out any dead or diseased branches from your fruit tree. These branches can attract pests and diseases, so it’s essential to remove them for the tree’s health.

Cut just above the branch collar, which is the swollen area at the base of the branch, to promote proper healing.

Removing dead and diseased wood is a fundamental principle of winter pruning that helps maintain the overall health and productivity of your fruit tree.

Structural Integrity

To ensure the structural integrity of your fruit tree, focus on maintaining a well-balanced framework that allows for good air circulation and light penetration. This will reduce the risk of fungal diseases and promote the development of healthy fruiting wood.

To achieve this, follow these fundamental principles of winter pruning:

  • Remove crossing and rubbing branches:
  • Select the weaker branch and cut above the branch collar.
  • Thin out crowded areas:
  • Promote air circulation and light penetration by selectively removing excess branches.

Thinning

To achieve a well-balanced framework that promotes air circulation and light penetration, you’ll need to thin out crowded areas by selectively removing excess branches.

Thinning helps create adequate spacing between branches and ensures that each branch receives enough sunlight for proper fruit development.

By reducing the overall weight of the tree, thinning also prevents branches from breaking under heavy fruit loads.

This process is crucial for maintaining the health and productivity of fruit trees.

Fruit Production

To promote fruit production in winter pruning, selectively retain and shape branches that will bear a bountiful harvest. Here are the fundamental principles to follow:

  • Retain fruiting wood: Focus on branches that produced fruit in the previous year.
  • Remove excessive vegetative growth: Thin out branches that hinder sunlight penetration and air circulation.

These principles ensure that energy is directed towards fruit production and the tree’s overall health and productivity are maximized.

Shape and Training

Now let’s delve into the fundamental principles of winter pruning for shaping and training your fruit trees.

When considering shape and training, it’s important to choose the desired shape, such as open vase or central leader, and prune accordingly. Maintaining the desired shape not only enhances the tree’s aesthetics but also supports healthy growth and facilitates easy fruit harvesting.

Remove any branches that deviate from the desired shape to ensure a well-balanced and structurally sound tree.

Rejuvenation Pruning

Start by assessing your mature fruit tree’s overall health and vigor before proceeding with rejuvenation pruning in winter. Rejuvenation pruning involves removing a significant portion of older branches to stimulate new growth and improve fruit production.

To successfully rejuvenate your fruit tree, follow these fundamental principles of winter pruning:

  • Remove older branches: Cutting back older wood encourages the development of new, vigorous shoots.
  • Promote new growth: Rejuvenation pruning stimulates the tree’s overall vigor and increases fruit production.

Sanitize Tools

First, gather the necessary tools and sanitize them to ensure cleanliness and prevent the spread of diseases.

Before moving on to another tree or storing your tools, clean and sanitize them.

Use disinfectant sprays or rubbing alcohol to sanitize pruning tools between cuts or after working on diseased branches.

Tips on How to Prune Fruit Trees in Winter

To ensure successful pruning of your fruit trees in winter, gather the necessary tools and assess the tree’s condition.

Start by sterilizing your tools with a bleach solution to prevent disease spread.

Remove dead, diseased, or damaged branches, cutting back to healthy wood.

Next, eliminate crossing or rubbing branches to avoid damage and hindered fruit production.

Shape the tree by cutting back lateral branches and terminal buds.

If promoting fruit production, leave unpruned shoots near the trunk.

When Is It Too Late to Prune Fruit Trees

If you’re wondering when it’s too late to prune your fruit trees, there’s a general rule to keep in mind. It’s best to prune fruit trees in late winter or early spring before new growth begins. However, there are exceptions.

If your tree is overgrown or damaged, pruning later in the season can still be beneficial. Just be cautious not to prune after mid-summer, as it can interfere with fruit ripening.

What Should You Not Cut Back in The Winter

What branches should you avoid cutting back in the winter?

  • Flowering Branches:
    • Cutting back flowering branches in winter would result in a loss of blooms for the upcoming spring season.
    • It’s best to wait until after the tree has finished blooming to prune flowering branches.
  • New Growth:
    • Cutting back new growth in winter can disrupt the tree’s natural growth cycle.
    • It’s important to allow new growth to establish and mature before pruning.

What Do I Need to Do for My Fruit Trees in Winter?

During the winter months, it’s important to take certain steps to care for your fruit trees and ensure their health and productivity.

First, prune your trees to promote stronger growth and increased fruit production.

Keep an eye on the weather forecast and protect your trees from extreme cold or heat waves.

Fertilize your trees to provide them with essential nutrients.

Water your trees regularly, especially during periods of little rainfall, to prevent stress and susceptibility to disease and pests.

Frequently Asked Questions

Can I Prune My Fruit Trees in the Summer Instead of Winter?

No, it is not recommended to prune fruit trees in the summer. Pruning during winter is ideal as the trees are dormant, reducing stress and preventing disease spread.

How Often Should I Prune My Fruit Trees in Winter?

You should prune your fruit trees in winter to promote overall health, productivity, and longevity. Pruning during this dormant stage helps control diseases, enhances air circulation and sunlight penetration, and maintains the desired shape and structure of the trees.

Are There Any Specific Techniques for Pruning Different Types of Fruit Trees?

Yes, there are specific techniques for pruning different types of fruit trees. Each tree has its own pruning requirements based on its growth habit and fruiting characteristics.

Can I Use Household Disinfectant Instead of a Disinfectant Spray for Cleaning My Pruning Tools?

No, you cannot use household disinfectant instead of a disinfectant spray for cleaning pruning tools. Household disinfectants may not be effective in killing pathogens that can spread diseases between trees.

Can I Prune My Fruit Trees in Winter if They Are Still Producing Fruit?

Yes, you can prune your fruit trees in winter, even if they are still producing fruit. Winter pruning helps maintain tree health, shape, and structure, and stimulates new growth and fruit production.

Conclusion

Following these 10 easy steps and using the necessary tools, you can effectively prune your fruit trees in winter.

Pruning during this season promotes the overall health, productivity, and longevity of the trees.

Remember to assess the tree for dead, damaged, or diseased branches and remove them accordingly.

Thin out crowded areas and maintain the tree’s shape to ensure optimal fruit production.

Clean and sanitize your tools for future use.

Prune like a pro and enjoy the benefits of well-maintained fruit trees!

When to Fertilize Apple Trees – 3 Useful Tips for Fertilizing Apple Tree

Are you ready to take your apple tree care to the next level?

Learn how to fertilize your apple trees for optimum health and productivity with these three useful tips.

Discover the importance of using a balanced fertilizer and the optimal timing for application based on your trees’ growth stage.

Plus, explore regional recommendations tailored to specific climates.

Equip yourself with the knowledge and know-how to nourish your apple trees and enjoy a thriving harvest.

Let’s dive in and master the art of fertilizing your apple trees!

What Kind of Fertilizer Do Apple Trees Need

To ensure healthy growth and abundant fruit production, you’ll need to use a fertilizer that’s specifically designed for apple trees and contains the necessary nutrients of nitrogen, phosphorus, and potassium. Apple trees require these essential nutrients for their overall development and fruiting process.

A balanced fertilizer labeled as complete, with all three nutrients in the right proportions, is ideal for apple trees. It’s recommended to apply the fertilizer once a year, preferably in the springtime before new growth begins. When applying the fertilizer, make sure to spread it around the drip line of the tree, avoiding direct contact with the trunk. Over-fertilizing can be detrimental to the tree, so it’s crucial to use the correct amount.

During the vegetative stage, when apple trees are actively growing leaves and stems, a balanced fertilizer with nitrogen, phosphorus, and potassium should be used. In the early spring, a fertilizer with a ratio of 10-10-10 is suitable. In late spring/early summer, switch to a high nitrogen fertilizer like 30-10-10. In late summer/fall, reduce the frequency of fertilization and increase phosphorus levels.

It’s recommended to consult with a local nursery or extension office for guidance on correct fertilization practices. By following these guidelines and using the right fertilizer, you can ensure the healthy growth and fruitful production of your apple trees.

At Which Stage Apple Trees Needs What Type of Fertilizer

During different stages of growth, apple trees require different types of fertilizer.

In the early spring, when apple trees are actively growing leaves and stems, a balanced fertilizer with nitrogen, phosphorus, and potassium, such as 10-10-10, is recommended.

In the late spring/early summer, it’s best to switch to a high nitrogen fertilizer like 30-10-10 to promote healthy shoot and leaf growth.

In the late summer/fall, reduce fertilization frequency and increase phosphorus levels to support root development and nutrient storage for the winter.

Early Spring

In early spring, apple trees require a specific type of fertilizer based on their growth stage.

During this time, apple trees are in the vegetative stage, actively growing leaves and stems.

To support this growth, it’s recommended to use a balanced fertilizer like 10-10-10. This type of fertilizer contains equal amounts of nitrogen, phosphorus, and potassium, providing the tree with the necessary nutrients for healthy development.

Applying the fertilizer in early spring ensures that the nutrients are available when the tree needs them the most.

Remember to follow the manufacturer’s instructions for proper application and adjust the amount of fertilizer based on the size and growth stage of the tree.

Providing the right nutrients at the right time will promote strong, healthy growth in your apple trees.

Late Spring/Early Summer

For late spring/early summer, apple trees require a different type of fertilizer based on their growth stage. During this time, apple trees are in their vegetative stage, actively growing leaves and stems.

To support this growth, it’s recommended to switch to a high nitrogen fertilizer like 30-10-10. The high nitrogen content promotes the development of lush foliage, which is essential for healthy fruit production.

Nitrogen is responsible for the green color in plants and plays a crucial role in photosynthesis and overall plant growth. By providing the tree with a fertilizer high in nitrogen, you’re ensuring that it has an adequate supply of this essential nutrient during this critical growth period.

Remember to follow the manufacturer’s instructions for proper application and adjust the amount of fertilizer based on the size and growth stage of the tree.

Late Summer/Fall

To determine the type of fertilizer needed for apple trees in late summer/fall, assess the growth stage and adjust nutrient levels accordingly. Here are three important factors to consider:

  • Nutrient requirements: Apple trees in late summer/fall shift their focus from vegetative growth to fruit development. This means they require higher levels of phosphorus, which promotes strong root development and enhances fruit production.
  • Fertilizer composition: Look for a fertilizer with a higher phosphorus content, such as a 5-10-10 or 10-20-20 formulation. These ratios indicate the percentage of nitrogen, phosphorus, and potassium in the fertilizer, respectively.
  • Application timing: Apply the fertilizer in late summer or early fall, before the tree enters dormancy. This allows the tree to absorb and store the nutrients during the dormant period, preparing it for the next growing season.

When Should I Fertilize My Newly Planted Apple Trees

Fertilize your newly planted apple trees in the early spring before new growth begins. This is the best time to provide your trees with the necessary nutrients for healthy growth and development. When you plant apple trees, they need time to establish their root systems before they can effectively take up nutrients from the soil. By fertilizing in the early spring, you give the trees a boost of nutrients just as they’re waking up from their winter dormancy.

Choose a balanced fertilizer, such as a 10-10-10 formulation, which contains equal parts nitrogen, phosphorus, and potassium. This will ensure that your trees receive all the essential nutrients they need for optimal growth. Apply the fertilizer around the drip line of the tree, avoiding direct contact with the trunk. Spread it evenly, following the package instructions for the appropriate application rate.

Fertilizing your newly planted apple trees in the early spring will help them establish strong root systems and promote healthy growth. It’s an important step in ensuring the long-term health and productivity of your apple trees. By giving them the right nutrients at the right time, you set them up for success and increase the likelihood of a bountiful harvest in the future.

3 Tips for Fertilizing Apple Tree

When fertilizing your apple tree, it’s important to consider a few useful tips that will help promote healthy growth and maximize fruit production. Here are three tips to keep in mind:

  • Use a balanced fertilizer: Look for a fertilizer labeled as complete or balanced, containing nitrogen, phosphorus, and potassium. These three essential nutrients are crucial for the overall health of your apple tree.
  • Apply fertilizer at the right time: Fertilize your apple tree once a year, in the springtime before new growth begins. This ensures that the tree receives the necessary nutrients to support its growth and fruit production.
  • Follow proper application techniques: Apply the fertilizer around the drip line of the tree, avoiding the trunk. Over-fertilizing can harm the tree, so it’s important to use the right amount. Consult the manufacturer’s instructions or seek guidance from a local nursery or extension office for the correct application rate.

How Often Do You Fertilize Apple Trees

You should fertilize apple trees regularly to ensure their health and fruit production. The frequency of fertilization depends on the age and growth stage of the tree. For young apple trees, it’s recommended to fertilize them three times per year. This should be done in early spring, mid-summer, and late fall.

Mature apple trees, on the other hand, only require fertilization twice per year. This should be done in early spring and mid-summer.

When choosing a fertilizer, it’s important to use a high-quality product specifically designed for fruit trees. Look for a balanced fertilizer that contains nitrogen, phosphorus, and potassium. A popular option is the 10-10-10 fertilizer, which contains 10% nitrogen, 10% phosphorus, and 10% potassium. This well-balanced fertilizer promotes healthy growth in apple trees.

To determine the amount of fertilizer to use, you can follow a general guideline of using 1/2 pound of fertilizer per year for each inch of trunk diameter. However, it’s always best to consult the manufacturer’s instructions for the specific fertilizer you’re using.

Is 10 10 10 Fertilizer Good for Apple Trees

Using a 10-10-10 fertilizer for apple trees can be beneficial for their growth and fruit production. This well-balanced fertilizer contains 10% nitrogen, 10% phosphorus, and 10% potassium, providing the essential nutrients that apple trees need.

Here are three reasons why 10-10-10 fertilizer is good for apple trees:

  • Balanced nutrient supply: The equal proportions of nitrogen, phosphorus, and potassium in 10-10-10 fertilizer ensure that apple trees receive a well-rounded nutrient supply. Nitrogen promotes leaf and stem growth, phosphorus enhances root development, and potassium supports overall plant health and fruit production.
  • Easy application: 10-10-10 fertilizer is widely available and easy to use. Simply follow the package instructions for the recommended application rate. Apply the fertilizer in early spring, just before blooming, to ensure that the nutrients are readily available to the trees when they need them the most.
  • Versatility: 10-10-10 fertilizer can be used for both young and mature apple trees. Adjust the amount of fertilizer based on the size and growth stage of the tree. For young trees, fertilize three times a year in early spring, mid-summer, and late fall. For mature trees, a single application in early spring is sufficient to maintain tree health and promote fruit production.

Is Fertilizing Apple Trees in Fall Correct

Fertilizing apple trees in the fall is a common practice among many gardeners. However, it’s important to determine whether this practice is correct for your specific situation. Fall fertilization can be beneficial for apple trees, but it isn’t always necessary or recommended.

One factor to consider is the climate in your region. In colder climates, fall fertilization can help promote root growth and nutrient storage before the onset of winter. This can provide the tree with the necessary resources to withstand the harsh conditions and emerge healthy in the spring. For example, in Michigan, it’s recommended to fertilize young trees once in the spring and mature trees twice, in the spring and fall.

On the other hand, in warmer climates like Florida, fall fertilization may not be necessary. It’s advised to fertilize apple trees in late fall, just before dormancy for winter. In North Carolina, early spring fertilization before blooming is recommended, with a mid-season application for struggling trees. In Australia, fertilization is recommended from late winter to early spring, or mid-spring for a nutrient boost before fruit production.

It is important to consult local recommendations or a horticulture expert for guidance on the correct timing and frequency of fall fertilization for apple trees in your specific area. They can provide tailored advice based on your climate, soil conditions, and the specific needs of your apple trees.

When to Fertilize Apple Trees in Michigan

The recommended time to fertilize apple trees in Michigan is during the early spring before leaf buds emerge. This ensures that the trees receive the necessary nutrients for healthy growth and fruit production.

Here are three important tips for fertilizing apple trees in Michigan:

  • Choose a balanced fertilizer: Look for a complete or balanced fertilizer that contains nitrogen, phosphorus, and potassium. This will provide the tree with the essential nutrients it needs to thrive.
  • Apply the fertilizer correctly: Spread the fertilizer evenly around the drip line of the tree, avoiding direct contact with the trunk. This ensures that the nutrients are distributed to the tree’s root system, where they’re needed most.
  • Follow the recommended schedule: For young apple trees, fertilize them three times a year – in early spring, mid-summer, and late fall. Mature apple trees only need to be fertilized twice a year – in early spring and mid-summer. Adjust the amount of fertilizer based on the tree’s size and growth stage.

When to Fertilize Apple Trees in Florida

When fertilizing apple trees in Florida, it’s important to consider the specific recommendations for this region. In Florida, the best time to fertilize apple trees is in late fall before dormancy for winter. Fertilizing during this time promotes root growth and nutrient storage, which are crucial for the tree’s overall health.

It’s recommended to use a high-nitrogen fertilizer for apple trees in Florida. Nitrogen is essential for promoting leaf and shoot growth, which directly impacts fruit production. Applying the fertilizer in late fall ensures that the nutrients are available to the tree during the dormant period, setting the stage for healthy growth in the upcoming season.

When choosing a fertilizer, it’s advisable to use a well-balanced option like a 10-10-10 fertilizer, which contains 10% nitrogen, 10% phosphorus, and 10% potassium. Adjust the amount of fertilizer based on the size and growth stage of the tree, following the manufacturer’s instructions for proper application.

When to Fertilize Apple Trees in NC

To fertilize apple trees in NC, you should continue following the recommendations for the region and consider the specific needs of your trees. Here are three important tips to keep in mind:

  • Timing: In North Carolina, it’s best to fertilize apple trees in early spring before blooming. This ensures that the nutrients are available when the trees need them the most for healthy growth and fruit production. For struggling trees, a mid-season application may be beneficial to provide an extra nutrient boost.
  • Fertilizer Type: When choosing a fertilizer for your apple trees, opt for a balanced option such as a 10-10-10 fertilizer. This means it contains 10% nitrogen, 10% phosphorus, and 10% potassium, providing a well-rounded mix of essential nutrients. Be sure to follow the manufacturer’s instructions for proper application.
  • Consider Tree Health: It’s important to assess the health of your apple trees before fertilizing. If your trees are showing signs of nutrient deficiency or struggling to thrive, they may require additional fertilization. Consulting with a local nursery or extension office can provide guidance on the correct fertilization approach for your specific trees.

When to Fertilize Apple Trees in Australia

For fertilizing apple trees in Australia, it’s important to consider the specific timing and recommendations for the region. In Australia, the best time to fertilize apple trees is from late winter to early spring, or mid-spring for a nutrient boost before fruit production. During this time, apple trees are coming out of dormancy and preparing for new growth. Applying fertilizer at this stage provides the necessary nutrients for healthy leaf and shoot development, which is crucial for fruit production.

When fertilizing apple trees in Australia, it’s recommended to use a balanced fertilizer with nitrogen, phosphorus, and potassium, such as a 10-10-10 formulation. This balanced fertilizer promotes overall growth and development of the tree. The amount of fertilizer to use depends on the size and growth stage of the tree. As a general guideline, apply 1/2 pound of fertilizer per year for each inch of trunk diameter.

To ensure proper application, follow the manufacturer’s instructions on the fertilizer packaging. It’s also advisable to consult with local nurseries or extension offices for specific recommendations based on the local climate and soil conditions.

Frequently Asked Questions

How Often Should I Fertilize My Newly Planted Apple Trees?

You should fertilize your newly planted apple trees once in the spring, just before new growth begins. Use a balanced fertilizer, like 10-10-10, and apply it around the drip line of the tree.

Is 10-10-10 Fertilizer Good for Apple Trees?

Yes, 10-10-10 fertilizer is good for apple trees. It contains balanced amounts of nitrogen, phosphorus, and potassium, which promote healthy growth. Apply it in early spring before new growth begins for best results.

Is Fertilizing Apple Trees in the Fall Correct?

Fertilizing apple trees in the fall is not recommended. The best time to fertilize is in the spring, before new growth begins. Using a balanced fertilizer like 10-10-10 will promote healthy growth and fruit production.

When Is the Best Time to Fertilize Apple Trees in Michigan?

The best time to fertilize apple trees in Michigan is once in the spring for young trees and twice (spring and fall) for mature trees. Use a balanced fertilizer, like 10-10-10, following the package instructions.

When Should I Fertilize Apple Trees in Australia?

In Australia, fertilize apple trees from late winter to early spring, or mid-spring for a nutrient boost before fruit production. Use a balanced fertilizer like 10-10-10 according to the manufacturer’s instructions for proper application.

Conclusion

Properly fertilizing your apple trees is essential for maintaining their health and maximizing fruit production. By using a balanced fertilizer containing nitrogen, phosphorus, and potassium, applying it at the right growth stage, and following regional recommendations, you can ensure optimal growth and abundant harvests.

Regular fertilization and attention to your apple trees’ specific needs will result in lush foliage and bountiful fruit. Take the time to nourish your apple trees and enjoy the rewards of a thriving orchard.

How to Fertilize Apple Trees – 5 Step by Step Easy Guidelines

Do you want to ensure healthy and bountiful apple tree harvests? You’re in luck! This article will guide you through five easy steps on how to fertilize your apple trees effectively.

We’ll cover everything from necessary supplies to proper application techniques, and even give recommendations for the best fertilizers.

Following these expert guidelines, you’ll be well on your way to promoting healthy growth and maximizing the yield of your apple trees.

Tips You Must Need to Know Before Applying Fertilizer to Apple Tree

Before applying fertilizer to your apple tree, there are a few important tips you need to know. First, gather the necessary supplies such as a fertilizer spreader, gloves, and tree-specific fertilizer. Read the instructions on the fertilizer carefully to ensure proper application. Fill the spreader with the appropriate amount of fertilizer according to the package directions.

When spreading the fertilizer, make sure to avoid contact with the trunk and leaves. Instead, spread it around the tree’s drip line. After applying the fertilizer, water deeply to aid absorption into the roots. It’s crucial to choose between organic or inorganic fertilizer options. For every inch of trunk diameter, use 1/2 pound of actual nitrogen per year. For example, a 3-year-old tree with a 2-inch trunk diameter would require 1 pound of nitrogen fertilizer.

To prepare your own fertilizer mix, combine equal parts compost, manure, and peat moss in a bucket or wheelbarrow. Spread this mixture around the base of the tree, avoiding contact with the trunk and leaves. Choose a fertilizer specifically designed for trees and apply it during early spring or late fall when the tree is actively growing. Follow the recommended dosage mentioned on the fertilizer label.

How to Prepare Fertilizer for Apple Tree

To prepare fertilizer for your apple tree, gather the necessary supplies and choose the right type of tree-specific fertilizer. Here’s a step-by-step guide to help you:

  1. Gather the necessary supplies: You’ll need a fertilizer spreader, gloves, and tree-specific fertilizer. These supplies will ensure an efficient and effective fertilization process.
  2. Read the instructions carefully: Before applying the fertilizer, make sure to read the instructions on the packaging. This will help you understand the proper application techniques and dosage requirements.
  3. Fill the spreader with the appropriate amount of fertilizer: Follow the package directions to determine the correct amount of fertilizer to use. Fill the spreader accordingly to ensure accurate distribution.

Once you have prepared the fertilizer, you can move on to applying it to your apple tree. Remember to spread the fertilizer around the tree’s drip line, avoiding contact with the trunk and leaves. After applying the fertilizer, water deeply to aid in its absorption into the roots.

How Do You Apply Fertilizer to Apple Tree

To properly apply fertilizer to your apple tree, there are a few key points to keep in mind.

First, choose the right fertilizer that’s specifically formulated for fruit trees.

Apply the fertilizer at the proper time of year, ideally in early spring before new growth begins.

Know how much fertilizer to apply based on the diameter of the trunk.

Use the right application method, such as spreading granular fertilizer around the drip line or injecting liquid fertilizer into the soil.

Following these guidelines will ensure that your apple tree receives the nutrients it needs for healthy growth and optimal fruit production.

1. Choose the Right Fertilizer

Selecting the appropriate fertilizer is crucial for effectively nourishing your apple tree and ensuring optimal growth and fruit production. To choose the right fertilizer, follow these steps:

  1. Consider the needs of your apple tree: Determine whether your tree requires an organic or inorganic fertilizer based on its specific requirements and your personal preference.
  2. Look for a tree-specific fertilizer: Choose a fertilizer specifically designed for fruit trees, like Miracle-Gro Shake ‘n Feed Fruit & Citrus Fertilizer, Espoma Organic Tree-Tone, or Jobes Organics Fruit & Citrus Fertilizer Spikes.
  3. Read the instructions: Carefully read the instructions on the fertilizer package to understand the recommended dosage and application method.

2. Apply at The Proper Time of Year

Now that you have chosen the right fertilizer for your apple tree, it’s important to know when and how to apply it for optimal results.

The best time to fertilize apple trees is in early spring before the leaves start to bud. This allows for better nutrient absorption and promotes healthy growth.

It’s crucial to fertilize before new leaves and flowers emerge to ensure the tree receives the necessary nutrients. Applying the fertilizer at the right time promotes healthy tree growth and optimal fruit production.

Remember to follow the recommended dosage mentioned on the fertilizer label and apply it around the drip line of the tree, avoiding direct contact with the trunk and leaves.

3. Know how Much to Apply

When fertilizing your apple tree, it’s important to know how much fertilizer to apply and how to apply it properly. Here are three key steps to help you determine the right amount of fertilizer for your tree:

  1. Calculate the amount of nitrogen needed: Generally, apple trees require 1/2 pound of actual nitrogen per year for every inch of trunk diameter. For example, a 3-year-old tree with a 2-inch trunk diameter would require 1 pound of nitrogen fertilizer.
  2. Read the fertilizer instructions: It’s crucial to carefully read the instructions on the fertilizer package to ensure proper application. The instructions will provide guidance on the recommended dosage based on the tree’s size and age.
  3. Apply the fertilizer around the drip line: Once you know the correct amount of fertilizer to use, spread it evenly around the tree’s drip line, avoiding direct contact with the trunk and leaves. Water deeply after applying the fertilizer to aid its absorption into the roots.

4. Use the Right Application Method

To apply fertilizer to your apple tree, use the appropriate application method for optimal results.

One common method is using a fertilizer spreader. Make sure to wear gloves and choose a tree-specific fertilizer. Read the instructions carefully. Fill the spreader with the recommended amount of fertilizer according to the package directions. Spread the fertilizer around the tree’s drip line, avoiding contact with the trunk and leaves.

After applying the fertilizer, water deeply to aid absorption into the roots.

Another method is to mix equal parts compost, manure, and peat moss in a bucket or wheelbarrow. Spread this mixture around the base of the tree, again avoiding contact with the trunk and leaves.

Whichever method you choose, make sure to follow the recommended dosage mentioned on the fertilizer label and apply during the tree’s active growing season.

What Is the Best Fertilizer for An Apple Tree

If you want to fertilize your apple tree, it’s important to know which fertilizer is best for its optimal growth and fruit production. Here are three recommended fertilizers for apple trees:

  1. Miracle-Gro Shake ‘n Feed Fruit & Citrus Fertilizer: This fertilizer is specifically designed for fruit trees and contains essential nutrients like nitrogen, phosphorus, and potassium. It promotes healthy growth and abundant fruit production.
  2. Espoma Organic Tree-Tone: If you prefer an organic option, this fertilizer is a great choice. It’s made from natural ingredients and provides a balanced blend of nutrients to support overall tree health and fruit development.
  3. Jobes Organics Fruit & Citrus Fertilizer Spikes: These fertilizer spikes are easy to use and provide a slow-release formula that nourishes apple trees over time. They’re enriched with beneficial microbes, which improve soil health and nutrient absorption.

When choosing a fertilizer for your apple tree, look for one that’s high in nitrogen and low in phosphorus. Nitrogen promotes leaf and stem growth, while phosphorus supports root development. Apply the fertilizer during early spring before the leaves start to bud, and follow the recommended dosage mentioned on the fertilizer label.

With the right fertilizer and proper application, you can ensure your apple tree receives the nutrients it needs for healthy growth and bountiful harvests.

How Often Should Apple Trees Be Fertilized?

Fertilize your apple trees annually for optimal growth and fruit production. Regular fertilization is essential to provide the necessary nutrients for the tree’s overall health. By fertilizing your apple trees once a year, you ensure that they receive a consistent supply of essential elements to support their growth and development.

The best time to fertilize your apple trees is in early spring, before new growth begins. This allows for better nutrient absorption and promotes healthy tree growth. Fertilizing at this time also ensures that the tree has enough nutrients to support the production of high-quality fruits.

When it comes to the amount of fertilizer to use, a general guideline is to apply 1 pound of nitrogen per inch of trunk diameter. For example, if your apple tree has a 12-inch trunk, it would require 12 pounds of nitrogen fertilizer. However, it’s important to read and follow the instructions on the fertilizer label for precise dosage recommendations.

Remember to choose a fertilizer specifically formulated for fruit trees and apply it around the drip line, where most of the tree’s roots are located. Proper watering after fertilization helps the nutrients reach the roots and aids in their absorption.

Frequently Asked Questions

Can I Use Regular Garden Fertilizer for My Apple Trees?

Yes, you can use regular garden fertilizer for your apple trees. However, it’s important to choose a fertilizer specifically formulated for fruit trees, as they have different nutrient requirements. Follow the guidelines for proper application.

Is It Necessary to Wear Gloves When Applying Fertilizer to Apple Trees?

Yes, it is necessary to wear gloves when applying fertilizer to apple trees. Gloves protect your hands from potential skin irritation or allergic reactions caused by the fertilizer.

Can I Apply Fertilizer to My Apple Trees During the Winter?

Yes, you can apply fertilizer to your apple trees during the winter. However, it is best to fertilize apple trees in early spring before new growth begins for optimal nutrient absorption and healthy tree growth.

How Long Should I Wait After Fertilizing to Water My Apple Trees?

Wait at least 24 hours after fertilizing to water your apple trees. This allows the fertilizer to settle into the soil and be absorbed by the roots. Water deeply to ensure proper nutrient uptake.

Can I Use Liquid Fertilizer on My Apple Trees Instead of Granular Fertilizer?

Yes, you can use liquid fertilizer on your apple trees instead of granular fertilizer. Liquid fertilizers can be injected into the soil or applied through irrigation systems for easy absorption by the roots.

Conclusion

Following these five easy-to-follow steps, you can effectively fertilize your apple trees and ensure healthy and bountiful harvests.

Remember to:

  • Gather the necessary supplies
  • Read the fertilizer instructions carefully
  • Fill the spreader with the appropriate amount of fertilizer
  • Spread it around the tree’s drip line
  • Water deeply after application

Choose the best fertilizer for apple trees, considering organic or inorganic options.

Fertilizing your apple trees regularly, you’ll promote healthy growth and maximize your yield.

How and When to Apply Fertilizer to Make Trees Grow Fast – 6 Steps for Success

Are you eager to see your trees thrive and grow faster? Discover the secrets to successful fertilizer application in just six simple steps.

Learn how to recognize the signs that your trees need fertilizing, and the optimal timing for application.

Uncover the importance of selecting the right fertilizer for your tree’s needs and how to determine the proper amount.

We’ll discuss the benefits of fertilizing for fast growth and provide essential tips for maintaining healthy trees.

Get ready to witness your trees flourish like never before.

Active Signs of When Your Tree Needs Fertilizing

Look for specific signs indicating when your tree requires fertilizing. There are several active signs that can help you determine when your tree needs a boost of nutrients.

One of the most common signs is slow or stunted growth. If your tree isn’t growing as fast as it should or if it seems smaller than other trees of the same species, it may be lacking essential nutrients.

Another sign to look out for is yellowing or discolored leaves. Nutrient deficiencies can cause leaves to turn yellow, brown, or have unusual spots.

If your tree isn’t producing as many fruits or flowers as usual, it may be a sign that it needs fertilizing. Keep an eye out for any abnormal or unhealthy-looking foliage as well.

These signs indicate that your tree isn’t getting the necessary nutrients from the soil and could benefit from a well-timed application of fertilizer. By paying attention to these active signs, you can ensure that your tree receives the nourishment it needs to thrive and grow fast.

When to Apply Fertilizer to Make Trees Grow Fast

To ensure optimal growth and fast results, it’s important to know when to apply fertilizer to your trees. Timing is crucial for fertilizer application as it directly affects the tree’s ability to absorb and utilize nutrients efficiently. The best time to apply fertilizer is during the active growing season, which is typically in early spring and late fall. These periods provide the tree with the necessary nutrients to support vigorous growth.

It is essential to avoid extreme weather conditions when applying fertilizer. Extremely hot or cold temperatures can stress the tree and hinder nutrient uptake. Ensure that the soil has adequate moisture before applying fertilizer. Moist soil promotes optimal nutrient absorption by the tree’s roots.

When applying fertilizer, it’s crucial to follow the specific instructions for the type of fertilizer you’re using. Different fertilizers have different release rates and application methods. Consider the size of the tree and adjust the amount of fertilizer accordingly. For smaller trees, a broadcast spreader may be suitable, while larger trees may require a granular application method.

How to Apply Fertilizer to Make Trees Grow Fast (6 Steps for Success)

To apply fertilizer and make your trees grow fast, you need to follow these six steps for success.

First, understand the nutritional needs of your trees to ensure they receive the right nutrients.

Next, select the appropriate fertilizer based on these needs and the composition of your soil.

Then, determine the required amount of fertilizer before applying it during the active growing season. Timing is crucial, so choose early spring or late fall for optimal results.

Use proper application techniques based on the type of fertilizer and the size of your trees.

Step 1: Understand the Nutritional Needs

First, understand the nutritional needs of your trees to effectively apply fertilizer for fast growth. It’s important to know the signs and timing of fertilizer application.

Active signs that indicate your tree needs fertilizing include slow growth, pale or yellow leaves, and reduced fruit production. To make trees grow fast, apply fertilizer during the active growing season, preferably in early spring and late fall.

It’s crucial to avoid extreme weather conditions and ensure adequate soil moisture for optimal nutrient uptake. When selecting fertilizer, consider the tree’s specific nutrient requirements and soil composition. Proper timing and application techniques are essential, based on the fertilizer type and tree size.

After fertilizing, water the tree deeply and apply a layer of mulch around the base to promote healthy growth.

Step 2: Select the Right Fertilizer

You need to select the right fertilizer to make your trees grow fast. When choosing a fertilizer, consider the nutrient composition and the specific needs of your trees. Look for a balanced blend of nitrogen, phosphorus, and potassium, as these are essential for healthy growth.

Opt for slow-release or controlled-release fertilizers that provide a steady supply of nutrients over time. Micronutrients are also important for tree health, so choose a fertilizer that includes these essential elements.

You can choose between organic and synthetic fertilizers based on your preferences and needs. If you’re unsure about which fertilizer to choose, it’s always a good idea to consult with a professional who can provide guidance and recommendations based on your specific situation.

Step 3: Determine the Required Amount of Fertilizer Before Applying

Before applying fertilizer to make your trees grow fast, it’s important to determine the required amount of fertilizer. This step ensures that you’re providing your trees with the right amount of nutrients they need for optimal growth.

To determine the required amount of fertilizer, you should consider the tree’s size, age, and nutritional needs. Start by measuring the circumference of the tree trunk at chest height, and then refer to a fertilizer guide or consult with a professional to determine the appropriate fertilizer application rate. The recommended fertilizer rate will depend on the specific tree species and its nutrient requirements.

It’s crucial to follow the recommended application rate to avoid over-fertilization, which can harm the tree and the surrounding environment. Taking the time to determine the required amount of fertilizer will help ensure healthy and fast growth for your trees.

Step 4: Timing is Key

To ensure optimal growth and fast results, timing plays a crucial role in applying fertilizer to make trees grow fast. Proper timing ensures that trees receive the nutrients they need when they’re most active in their growth cycle. Here are four key factors to consider when timing your fertilizer application:

  • Apply fertilizer during the active growing season: Fertilizer is most effective when trees are actively growing, as this is when they’ve the highest nutrient demand.
  • Early spring and late fall are ideal times to apply fertilizer: These seasons provide the best conditions for nutrient uptake and absorption.
  • Avoid extreme weather conditions: Applying fertilizer during periods of extreme heat or cold can stress the tree and hinder nutrient absorption.
  • Ensure adequate soil moisture for optimal nutrient uptake: Moist soil helps nutrients dissolve and move towards tree roots, maximizing their absorption.

Step 5: Application Techniques

Proper application techniques are essential for maximizing tree growth and ensuring fast results when applying fertilizer.

When it comes to applying fertilizer to make trees grow fast, there are a few key techniques to keep in mind.

Firstly, it’s important to evenly spread the fertilizer around the tree, avoiding direct application to the trunk. This ensures that the nutrients are distributed evenly to the entire root zone.

Secondly, the application technique will vary depending on the type of fertilizer being used. For granular fertilizers, it’s recommended to broadcast the fertilizer evenly over the soil surface, while liquid fertilizers should be applied directly to the soil around the tree.

Lastly, it’s crucial to water the tree deeply after fertilizer application to promote nutrient uptake.

Step 6: Apply Fertilizer

During the process of applying fertilizer to make trees grow fast, you should ensure that you’re following proper guidelines. Here are some important steps to keep in mind:

  • Understand the nutritional needs of the tree: Different trees have different nutrient requirements, so it’s crucial to know what your tree needs.
  • Select the right fertilizer: Choose a fertilizer that meets the nutrient requirements of your tree and matches the composition of your soil.
  • Determine the required amount of fertilizer: It’s important not to over or under-fertilize, so calculate the appropriate amount needed for your tree.
  • Timing is key: Apply fertilizer during the active growing season, preferably in early spring or late fall. Avoid extreme weather conditions and ensure adequate soil moisture for optimal nutrient uptake.

What to Do After Applying Fertilizer to The Tree

After applying fertilizer to your tree, it’s crucial to provide adequate watering to ensure optimal nutrient uptake. Deeply water the tree to help the fertilizer penetrate the root zone and promote healthy growth.

Apply a layer of mulch around the base of the tree to conserve moisture and prevent weed growth.

Monitor and adjust the tree’s health and growth, providing proper care such as sunlight, pruning, and regular watering.

Follow-up fertilization may be necessary, depending on the type of fertilizer used and the specific needs of the tree.

Watering

To ensure optimal nutrient uptake, water the tree deeply after applying fertilizer. Watering helps to dissolve the fertilizer and move it through the soil, making it available to the tree’s roots.

Here are four important things to keep in mind when watering your tree after fertilizer application:

  • Water deeply: Give the tree a thorough soaking to ensure that the water reaches the root zone. This will encourage the roots to grow deeper and access the nutrients from the fertilizer.
  • Water slowly: Avoid rapid, heavy watering that may cause runoff. Instead, water slowly to allow the soil to absorb the moisture and prevent wastage.
  • Water evenly: Make sure to water the entire root zone of the tree evenly. This will help distribute the fertilizer and prevent concentration in one area.
  • Water consistently: Regular and consistent watering is important to maintain the moisture level in the soil and ensure continuous nutrient uptake by the tree.

Mulching

After applying fertilizer to your tree, it’s important to mulch around the base of the tree to promote healthy growth and retain moisture in the soil. Mulching provides several benefits for the tree and the surrounding environment.

Firstly, it helps conserve soil moisture by reducing evaporation, which is especially crucial during hot and dry periods. Mulch acts as an insulator, protecting the tree’s roots from extreme temperatures. It also suppresses weed growth, preventing competition for nutrients and water.

When mulching, make sure to spread a layer of organic material, such as wood chips or bark, around the tree, extending it to the drip line. Avoid piling mulch against the trunk, as this can lead to moisture retention and potential decay. Maintain a thickness of around 2-4 inches, regularly checking and replenishing the mulch as needed.

Monitor and Adjust

Once you have applied fertilizer to your tree, it’s important to monitor its health and growth and make any necessary adjustments. Here are some steps you can take to effectively monitor and adjust the fertilizer application:

  • Regularly inspect the tree for any signs of nutrient deficiencies or excesses, such as yellowing leaves or stunted growth.
  • Measure the tree’s growth by monitoring its height and diameter over time.

Keep track of the fertilizer dosage and application frequency to ensure that you’re providing the right amount of nutrients.

  • Conduct soil tests periodically to assess the nutrient levels and pH balance of the soil, and adjust the fertilizer application accordingly.

Maintain Proper Care

After applying fertilizer to the tree, continue to provide proper care to ensure its health and growth. Proper care includes providing adequate sunlight, pruning as needed, and regular watering.

Sunlight is essential for photosynthesis, which is crucial for the tree’s growth and development.

Pruning helps maintain the tree’s shape, promotes airflow, and removes dead or diseased branches.

Regular watering is important to keep the soil moist and ensure the tree can efficiently absorb the nutrients from the fertilizer.

It’s important to monitor the tree’s health and growth after fertilizer application. If necessary, follow up with additional fertilization to provide the tree with the necessary nutrients for continued growth.

Follow-up Fertilization

To ensure the continued health and growth of your tree, it’s important to follow up with additional fertilization after applying the initial dose. Here are four steps to take for successful follow-up fertilization:

  • Monitor tree health: Keep an eye on the overall health and growth of your tree after applying fertilizer. Look for any signs of nutrient deficiencies or stress.
  • Adjust fertilizer application: Depending on the tree’s response and nutrient requirements, you may need to adjust the amount and timing of subsequent fertilizer applications.
  • Provide proper care: In addition to fertilization, continue to provide your tree with proper care, including adequate sunlight, pruning, and regular watering.
  • Consult with a professional: If you’re unsure about the next steps or if your tree requires specialized care, it’s always a good idea to consult with an arborist or horticulturist for expert guidance.

How Can I Make My Tree Grow Faster

If you want to make your tree grow faster, follow these six steps for success.

Firstly, ensure that you understand the nutritional needs of your tree. Different tree species have varying requirements, so it’s important to research and understand what nutrients your tree needs for optimal growth.

Secondly, select the right fertilizer based on these nutrient requirements and the composition of your soil. Look for a balanced blend of nitrogen, phosphorus, and potassium, as these are essential for healthy tree growth. Consider using slow-release or controlled-release fertilizers, as they provide a steady supply of nutrients over time.

The third step is to determine the required amount of fertilizer before applying. Too much fertilizer can harm the tree, while too little may not provide the necessary nutrients. Carefully follow the instructions on the fertilizer package and consult with a professional if needed.

The fourth step is timing. Apply the fertilizer during the active growing season, preferably in early spring or late fall. Avoid extreme weather conditions, as they can affect nutrient absorption.

The fifth step is to use appropriate application techniques based on the type of fertilizer and the size of your tree. Apply the fertilizer evenly around the tree, avoiding direct contact with the trunk.

Finally, water the tree deeply after applying the fertilizer and apply a layer of mulch around the base to retain moisture and protect the roots.

Can You Fertilize Trees to Make Them Grow Faster

Fertilizing trees can indeed accelerate their growth, providing them with the necessary nutrients for optimal development. By fertilizing your trees, you can promote faster growth and ensure their overall health and vitality. Here are four important points to consider when fertilizing trees:

  • Understand the nutritional needs of the tree: Different trees have different nutrient requirements. It’s essential to understand the specific needs of your tree before selecting the right fertilizer.
  • Select the right fertilizer based on nutrient requirements and soil composition: Choose a fertilizer that contains the appropriate balance of nitrogen, phosphorus, and potassium for your tree’s specific needs. Consider the soil composition and pH balance to ensure the fertilizer will be effective.
  • Determine the required amount of fertilizer before applying: It’s crucial to apply the correct amount of fertilizer to avoid over or under-fertilization. Consult a professional or refer to the fertilizer package instructions for guidance.
  • Timing is key for fertilizer application: Apply fertilizer during the active growing season, typically in early spring or late fall. Avoid extreme weather conditions and ensure adequate soil moisture for optimal nutrient uptake.

Following these guidelines will help you effectively fertilize your trees and promote their fast growth. Remember to monitor and adjust the fertilizer application as needed, and provide proper care such as sunlight, pruning, and regular watering for the best results.

What Fertilizer Should I Use to Accelerate Tree Growth

To accelerate tree growth, it’s important to consider the nutrient composition of the fertilizer you choose. Look for a balanced blend of nitrogen, phosphorus, and potassium, which are essential for healthy tree growth.

Opt for slow-release or controlled-release fertilizers to provide a steady supply of nutrients over time.

Consider the specific nutrient requirements of your tree species and soil composition when selecting between organic and synthetic fertilizers.

Consulting with a professional can help you make the best choice for accelerating tree growth.

Nutrient Composition

To accelerate tree growth, you should choose a fertilizer with the proper nutrient composition. The nutrient composition of a fertilizer plays a crucial role in providing the necessary elements for healthy tree growth.

Here are four key factors to consider when selecting a fertilizer:

  • Nitrogen (N): This nutrient promotes foliage growth and helps trees produce lush, green leaves.
  • Phosphorus (P): Phosphorus is essential for root development and overall plant vigor.
  • Potassium (K): Potassium enhances disease resistance, water uptake, and overall plant health.
  • Micronutrients: Micronutrients such as iron, manganese, and zinc are required in smaller quantities but are equally important for optimal tree growth and development.

Slow-Release Formulation

Choose a slow-release fertilizer to accelerate tree growth and provide long-lasting nourishment. Slow-release fertilizers are designed to release nutrients gradually over an extended period, ensuring a steady supply of essential elements for your trees. These formulations typically consist of granules or pellets coated with a special membrane that controls the release of nutrients.

Slow-release fertilizers offer several advantages for tree growth. First, they reduce the risk of nutrient leaching, as the nutrients are released slowly and are less likely to be washed away by rain or irrigation.

Slow-release fertilizers promote sustained growth by delivering nutrients over an extended period, providing continuous nourishment to the trees. This ensures that the trees receive a balanced supply of essential nutrients, leading to healthier and more vigorous growth.

When selecting a slow-release fertilizer, look for products with a balanced blend of nutrients, including nitrogen, phosphorus, and potassium, as well as micronutrients.

Micronutrients

When selecting a fertilizer to accelerate tree growth, it’s important to consider the micronutrients that the trees need for optimal health and development. Micronutrients are essential elements required by trees in smaller quantities but are crucial for their overall growth and development.

Here are four micronutrients that you should look for in a fertilizer:

  • Iron (Fe): Iron is important for the formation of chlorophyll and plays a key role in photosynthesis.
  • Zinc (Zn): Zinc is necessary for enzyme activity and helps with the synthesis of growth hormones in trees.
  • Manganese (Mn): Manganese aids in the production of chlorophyll and assists in energy transfer within the tree.
  • Copper (Cu): Copper is involved in several enzymatic processes and aids in the formation of lignin, which provides structural support to trees.

Organic vs. Synthetic Fertilizers

For optimal tree growth, it’s important to consider the differences between organic and synthetic fertilizers.

Organic fertilizers are derived from natural sources such as compost, manure, and plant materials. They release nutrients slowly over time, providing a steady supply of nourishment to the trees. Organic fertilizers also improve soil structure and enhance soil fertility in the long term.

On the other hand, synthetic fertilizers are made from chemical compounds and provide a quick release of nutrients to the trees. They’re easily absorbed by the roots but can leach into groundwater if overused. Synthetic fertilizers are typically more concentrated and can be tailored to meet specific nutrient requirements. However, they don’t improve soil quality like organic fertilizers do.

Ultimately, the choice between organic and synthetic fertilizers depends on personal preference, environmental considerations, and specific tree needs.

Tree Species and Soil Requirements

To determine the appropriate fertilizer for accelerating tree growth, consider the specific nutrient requirements and soil composition of your tree species.

Different tree species have different nutrient needs, so it’s important to choose a fertilizer that provides the necessary nutrients in the correct proportions.

The soil composition plays a crucial role in determining the availability of nutrients to the tree roots. Some trees thrive in acidic soils, while others prefer alkaline or neutral soils.

It’s also important to consider the pH balance of the soil, as certain nutrients may become unavailable to the tree if the pH is too high or too low.

Conducting a soil test can help identify any nutrient deficiencies or imbalances, allowing you to choose the most suitable fertilizer for your tree’s needs.

Consider Professional Advice

To accelerate tree growth, it’s advisable to seek professional advice on the most suitable fertilizer to use. Professionals, such as arborists or horticulturists, have the expertise to assess your specific tree’s needs and recommend the fertilizer that will best promote its growth.

They’ll consider factors such as the tree species, soil composition, and nutrient requirements to determine the most effective fertilizer for your trees. They can provide guidance on choosing between organic and synthetic fertilizers based on your specific needs and preferences.

Professional advice is crucial as it ensures that you select the right fertilizer with the appropriate nutrient composition, including a balanced blend of nitrogen, phosphorus, and potassium. By consulting with experts, you can make informed decisions and maximize the growth potential of your trees.

Best Fertilizer for Tree Root Growth

When it comes to promoting tree root growth, there are several fertilizers that have proven effective.

Some popular options include Espoma Tree-tone, Miracle-Gro Shake ‘n Feed Tree & Shrub Food, Jobe’s Organics Granular Fertilizer, and Osmocote Plus Outdoor & Indoor Smart Release Plant Food.

These fertilizers are specifically formulated to provide the necessary nutrients for healthy root development, ensuring your trees grow fast and strong.

Consider the nutrient composition, release mechanism, and your specific needs when choosing the best fertilizer for tree root growth.

1) Espoma Tree-tone

For optimal tree root growth, apply Espoma Tree-tone during the active growing season. Espoma Tree-tone is a specially formulated fertilizer that promotes healthy root development and overall tree growth. Here are four reasons why Espoma Tree-tone is the best fertilizer for tree root growth:

  • Slow-release formula: Espoma Tree-tone releases nutrients slowly over time, providing a steady supply of essential nutrients to the tree’s roots. This ensures that the roots receive a consistent source of nourishment for sustained growth.
  • Balanced nutrient composition: Tree-tone contains a balanced blend of nitrogen, phosphorus, and potassium, along with essential micronutrients. This nutrient composition is specifically designed to meet the needs of tree roots, promoting vigorous growth and strong root systems.
  • Organic and natural ingredients: Espoma Tree-tone is made from all-natural and organic ingredients, making it safe for use around children, pets, and wildlife. It enriches the soil with organic matter, improving its structure and fertility, which in turn enhances root growth.
  • Easy to use: Applying Espoma Tree-tone is simple and convenient. Just follow the instructions on the package for the recommended amount to use based on the size and age of your tree. Apply the fertilizer evenly around the drip line of the tree, avoiding direct contact with the trunk.

2) Miracle-Gro Shake ‘n Feed Tree & Shrub Food

Continuing the discussion on the best fertilizer for tree root growth, let’s explore the benefits of using Miracle-Gro Shake ‘n Feed Tree & Shrub Food.

This fertilizer is specifically formulated to promote healthy root development and overall growth in trees and shrubs. With its unique blend of essential nutrients, including nitrogen, phosphorus, and potassium, Miracle-Gro Shake ‘n Feed provides a balanced diet for your trees.

The slow-release formula ensures a steady supply of nutrients over time, allowing for optimal absorption and utilization by the roots. This fertilizer also contains micronutrients that are vital for tree health, such as iron, manganese, and zinc.

3) Jobe’s Organics Granular Fertilizer

To achieve optimal tree root growth, use Jobe’s Organics Granular Fertilizer. It is a highly effective fertilizer that promotes healthy root development and overall tree growth. This organic fertilizer provides the necessary nutrients for trees to thrive and grow at a fast pace.

Here are four reasons why Jobe’s Organics Granular Fertilizer is the best choice for tree root growth:

  • Slow-release formula: Jobe’s Organics Granular Fertilizer releases nutrients slowly over time, ensuring a steady supply of essential elements to the tree’s roots.
  • Balanced nutrient composition: This fertilizer contains a well-balanced blend of nitrogen, phosphorus, and potassium, which are essential for root development and overall tree health.
  • Organic ingredients: Made from natural and organic materials, Jobe’s Organics Granular Fertilizer is safe for the environment and promotes sustainable gardening practices.
  • Easy application: Simply sprinkle the granules around the base of the tree and water thoroughly. The granules will gradually break down, releasing nutrients into the soil and providing long-lasting nourishment for the roots.

4) Osmocote Plus Outdoor & Indoor Smart Release Plant Food

You can achieve optimal tree root growth by using Osmocote Plus Outdoor & Indoor Smart Release Plant Food, the best fertilizer for promoting healthy and vigorous roots.

Osmocote Plus is a smart release plant food that provides a balanced blend of essential nutrients for tree growth. It contains nitrogen, phosphorus, and potassium, which are essential for root development.

This fertilizer is designed to release nutrients slowly over time, ensuring a steady supply of nutrients for your trees. Osmocote Plus also includes micronutrients that are vital for tree health.

It’s suitable for both outdoor and indoor use, making it a versatile option for promoting tree root growth in various environments. By using Osmocote Plus, you can ensure that your trees receive the necessary nutrition they need to thrive and grow quickly.

How Do You Apply Fertilizer to Trees

Applying fertilizer to trees requires careful consideration of their nutrient needs and soil composition. To apply fertilizer properly, you need to follow a few key steps.

First, it’s crucial to understand the nutritional requirements of the tree you’re fertilizing. This will help you select the right fertilizer based on its nutrient composition. You should consider the soil composition and pH balance, as different trees have specific soil requirements. Conducting a soil test can help identify any nutrient deficiencies and guide your fertilizer selection.

Once you have selected the appropriate fertilizer, determine the required amount before application. Timing is crucial, and it’s best to apply fertilizer during the active growing season. Early spring and late fall are ideal times for most trees. However, it’s important to avoid extreme weather conditions that can hinder nutrient uptake.

When applying fertilizer, use the appropriate techniques based on the fertilizer type and tree size. Spread the fertilizer evenly around the tree, avoiding direct application to the trunk. After application, water the tree deeply to ensure proper nutrient absorption. Adding a layer of mulch around the base of the tree can help retain moisture and promote healthy growth.

Monitoring and adjusting fertilizer application as needed is essential for successful tree growth. Regularly assess the tree’s health and growth after fertilization. Provide proper care, including adequate sunlight, pruning, and regular watering. In some cases, follow-up fertilization may be necessary to maintain optimal nutrient levels.

How to Fertilize Large Trees

To fertilize large trees, follow these six steps for success:

Step 1: Understand the nutritional needs of the tree. Different tree species have specific nutrient requirements, so it’s essential to identify them to provide the right fertilizer.

Step 2: Select the right fertilizer based on nutrient requirements and soil composition. Consider the tree’s needs and the soil’s nutrient deficiencies or imbalances.

Step 3: Determine the required amount of fertilizer before applying. Calculating the appropriate dosage ensures optimal nutrient uptake without over- or under-fertilizing.

Step 4: Timing is key for fertilizer application. Apply fertilizer during the active growing season, preferably in early spring or late fall, when the tree can absorb nutrients efficiently.

When fertilizing large trees, it’s crucial to consider their size and specific needs. These steps will help you provide the right nutrients at the right time, promoting healthy growth and vitality.

Remember to water the tree deeply after fertilization and apply a layer of mulch around the base to retain moisture and prevent weed growth.

Conclusion

Understanding how and when to apply fertilizer is crucial for promoting fast and healthy tree growth. Recognizing the signs that your tree needs fertilizing and applying fertilizer during the active growing season, you can ensure optimal nutrient uptake.

Selecting the right fertilizer based on your tree’s needs and soil composition, determining the proper amount, and using the correct application techniques are all essential for success.

Following these steps, you can provide your trees with the necessary nutrition to thrive and witness impressive growth.

6 Best Homemade Fertilizer for Apple Trees: Nourishing Your Orchard Naturally

Looking to give your apple trees a natural and cost-effective boost? You’ve come to the right place! In this article, we’ll dive into the benefits of homemade fertilizer for apple trees and share some easy-to-make recipes.

Creating your own fertilizer, you can tailor the nutrients to meet your specific plant needs. Not only is it budget-friendly, but it also promotes sustainability by using organic ingredients.

Plus, homemade fertilizers enhance soil health and reduce chemical exposure.

Get ready to nourish your apple trees naturally!

Benefits of Homemade Fertilizer for Apple Trees

When it comes to homemade fertilizer for your apple trees, there are several benefits to consider.

First, you have the advantage of customization, allowing you to tailor the nutrient composition to meet the specific needs of your trees.

Secondly, homemade fertilizer is cost-effective, offering a more affordable option in the long run.

Using homemade fertilizer promotes sustainability by utilizing organic and natural ingredients, while also improving soil health and reducing chemical exposure.

Customization

Customization is a key benefit of homemade fertilizer for apple trees, allowing you to tailor the nutrient composition to meet the specific needs of your plants. This level of customization ensures that your apple trees receive the exact nutrients they require for optimal growth and fruit production.

By understanding the nutrient deficiencies or imbalances in your soil, you can adjust the homemade fertilizer recipe to provide the necessary elements. For example, if your soil lacks potassium, you can create a banana peel fertilizer, which is rich in potassium. If your soil needs calcium and magnesium, you can opt for an Epsom salt and eggshell fertilizer.

Customizing your homemade fertilizer ensures that your apple trees receive the right nutrients at the right time, leading to healthier, more productive trees.

Cost-Effectiveness

To further emphasize the benefits of homemade fertilizer for apple trees, you can now explore the cost-effectiveness aspect.

Homemade fertilizers can be a more affordable option in the long run compared to commercial fertilizers. By using readily available ingredients such as fish emulsion, seaweed extract, molasses, banana peels, Epsom salt, eggshells, and compost, you can create your own fertilizer without breaking the bank. These ingredients are often found in your kitchen or garden, making them easily accessible and cost-effective.

Homemade fertilizers promote sustainability by utilizing organic and natural ingredients, reducing the need for synthetic chemicals. By nourishing your apple trees naturally, you not only save money but also contribute to a healthier and more eco-friendly orchard.

Sustainability

One of the key benefits of homemade fertilizer for apple trees is its sustainability, allowing you to nourish your orchard naturally. By utilizing organic and natural ingredients, you can reduce your reliance on synthetic chemicals and promote a more sustainable gardening approach.

Here are three reasons why homemade fertilizer is a sustainable choice for your apple trees:

  1. Environmental Impact: Homemade fertilizers are made from organic materials such as compost, banana peels, and fish emulsion. These ingredients are biodegradable and don’t contribute to water pollution or harm beneficial microorganisms in the soil.
  2. Reduced Waste: Homemade fertilizers often utilize common kitchen waste products like banana peels and coffee grounds. By repurposing these items, you can reduce the amount of organic waste going to landfills and contribute to a more circular economy.
  3. Long-Term Soil Health: Homemade fertilizers improve soil structure and fertility over time. They add organic matter, essential nutrients, and promote the growth of beneficial microorganisms. This leads to healthier soil and stronger apple trees that are more resistant to pests and diseases.

Soil Health

Improve the fertility and structure of your soil with homemade fertilizer for apple trees.

Homemade fertilizers offer a range of benefits for soil health, ensuring optimal conditions for your orchard to thrive. By using natural and organic ingredients, you can enhance the nutrient composition of your soil while minimizing chemical exposure.

Homemade fertilizers also allow for customization, tailoring the nutrient content to meet the specific needs of your apple trees. These fertilizers are cost-effective, saving you money in the long run compared to commercial alternatives. They promote sustainability by utilizing common kitchen waste products and organic matter.

Reduced Chemical Exposure

By using homemade fertilizers for your apple trees, you can significantly reduce your exposure to synthetic chemicals. This is beneficial for both your health and the environment.

Here are three key advantages of using homemade fertilizers:

  1. Customization: Homemade fertilizers allow you to tailor the nutrient composition to meet the specific needs of your apple trees. You can adjust the levels of nitrogen, phosphorus, and potassium based on soil test results and the growth stage of your trees.
  2. Sustainability: Homemade fertilizers utilize organic and natural ingredients, reducing the reliance on synthetic chemicals. This promotes a more sustainable gardening approach and helps protect the ecosystem.
  3. Cost-Effectiveness: Making your own fertilizer can be more affordable in the long run compared to purchasing commercial products. Many homemade fertilizers can be made using readily available ingredients found in your kitchen or garden, saving you money while nourishing your apple trees naturally.

Low Environmental Impact

To further reduce your impact on the environment, continue nourishing your apple trees naturally with homemade fertilizers that have low environmental impact.

Homemade fertilizers offer a sustainable and eco-friendly alternative to synthetic chemical fertilizers. By utilizing organic and natural ingredients, you can provide your apple trees with the nutrients they need while minimizing harm to the environment.

Basic all-purpose liquid fertilizer, made with fish emulsion, seaweed extract, and molasses, is a great option that provides essential nutrients and promotes healthy growth.

Banana peel fertilizer, which utilizes potassium-rich banana peels, is another low environmental impact choice that can be easily made with minimal ingredients.

Epsom salt and eggshell fertilizer, made with common household items, enhances soil fertility and improves nutrient availability for your apple trees.

Compost tea fertilizer, derived from nutrient-rich liquid from compost, improves soil structure and fertility while enhancing beneficial microorganism activity.

Educational Value

You can gain valuable knowledge about the benefits of homemade fertilizer for your apple trees. Here are three reasons why homemade fertilizer is a great choice for your orchard:

  1. Customization: Homemade fertilizer allows you to tailor the nutrient composition to the specific needs of your apple trees. You can adjust the levels of nitrogen, phosphorus, and potassium based on soil tests and the growth stage of your trees.
  2. Cost-Effectiveness: Making your own fertilizer can be more affordable in the long run compared to commercial products. By using readily available ingredients, such as fish emulsion, seaweed extract, and molasses, you can save money while providing essential nutrients to your orchard.
  3. Sustainability: Homemade fertilizer utilizes organic and natural ingredients, reducing the need for synthetic chemicals. This not only benefits the environment but also promotes a more sustainable gardening approach in your orchard.

Connection to Nature

Using homemade fertilizer for your apple trees fosters a stronger connection to nature, benefiting both your orchard and the environment.

By creating your own fertilizer, you’re able to customize the nutrient composition to meet the specific needs of your trees. This not only ensures that they’re receiving the essential nutrients for healthy growth and fruit production but also promotes a more sustainable gardening approach.

Homemade fertilizers, made from organic and natural ingredients, reduce the need for synthetic chemicals, minimizing chemical exposure in your orchard. These fertilizers help improve soil health by enhancing soil structure and fertility.

Flexibility and Experimentation

When it comes to homemade fertilizer for apple trees, flexibility and experimentation are key to finding the perfect nutrient blend for your orchard. Trying different recipes and ingredients can help you tailor the fertilizer to meet the specific needs of your apple trees.

Here are three benefits of being flexible and experimenting with homemade fertilizer:

  1. Customization: Homemade fertilizers allow you to customize the nutrient composition based on the specific requirements of your apple trees. You can adjust the levels of nitrogen, phosphorus, and potassium to promote healthy growth and fruit production.
  2. Cost-Effectiveness: Making your own fertilizer using organic and natural ingredients can be more affordable in the long run compared to buying commercial products. You can save money while still providing the necessary nutrients for your orchard.
  3. Sustainability: Homemade fertilizers often utilize organic materials and kitchen waste, reducing the need for synthetic chemicals and promoting a more sustainable gardening approach. By using homemade fertilizers, you can nourish your apple trees while minimizing your environmental impact.

Sense of Accomplishment

Experimenting with homemade fertilizer for your apple trees can bring a sense of accomplishment as you nourish your orchard naturally. By creating your own fertilizer, you have the opportunity to tailor the nutrient composition to meet the specific needs of your apple trees.

Not only is this a cost-effective approach in the long run, but it also promotes sustainability by utilizing organic and natural ingredients. Homemade fertilizers improve soil health by enhancing soil structure and fertility, while reducing chemical exposure by minimizing the use of synthetic chemicals.

Some popular homemade fertilizer recipes for apple trees include the basic all-purpose liquid fertilizer, banana peel fertilizer, Epsom salt and eggshell fertilizer, compost tea fertilizer, and coffee grounds fertilizer. Each of these options provides various benefits such as providing essential nutrients, promoting healthy growth and fruit production, and improving soil health.

6 Best Homemade Fertilizer for Apple Trees Recipes

Now let’s explore some of the best homemade fertilizer recipes for apple trees.

These include:

  • A basic all-purpose liquid fertilizer made with fish emulsion, seaweed extract, and molasses.
  • A potassium-rich banana peel fertilizer.
  • An Epsom salt and eggshell fertilizer for enhanced soil fertility.
  • A nutrient-rich compost tea fertilizer made from compost and water.
  • An eggshell and coffee ground fertilizer to add nitrogen and organic matter to the soil.

These recipes offer a cost-effective and sustainable way to nourish your apple trees naturally, promoting healthy growth and fruit production.

1. Basic All-Purpose Liquid Fertilizer

To nourish your apple trees naturally, start by creating a basic all-purpose liquid fertilizer. This recipe combines fish emulsion, seaweed extract, and molasses to provide essential nutrients and encourage soil microbial activity. Here’s how you can make it:

  1. Gather your ingredients: You’ll need 1 gallon of water, 1 tablespoon of fish emulsion, 1 tablespoon of seaweed extract, and 1 tablespoon of molasses.
  2. Mix the ingredients: In a large container, combine the water, fish emulsion, seaweed extract, and molasses. Stir the mixture thoroughly until all the ingredients are well incorporated.
  3. Apply the fertilizer: Pour the liquid fertilizer around the base of your apple trees, avoiding direct contact with the leaves or trunk. Use this fertilizer every 4-6 weeks during the growing season to promote healthy growth and fruit production.

2. Banana Peel Fertilizer

To create a nutrient-rich liquid fertilizer for your apple trees, gather a few banana peels and follow these simple steps.

First, chop the banana peels into small pieces to increase their surface area.

Then, place the chopped banana peels in a container and cover them with water. Allow the mixture to steep for a few days, stirring occasionally.

After the steeping period, strain out the banana peel pieces to obtain the liquid.

Next, dilute the banana peel liquid with water, aiming for a ratio of approximately 1 part banana peel liquid to 5 parts water.

Finally, use this diluted mixture to water the soil around your apple trees.

The potassium in the banana peels promotes flowering and fruit development, making it an effective and sustainable homemade fertilizer option for your orchard.

3. Epsom Salt and Eggshell Fertilizer

To enhance the fertility of your apple tree soil, create a nutrient-rich homemade fertilizer using Epsom salt and crushed eggshells. This combination provides calcium from eggshells and magnesium from Epsom salt, which are essential nutrients for apple trees.

Here’s a simple recipe to make this fertilizer:

  1. Clean and dry the eggshells thoroughly.
  2. Crush the eggshells into small pieces or grind them into a fine powder using a mortar and pestle or a blender.
  3. In a bowl, mix the crushed eggshells with 2 tablespoons of Epsom salt.
  4. Sprinkle the mixture evenly around the base of your apple trees, keeping it a few inches away from the trunk.
  5. Gently work the mixture into the soil using a rake or by lightly tilling the top layer.

4. Nutrient-Rich Compost Tea

Create nutrient-rich compost tea to nourish your apple trees naturally and promote soil health and fertility.

Compost tea is a fantastic way to infuse your trees with a diverse range of nutrients, beneficial microorganisms, and organic matter.

To make compost tea, you’ll need 1 gallon of water, 1 cup of well-aged compost, and 1 tablespoon of molasses as a microbial food source.

Start by filling a bucket or container with water and adding the compost. Stir the mixture thoroughly and let it steep for 24-48 hours, stirring occasionally.

After that, strain the liquid to remove any solid particles and dilute the compost tea with water at a ratio of 1:4 (1 part compost tea to 4 parts water).

Apply the diluted compost tea to the soil around the base of your apple trees every 4-6 weeks during the growing season. This can be done using a watering can or a sprayer.

Compost tea will boost soil health, improve fertility, and promote tree vitality naturally.

5. Eggshell and Coffee Ground Fertilizer

Now let’s dive into the benefits of using eggshell and coffee ground fertilizer for your apple trees.

  1. Nutrient-Rich Soil:
    Eggshells provide calcium, which is essential for strong cell walls and overall plant health. Coffee grounds add nitrogen, promoting leaf growth and vibrant green foliage.
  2. Improved Soil Structure:
    The combination of eggshells and coffee grounds enhances soil fertility by improving its structure. This allows for better water drainage, root development, and nutrient absorption.
  3. Pest Prevention:
    By gently working the mixture into the top layer of soil, you can deter pests from being attracted to the surface. This helps protect your apple trees from potential damage or infestations.

To make this homemade fertilizer, simply dry and crush the eggshells, collect used coffee grounds, and mix them together. Sprinkle the mixture around the drip line of your apple trees and gently work it into the top layer of soil.

Enjoy the benefits of this natural and cost-effective fertilizer for your apple orchard.

6. Seaweed and Epsom Salt Spray

Continuing with the benefits of homemade fertilizers for apple trees, let’s now explore the effectiveness of the Seaweed and Epsom Salt Spray in nourishing your orchard naturally.

This foliar spray provides a boost of nutrients directly to the leaves of the apple trees. To make this spray, you’ll need 1 gallon of water, 1 cup of chopped fresh or dried seaweed (rich in minerals), and 1 tablespoon of Epsom salt.

Start by adding the chopped seaweed to a gallon of water and letting it soak for about 24 hours. Then, strain the liquid to remove the seaweed and add the Epsom salt, mixing well.

Pour the solution into a spray bottle and apply it to the leaves, making sure to cover both sides. Apply the spray in the early morning or late afternoon to avoid sunburn on the wet leaves.

This natural spray provides your apple trees with essential minerals and can be used alongside other homemade fertilizers to promote healthy growth and fruit production.

Best Practices for Using Homemade Fertilizers

To ensure the effectiveness of homemade fertilizers for your apple trees, there are some best practices to keep in mind.

First, it’s essential to conduct a soil test to determine any nutrient deficiencies and adjust your fertilizer recipe accordingly.

Secondly, strive for balanced nutrition by providing the necessary macro and micronutrients in the right proportions.

Timing is crucial when applying homemade fertilizers, so consider the growth stage of your apple trees and apply the fertilizer accordingly.

Lastly, moderation is key – avoid over-fertilizing to prevent nutrient imbalances and potential harm to your trees. Diluting the homemade fertilizer as recommended will help ensure proper application.

Soil Testing

Before applying homemade fertilizers to your apple trees, it’s essential to conduct a soil test. This will help you determine the specific nutrient needs of your trees and ensure that you’re providing them with the right balance of nutrients. Here are some best practices for soil testing:

  1. Choose the right testing method: There are various soil testing methods available, including DIY kits and professional laboratory testing. Consider your budget and the level of accuracy you require.
  2. Collect soil samples properly: Take samples from different areas of your orchard, ensuring that you get a representative sample. Use a clean tool to collect soil from a depth of 6-8 inches, and mix the samples together in a clean container.
  3. Follow the testing instructions: Different testing methods may have specific instructions for sample preparation and submission. Read and follow these instructions carefully to ensure accurate results.

Balanced Nutrition

To achieve balanced nutrition for your apple trees using homemade fertilizers, it’s important to follow best practices and ensure the right combination of nutrients. Balanced nutrition is crucial for the overall health and productivity of your trees.

When creating your homemade fertilizers, consider using a combination of ingredients that provide a range of essential nutrients. For example, a basic all-purpose liquid fertilizer made with fish emulsion, seaweed extract, and molasses provides a good balance of nutrients for your apple trees.

Banana peel fertilizer is rich in potassium, which is essential for flowering and fruit development. Epsom salt and eggshell fertilizer can enhance soil fertility with calcium and magnesium. Compost tea fertilizer is an excellent option for improving soil structure and fertility while promoting beneficial microorganism activity.

Proper Application Timing

First, determine the appropriate timing for applying homemade fertilizers to your apple trees. Proper timing is crucial to ensure maximum effectiveness and avoid any potential harm to your trees. Here are some best practices for applying homemade fertilizers:

  • Early Spring: Apply basic all-purpose liquid fertilizer or compost tea fertilizer just as the buds begin to swell. This will provide essential nutrients for the upcoming growing season.
  • Mid-Spring: Use banana peel fertilizer to promote flowering and fruit development. Apply it when the trees are in full bloom.
  • Early Summer: Apply Epsom salt and eggshell fertilizer around the base of the trees to enhance soil fertility and nutrient availability.

Remember to follow the instructions of the specific homemade fertilizer recipe you’re using, as the timing and frequency of application may vary. Always water your trees after applying the fertilizer to ensure proper absorption.

Moderation

When applying homemade fertilizers to your apple trees, it’s important to use them in moderation. While these fertilizers can provide numerous benefits, over-application can lead to nutrient imbalances or even damage to the trees. To ensure proper usage, follow these best practices:

  1. Read the instructions: Each homemade fertilizer recipe may have specific instructions on the recommended application rates and frequency. Carefully follow these guidelines to avoid over-fertilization.
  2. Start with small amounts: Begin by applying a small quantity of the homemade fertilizer and monitor the response of the trees. If they show signs of improved growth and health, continue with the recommended dosage. If there are no visible changes, you can gradually increase the amount.
  3. Consider soil conditions: Conduct a soil test to determine the nutrient levels and pH of your soil. This will help you identify any deficiencies and tailor the homemade fertilizer accordingly. Adjust the application rate based on the soil’s needs.
  4. Observe the trees: Regularly inspect your apple trees for any signs of nutrient deficiencies or excesses. These signs can include yellowing leaves, stunted growth, or burnt leaf edges. Adjust the fertilizer application accordingly to maintain a balanced nutrient supply.

Dilution

Mix the homemade fertilizer with water to dilute it before applying it to your apple trees. Dilution is important to ensure that the concentration of nutrients is appropriate for your trees’ needs. Here are some best practices for diluting homemade fertilizers:

  1. Follow the recommended dilution ratio: Each homemade fertilizer recipe may have a different recommended dilution ratio. Pay attention to the instructions and mix the fertilizer accordingly. This will help prevent over-fertilization and potential damage to your apple trees.
  2. Use clean water: It’s important to use clean, non-chlorinated water for dilution. Chlorine can have a negative impact on beneficial soil microbes and may interfere with nutrient absorption. If tap water is chlorinated, you can let it sit overnight to allow the chlorine to dissipate before using it for dilution.
  3. Mix thoroughly: Ensure that the fertilizer and water are mixed thoroughly to achieve a uniform solution. This will help distribute the nutrients evenly when you apply it to your apple trees.

Uniform Distribution

To ensure uniform distribution of homemade fertilizers, it’s important to thoroughly mix the diluted solution before applying it to your apple trees. This ensures that all the nutrients are evenly distributed throughout the solution, allowing for consistent feeding of your trees.

Start by adding the required amount of fertilizer to a container, then slowly add water while stirring continuously. Make sure the fertilizer is completely dissolved before using it. You can use a stick or a whisk to mix the solution effectively.

It’s also recommended to strain the mixture to remove any solid particles that could clog the sprayer or drencher. Once mixed, apply the fertilizer evenly around the base of each tree, making sure to cover the entire root zone.

This will help ensure that all your apple trees receive the proper nourishment they need for optimal growth and fruit production.

Avoid Trunk Contact

To ensure optimal growth and minimize potential damage, it’s important to avoid trunk contact when applying homemade fertilizers to your apple trees. Trunk contact can lead to burns or scarring, which can weaken the tree and make it more susceptible to diseases and pests. Here are some best practices to follow:

  1. Maintain a Safe Distance: When applying the fertilizer, make sure to keep a distance of at least 6-12 inches away from the trunk. This will prevent direct contact and reduce the risk of damage.
  2. Create a Ring Barrier: Use a circular barrier, such as a plastic or metal ring, around the base of the tree to create a physical barrier between the fertilizer and the trunk. This will help ensure that the fertilizer is distributed evenly around the tree without coming into contact with the trunk.
  3. Apply Fertilizer to the Drip Line: The drip line is the area directly below the outermost branches of the tree. This is where the majority of the tree’s feeder roots are located, and applying the fertilizer here will allow it to be absorbed by the roots and distributed throughout the tree.

Watering

To effectively water your apple trees while using homemade fertilizers, you’ll need to follow some best practices.

Watering is crucial for the overall health and growth of your trees, as it helps nutrients from the homemade fertilizers reach the root zone.

When applying water, make sure to do it slowly and deeply. This allows the water to penetrate the soil and reach the roots effectively. Avoid shallow watering, as it encourages shallow root growth and makes the trees more susceptible to drought stress.

It’s also important to water your trees in the early morning or late afternoon to minimize evaporation. Be mindful of the weather conditions and adjust your watering schedule accordingly.

Observation

Keep a close eye on your apple trees to ensure that the homemade fertilizers are being effectively utilized. Observing the trees will help you determine if the fertilizers are providing the necessary nutrients and promoting healthy growth.

Here are some best practices for using homemade fertilizers:

  1. Check for signs of nutrient deficiencies: Look for yellowing leaves, stunted growth, or poor fruit production. This could indicate a lack of specific nutrients in the soil.
  2. Monitor plant response: Observe how your apple trees are responding to the fertilizers. Are they showing signs of improved growth and vigor? Are they producing more flowers and fruits?
  3. Adjust the fertilizer application: If you notice any negative effects, such as leaf burn or excessive growth, it may be necessary to adjust the amount or frequency of fertilizer application. Remember that moderation is key when using homemade fertilizers.

Rotation

Continue to monitor your apple trees closely as you rotate the use of homemade fertilizers, ensuring optimal nutrient uptake and promoting long-term soil health.

Rotation is an important practice when it comes to using homemade fertilizers for apple trees. By alternating between different types of fertilizers, you can provide a well-rounded nutrient profile for your trees and prevent nutrient imbalances.

One way to rotate your fertilizers is by using different recipes throughout the growing season. Start with a basic all-purpose liquid fertilizer, which provides essential nutrients and encourages soil microbial activity. After a few weeks, switch to a banana peel fertilizer, rich in potassium for flowering and fruit development. Then, try an epsom salt and eggshell fertilizer to enhance soil fertility with calcium and magnesium. Finally, use a compost tea fertilizer to improve soil structure and fertility through beneficial microorganism activity.

Composting

As you transition into the topic of composting, it’s important to understand the best practices for utilizing homemade fertilizers in order to nourish your apple trees naturally. Here are some key tips to keep in mind:

  1. Use compost as a base: Compost is a fantastic homemade fertilizer that provides a wide range of nutrients to your apple trees. It improves soil structure, enhances nutrient availability, and promotes beneficial microorganism activity.
  2. Balance your ingredients: When creating your homemade fertilizer, make sure to include a mix of organic materials such as kitchen scraps, yard waste, and plant trimmings. This ensures a balanced nutrient composition and avoids excessive amounts of certain nutrients.
  3. Apply fertilizers properly: It’s important to apply homemade fertilizers in the right amounts and at the right time. Follow the recommended application rates and schedule for each type of fertilizer you’re using. This will prevent overfertilization, which can harm your apple trees.

Safety and Hygiene

Ensure the safety and hygiene of your homemade fertilizer application by following these best practices.

First, always wear gloves and protective clothing when handling and applying homemade fertilizers to avoid direct contact with the skin. This will help to prevent any potential irritation or allergic reactions.

It’s important to wash your hands thoroughly after handling fertilizers to avoid any accidental ingestion or contamination.

When preparing homemade fertilizers, make sure to do so in a well-ventilated area to prevent inhaling any potentially harmful fumes.

Store your homemade fertilizers in properly labeled containers and keep them out of reach of children and pets.

Finally, apply fertilizers according to the recommended dosage and frequency to prevent over-fertilization, which can harm the apple trees and the surrounding environment.

Labeling

Properly labeling your homemade fertilizers is essential to ensure their safe and effective use on your apple trees. Here are some best practices to follow:

  1. Clearly identify the contents:
    Write down the specific ingredients used in the fertilizer mixture. Include the names of organic materials, such as fish emulsion or compost, as well as any other additives or amendments.
  2. Note the nutrient composition:
    Indicate the nutrient content of the fertilizer, including the levels of nitrogen, phosphorus, and potassium. This information will help you determine the appropriate application rates for your apple trees.
  3. Provide usage instructions:
    Include detailed instructions on how to apply the fertilizer, including the recommended application rate, frequency, and method. This will ensure that you use the fertilizer correctly and achieve the desired results.

Research

To maximize the effectiveness of your homemade fertilizers, it’s crucial to conduct thorough research on the best practices for their use on your apple trees. Proper research will help you understand the specific nutrient requirements of apple trees at different stages of growth, allowing you to tailor your homemade fertilizers accordingly.

Start by studying the benefits and recipes of different homemade fertilizers, such as the basic all-purpose liquid fertilizer, banana peel fertilizer, Epsom salt and eggshell fertilizer, compost tea fertilizer, and coffee grounds fertilizer. Learn about the nutrients they provide, the recommended application methods, and the frequency of use.

Explore the advantages of each fertilizer, such as promoting healthy growth, improving soil fertility, and reducing chemical exposure. By conducting thorough research, you can ensure that your homemade fertilizers nourish your apple trees effectively and naturally.

Experimentation

Start by experimenting with small quantities of homemade fertilizers to gauge their effectiveness on your apple trees. This allows you to observe how your trees respond to different fertilizers before committing to larger applications.

Here are some best practices for using homemade fertilizers:

  • Conduct a control group: Leave a portion of your orchard untreated to compare the results with the fertilized trees. This helps you determine the impact of the homemade fertilizer.
  • Follow recommended application rates: Over-fertilizing can harm your apple trees. Stick to the recommended dosage provided by the fertilizer recipe or manufacturer.
  • Monitor plant health: Keep an eye on the overall health and growth of your apple trees. If you notice any negative effects, adjust the fertilizer application accordingly.

Conclusion

Homemade fertilizers offer a natural and cost-effective way to nourish your apple trees. By customizing the nutrient composition and utilizing organic ingredients, you can promote sustainability and improve soil health.

The recipes mentioned in this article, such as the all-purpose liquid fertilizer, banana peel fertilizer, Epsom salt and eggshell fertilizer, compost tea fertilizer, and coffee grounds fertilizer, are easy to make and provide unique benefits.

So start making your own fertilizer and watch your apple trees thrive naturally!

4 Best Fruit Trees for Northern England

Are you a gardening enthusiast in Northern England? Unsure which fruit trees will thrive in your region? Look no further!

This article will guide you through the best options for your climate and soil conditions. From apples and pears to cherries and plums, we’ll explore the top choices for your garden.

We’ll also provide tips on taste preferences and climate suitability. Whether you’re a seasoned gardener or just starting out, this article will help you create a fruitful garden that delights your taste buds and enhances your landscape.

Here Are Some of The Best Fruit Trees for Northern England

If you’re gardening in Northern England, the best fruit trees for you to consider are apples, pears, cherries, and plums. These trees are well-suited to the climate and soil conditions in the region, making them a reliable choice for fruit growers.

Apples are one of the most popular and widely-grown fruits in England, and there are countless varieties to choose from. Whether you prefer a tart flavor or a sweeter taste, you can find an apple tree that suits your preferences.

Pears are another great option, with their versatility in both sweet and savory dishes. Like apples, there are numerous pear varieties available, ensuring that you can find one that thrives in your area.

Cherries are a beloved summer fruit and can be grown successfully in Northern England. With their vibrant colors and sweet flavor, they’re a delight to have in your garden.

Plums, on the other hand, are a delicious summer fruit that can also thrive in Northern gardens. With their juicy flesh and variety of flavors, plums are a fantastic addition to any fruit tree collection.

When selecting fruit trees for your garden in Northern England, consider the specific climate and soil conditions in your area. This will help ensure that your trees have the best chance of thriving and producing an abundant harvest.

What Fruit Grows Well in England

What fruit thrives in England?

  • Apples: Apples are the most popular fruit in England and are grown in almost every county. With over two million tonnes produced annually, they’re a staple in English orchards.
  • Pears: Grown extensively in Devon and Somerset, pears are a versatile fruit used in both sweet and savory dishes. Over 500 thousand tonnes of pears are produced in England each year.
  • Plums: Plums thrive in England, particularly in the counties of Essex and Suffolk. With their delicious flavor, they’re a favorite summer fruit. More than 300 thousand tonnes of plums are harvested annually from English farms.
  • Cherries: Cherries have long been associated with English summers and are grown in Kentish orchards. With many different types available, they continue to be a beloved fruit in England.

These fruits grow well in England due to the country’s favorable climate and soil conditions. The temperate climate provides the ideal conditions for fruit trees to thrive, and the fertile soil adds to their success. The popularity of these fruits among English consumers is a testament to their quality and taste.

Whether you’re a gardener looking to grow your own fruit or simply an enthusiast who appreciates the flavors of English-grown produce, these fruits are sure to delight. From the crisp sweetness of apples to the juicy goodness of cherries, there’s something for everyone to enjoy.

Best Apple Trees for Northern England

When considering the best apple trees for Northern England, you should take into account factors such as climate, soil type, and desired purpose.

Northern England has a temperate climate, with average temperatures ranging from 10-12°C in winter to 18-20°C in summer. This makes it suitable for growing a wide variety of apple trees, including both traditional English varieties and more unusual types from other parts of the world.

The soil in Northern England is a mix of clay, loam, and sand, so it’s important to choose an apple tree that will thrive in your specific soil type. If you have heavy clay soil, rootstocks like M25 or MM106 would be ideal.

Consider what you want from your apple tree. Do you want it for eating fresh, making cider, or cooking? There are different types of apples suited to each purpose, so make sure to choose one that aligns with your needs.

One highly recommended apple tree for Northern England is the Coxs Orange Pippin, a classic English variety with a lovely orange-red skin and tart flavor.

Best Fruit Trees for North West England

Now let’s delve into the best fruit trees for North West England, building upon the previous discussion of apple trees for Northern England.

When choosing fruit trees for this region, it’s important to consider their hardiness in both warm and cold weather. Factors such as sunlight requirements and tree size should be taken into account.

Here are the top fruit trees that thrive in North West England:

  • Apple: Cox’s Orange Pippin, Bramley’s Seedling, and Discovery are excellent varieties that are known for their disease resistance and tolerance to cold weather.
  • Pear: Conference, Williams Bon Chretien, and Beurre Hardy are hardy pear varieties that produce large fruits. Whether you prefer eating fresh pears or using them in cooking, these varieties are perfect for both.
  • Plum: Victoria, Marjorie’s Seedling, and Stanley Prune are recommended plum varieties. They offer excellent flavor and are ideal for making jams or pies.
  • Cherry: Morello, Early Rivers, and Stella are suitable cherry varieties for North West England. These cherries are self-fertile, so you don’t need another cherry tree nearby for pollination. They also produce large and sweet fruits that are perfect for eating fresh or using in baking.

Best Time to Plant Fruit Trees UK

To ensure successful growth and establishment of fruit trees in the UK, it’s crucial to carefully consider the best time for planting. Late autumn or early winter is the ideal time to plant fruit trees in the UK. During this period, the soil is still warm from the summer sun, providing a favorable environment for root development.

The temperatures are cool enough to prevent stress on the trees during the transplanting process. Planting during this time allows the roots to establish themselves before the leaves begin to grow in the spring.

By planting fruit trees in late autumn or early winter, you give them a head start in terms of root development. This allows the trees to absorb nutrients and water from the soil, promoting healthy growth and establishment. It’s important to note that different fruit tree varieties may have specific planting requirements, so it’s advisable to consult a gardening expert or refer to specific planting guidelines for each type of tree.

Best Fruit Trees for Gardens UK

For your garden in the UK, consider the best fruit trees to plant. Here are some options to help you decide:

  • Apple Trees: There are many different varieties of apple trees that will do well in the UK climate. They range in size from dwarf varieties to standard ones, and have varying soil requirements. Some apple trees thrive in heavy soils, while others prefer lighter soils.
  • Pear Trees: Like apples, there are several pear tree varieties that will thrive in the UK climate and soil types. Pears generally require less pruning than apples and tend to be sweeter. While they may not produce as much fruit as apples, their smaller size makes them perfect for snacking.
  • Plum Trees: Plums are another popular choice for UK gardeners. They’re easy to care for and produce tasty fruits. There are many different plum varieties available, some suitable for eating fresh and others perfect for preserves. Plum trees come in various sizes, so choose one that fits your garden space.
  • Cherry Trees: Cherries are a favorite summer fruit and can be grown in UK gardens. There are different types of cherries available, with self-fertility and large, sweet fruits. Consider the space and climate in your garden when selecting a cherry tree.

When choosing fruit trees for your garden in the UK, consider the climate, soil type, and space available. With the right selection, you can enjoy a bountiful harvest of delicious fruits right in your own backyard.

Which Is the Easiest Fruit Tree to Grow in the UK

Looking to grow the easiest fruit tree in the UK? Consider planting an apple tree. Apples aren’t only one of the most popular fruit trees in the UK, but they’re also incredibly easy to grow. They thrive in almost any type of soil and can be grown in both sun and partial shade. Whether you have a small garden or a larger plot, apple trees can be accommodated. They’re resilient and can tolerate a variety of weather conditions, making them a reliable choice for UK gardeners.

Not only are apple trees easy to grow, but they also offer a wide range of varieties to choose from. Whether you prefer a tart Granny Smith or a sweet Gala, there’s an apple variety to suit every taste. You can even choose a specific variety based on its intended purpose, such as eating fresh, making cider, or cooking. Apple trees are known for their long lifespan, so once you plant one, you can enjoy its fruits for many years to come.

To ensure successful apple tree growth, consider the specific climate and soil conditions in your area. Some apple tree varieties may be better suited to certain regions of the UK, so it’s helpful to do some research or consult with local garden centers. Choosing the appropriate rootstock for your soil type, such as M25 or MM106 for heavy clay soil, can greatly contribute to the tree’s overall health and productivity.

Some Other Best Fruit Trees for Small Gardens UK

Now let’s explore some other best fruit trees for small gardens in the UK. Here are some options to consider:

  • Gooseberries: These fruit bushes are perfect for small gardens. They’re compact and can even be grown in containers. Gooseberries thrive in the UK’s temperate climate and can tolerate different types of soil. They produce tart, juicy berries that are great for jams, pies, and desserts.
  • Blackcurrants: Another excellent choice for small gardens, blackcurrant bushes are compact and easy to grow. They prefer well-drained soil and can tolerate partial shade. Blackcurrants are rich in vitamin C and make delicious jams, jellies, and cordials.
  • Raspberries: These fruit bushes are ideal for small spaces as they can be grown in pots or trained against a wall or fence. Raspberries prefer fertile, well-drained soil and require full sun for optimal fruit production. They come in different varieties, including summer-fruiting and autumn-fruiting, providing a long harvest season.
  • Blueberries: While blueberries require acidic soil, they can be grown in containers filled with ericaceous compost, making them suitable for small gardens. They’re known for their antioxidant properties and sweet-tart flavor. Blueberries also have attractive foliage and can be used as ornamental plants.

These fruit trees and bushes aren’t only suitable for small gardens but also offer delicious fruits that can be enjoyed fresh or used in various culinary creations. Consider your climate, soil type, and available space to select the best fruit trees for your small garden in the UK.

Which Fruit Tree Grows the Fastest UK

The fastest-growing fruit tree in the UK can be determined by considering the previous subtopic’s discussion on the best fruit trees for small gardens in the UK. While the previous subtopic focused on the best fruit trees for small gardens, it didn’t specifically address the growth rate of these trees. However, based on the knowledge provided, it’s clear that apple trees are one of the most popular and widely grown fruit trees in England. Apples are known for their ability to adapt to various growing conditions and produce abundant fruit.

When it comes to the growth rate of fruit trees in the UK, it’s important to consider the species and variety of the tree. Generally, fruit trees such as apples, pears, cherries, plums, and strawberries have a moderate growth rate. However, within each species, there can be variations in growth rate depending on the specific variety.

It is also worth noting that the growth rate of a fruit tree can be influenced by various factors such as soil conditions, climate, and care practices. Providing adequate sunlight, water, and nutrients can promote healthy growth and maximize the growth rate of fruit trees.

Therefore, while there may not be a specific fruit tree that’s known for its exceptionally fast growth rate in the UK, selecting a healthy and well-suited variety of fruit tree and providing proper care can help maximize its growth potential.

What is Easiest Fruit Tree to Grow?

If you’re considering growing fruit trees in Northern England, you may be wondering which is the easiest fruit tree to grow. Well, look no further because the apple tree takes the crown as the easiest fruit tree to grow in this region. Here are four reasons why:

  • Hardiness: Apple trees are incredibly hardy and can withstand a wide range of climates and soil types found in Northern England. They can tolerate both warm and cold weather, making them a reliable choice for this region.
  • Disease resistance: Apple trees have a natural resistance to many common diseases and pests, reducing the need for constant monitoring and intervention. This makes them low-maintenance and easy to grow, even for beginners.
  • Longevity: Once established, apple trees can continue to produce an abundance of fruit for many years. With minimal care and maintenance, you can enjoy a bountiful harvest year after year.
  • Versatility: Apples are versatile fruits that can be enjoyed fresh, used in cooking, or even turned into cider. With so many different varieties available, you can choose the ones that suit your taste preferences and desired purpose.

Conclusion

If you’re a gardening enthusiast living in Northern England, there are several fruit trees that thrive in the climate and soil conditions of the region.

From apples and pears to cherries and plums, you have a variety of options to choose from.

By selecting the right tree based on taste preferences and climate suitability, you can create a fruitful garden that will enhance the beauty of your landscape and provide delicious fruits for you to enjoy.

Happy gardening!

Best Fruit Trees for North West England

Are you a gardening enthusiast in North West England? Looking to enhance your garden with delicious fruit trees? Look no further!

This guide will help you choose the best fruit trees for your region. From apples like ‘Braeburn’ and ‘Coxs Orange Pippin’ to pears like ‘Conference’ and ‘Williams Bon Chretien’, we’ll explore varieties that thrive in the unique climate of North West England.

Plus, we’ll discuss the availability and benefits of unique fruits like quince.

Get ready to transform your garden into a fruitful paradise!

Some of The Best Fruit Trees for North West England

Here are three of the best fruit trees for North West England:

  • Apple trees, such as the varieties ‘Braeburn’ or ‘Coxs Orange Pippin’, are ideal for the region’s rainy areas. For colder winters, varieties like ‘Russet’ or ‘Golden Delicious’ are recommended.
  • Pear trees, like ‘Conference’ or ‘Williams Bon Chretien’, thrive in warm summers and cool winters. For extreme conditions, ‘Bartlett’ or ‘Doyenne du Comice’ are suitable choices.
  • Quince trees, known for their unique flavor and high pectin content, may be more difficult to find in nurseries, but they’re worth considering.

These fruit trees are specifically chosen for their ability to thrive in the climate of North West England. Their selection is based on expertise and knowledge of the region’s conditions. By choosing these trees, you can ensure a successful and fruitful harvest. Remember to consider factors such as rainfall, winter temperatures, and extreme conditions when selecting the best fruit trees for your garden in North West England.

Best Fruit Trees for Northern England

For fruit trees that thrive in the cooler climate of Northern England, consider apple trees, pear trees, plum trees, cherry trees, and apricot trees. These fruit trees have adapted to the colder temperatures and can still produce delicious fruits.

Apple trees are a popular choice, as they’re known for their ability to withstand colder temperatures and are often used in pies and crumbles.

Pear trees also do well in Northern England, producing sweet and juicy fruits that are perfect for enjoying fresh or using in desserts.

Plum trees are another great option, as they thrive in cooler climates and are ideal for making jams and pies.

If you’re looking for sweet cherries, cherry trees can be grown in Northern England, although they do require slightly warmer temperatures.

Apricot trees can be a delicious addition to your garden, but they prefer warmer temperatures.

Best Apple Trees for Northern England

If you’re considering planting apple trees in Northern England, you’ll be pleased to know that there are several varieties that thrive in the cooler temperatures and are known for their delicious fruits. Coxs Orange Pippin is a cold and hardy apple tree that’s resistant to pests and diseases, making it a reliable choice for Northern England. It produces sweet and juicy fruits that are perfect for eating fresh or using in pies and crumbles.

Bramleys Seedling is another excellent option. This apple tree is also cold and hardy, and it produces large-sized fruits with a tasty flavor. Ellisons Orange is a sweet-tart apple variety that offers good disease resistance. These apple trees will thrive in the cooler climate of Northern England and provide you with a bountiful harvest of flavorful fruits.

Whether you want to enjoy them fresh off the tree or incorporate them into your favorite recipes, these apple trees are sure to satisfy your taste buds. So go ahead and plant these delicious varieties in your Northern England garden and enjoy the fruits of your labor.

Best Fruit Trees for Small Gardens in North West England

Maximize your small garden space in North West England with the best fruit trees to plant. Even though you have limited space, you can still enjoy the delicious taste of homegrown fruit.

Here are the top fruit trees that are perfect for small gardens in this region:

  • Apple trees: These trees are suitable for most UK gardens and come in many varieties. Choose compact varieties like ‘James Grieve’ or ‘Egremont Russet’ that won’t grow too large but still produce tasty apples.
  • Plum trees: If you love sweet plums for eating or making jams and desserts, plum trees are a great choice for small gardens. Look for dwarf or patio varieties like ‘Victoria’ or ‘Stanley’ that won’t take up too much space.
  • Pear trees: While pears generally need more space, there are some compact varieties available that are suitable for small gardens. Consider ‘Concorde’ or ‘Beth’ pear trees, which have a columnar shape and can be grown against a wall or in containers.
  • Cherry trees: If you have a sunny spot in your small garden, a cherry tree can be a beautiful addition. Look for compact varieties like ‘Stella’ or ‘Morello’ that produce sweet cherries and don’t require a lot of space.

These fruit trees won’t only provide you with a bountiful harvest but also add beauty to your small garden. Enjoy the taste of freshly picked fruit right from your own backyard.

Fast Growing Fruit Trees in North West England

Looking to add some fast-growing fruit trees to your garden in North West England? You’re in luck! There are several fruit tree varieties that not only thrive in this region but also have a rapid growth rate.

One such tree is the ‘Discovery’ apple tree. Known for its quick growth and deliciously sweet, red fruits, the ‘Discovery’ apple tree is a popular choice for those looking for a fast-growing option.

Another fast-growing fruit tree that you might consider is the ‘Victoria’ plum tree. This tree produces large, juicy plums and can reach a mature height of up to 4 meters in just a few years.

If you prefer pears, the ‘Conference’ pear tree is a fantastic choice. It’s a fast grower and produces crisp, juicy fruits that are perfect for eating fresh or using in recipes.

Which Is the Easiest Fruit Tree to Grow in North West England

Growing fruit trees in North West England is made easiest when you choose varieties that are well-suited to the region’s climate and conditions. Here are the easiest fruit trees to grow in North West England:

  • Apple trees (varieties like ‘Braeburn’ or ‘Coxs Orange Pippin’ for rainy areas, ‘Russet’ or ‘Golden Delicious’ for colder winters): Apples are a popular choice for their versatility and abundance. With the right variety, they can thrive in the region’s wet and cold conditions.
  • Pear trees (varieties like ‘Conference’ or ‘Williams Bon Chretien’ for warm summers and cool winters, ‘Bartlett’ or ‘Doyenne du Comice’ for extreme conditions): Pears are another excellent option for North West England. They can tolerate a wide range of temperatures and produce sweet and juicy fruits.
  • Quince trees (unique flavor, high pectin content, may be difficult to find in nurseries): Quince trees may require some effort to find, but their unique flavor and high pectin content make them worth considering for North West England gardens.
  • Plum trees (varieties like ‘Victoria’ or ‘Czar’): Plum trees are relatively easy to grow and can provide delicious fruits for eating or making jams and desserts.

What Fruits Grow in Northern England

As you continue exploring fruit trees for North West England, let’s now delve into the fruits that thrive in the northern region.

Northern England offers a conducive climate for a variety of fruits, allowing you to enjoy a bountiful harvest. Apple trees, known for their versatility and hardiness, thrive in cooler temperatures and are perfect for making pies and crumbles.

Pear trees, on the other hand, produce sweet and juicy fruits that are a delight to savor. Plum trees, with their ability to thrive in cooler climates, are ideal for making delicious jams and pies.

Cherry trees, although requiring slightly warmer temperatures, reward you with sweet cherries that can be enjoyed fresh or used in various culinary creations. Lastly, apricot trees, which prefer warmer temperatures, add a delicious touch to recipes.

Which Fruit Trees Bear Fruit Fastest UK?

If you’re eager to enjoy the fruits of your labor in the shortest amount of time, consider planting fruit trees that bear fruit quickly in the UK. Here are some options for you to consider:

  • Cherry trees: Varieties like ‘Stella’ and ‘Morello’ can start producing fruit within 2-3 years of planting. Their sweet cherries are perfect for eating fresh or using in desserts.
  • Raspberry bushes: While not technically trees, raspberry bushes are a great option for quick fruit production. Varieties like ‘Autumn Bliss’ and ‘Polka’ can start yielding fruit in their second year.
  • Strawberry plants: Another non-tree option, strawberries are known for their fast fruiting. You can expect to start harvesting strawberries within a few months of planting.
  • Plum trees: Some plum tree varieties, like ‘Victoria’ and ‘Opal’, can bear fruit in as little as 3-4 years. Their juicy plums are ideal for making jams and pies.

By choosing these fruit trees and plants, you can enjoy delicious fruits in a shorter time frame. Remember to provide proper care and maintenance to ensure healthy growth and abundant harvests.

Happy gardening!

Conclusion

North West England offers a variety of fruit tree options that thrive in its unique climate. From apple trees like ‘Braeburn’ and ‘Coxs Orange Pippin’ to pear trees like ‘Conference’ and ‘Williams Bon Chretien’, there are options for every garden size.

Unique fruit trees like quince provide distinct flavors and high pectin content. Whether you have a small garden or a large one, you can transform it into a fruitful paradise with the best fruit trees for North West England.

6 Best Low Maintenance Fruit Trees NZ with Caring Tips

Looking to create a vibrant garden in NZ without the hassle of high maintenance? You’re in luck! In this article, we’ll explore the best low maintenance fruit trees for your NZ garden and provide you with essential caring tips.

From feijoas to lemons, we’ll guide you through the selection process, considering climate and space requirements. We’ll also delve into the importance of sunlight, water, soil moisture checks, fertilization, and pruning.

Whether you’re a novice or experienced gardener, we’ve got you covered! Let’s dive in and discover the easiest fruit trees for your NZ garden!

What Are Some Low Maintenance Fruit Trees NZ

Looking for low maintenance fruit trees for your NZ garden?

Feijoas, lemons, limes, mandarin oranges, and pomegranates are excellent choices.

These fruit trees are known for their ability to withstand various soil types and require minimal care.

Whether you’re a beginner or a seasoned gardener, these low maintenance options will provide you with delicious fruits without much effort.

1. Feijoas

Feijoas are a popular choice for low maintenance fruit trees in NZ gardens. They are known for their drought-tolerant nature and ability to thrive in various soil types. These trees produce fruit with a unique flavor that’s often described as a mix of pineapple, guava, and mint.

Feijoas can be grown from seeds or purchased as young plants from nurseries. Regular pruning is necessary to maintain their shape and promote fruit production. They are relatively easy to care for, requiring minimal watering and fertilization. In addition, feijoas have few issues with pests and diseases.

With their low maintenance requirements and delicious fruit, feijoas are an excellent choice for NZ gardeners looking for low maintenance fruit trees.

2. Lemons

For low maintenance fruit trees in NZ, lemons are a great choice. They’re easy to care for and offer a variety of uses in cooking, baking, and beverages.

Here are three reasons why lemons are a low maintenance option for your garden:

  1. Versatility: Lemons are a versatile fruit that can be used in a wide range of recipes. From adding a tangy flavor to salads and marinades to being the star ingredient in lemon pies and lemonade, lemons are a must-have in any kitchen.
  2. Sun and Soil Requirements: Lemon trees thrive in sunny locations and well-drained soil. As long as they receive adequate sunlight and water, they’ll grow and produce fruit with minimal effort.
  3. Pruning and Maintenance: Regular pruning is important to remove dead or diseased branches and maintain the shape of the tree. Other than that, occasional fertilization and watering are all that’s needed to keep your lemon tree healthy and productive.

With their low maintenance needs and delicious fruit, lemons are a fantastic choice for any NZ garden.

3. Limes

Limes are a low maintenance fruit tree option for your NZ garden. These trees thrive in a sunny position with well-drained soil. Limes are known for their tangy and refreshing flavor, making them a popular choice for various culinary applications.

To care for your lime tree, ensure it receives regular watering and occasional feeding. It’s important to prune the tree to remove any dead or crossing branches. When purchasing a lime tree, choose a reputable nursery or garden center. Plant it in a suitable area with adequate sunlight and good drainage.

With proper care, your lime tree will provide you with delicious fruit without requiring excessive maintenance.

4. Mandarin oranges

When it comes to low maintenance fruit trees in NZ, mandarin oranges are a fantastic option for your garden. Here are three reasons why:

  1. Easy to care for: Mandarin oranges are known for being low maintenance. They require minimal pruning and can tolerate a range of soil conditions. As long as they’re planted in a sunny spot with well-drained soil, they’ll thrive with little effort.
  2. Delicious and versatile fruit: Mandarin oranges are juicy and sweet, making them a popular choice for eating fresh or using in recipes. They can be enjoyed on their own, added to salads, used in desserts, or even squeezed for juice. Their versatility makes them a great addition to any garden.
  3. Health benefits: Mandarin oranges are packed with vitamins and minerals, including vitamin C, folate, and potassium. They’re also high in antioxidants, which can help boost your immune system and protect against chronic diseases.

5. Pomegranates

Growing pomegranates is an excellent choice for low maintenance fruit trees in NZ gardens. Pomegranate trees are hardy and can tolerate a variety of soil conditions. They require a sunny spot and well-drained soil.

Pomegranates are known for their juicy and tangy fruit, which is packed with antioxidants. These trees benefit from regular watering and occasional feeding. Pruning should be done to remove any dead or crossing branches and to maintain the tree’s shape.

Pomegranates can be propagated from cuttings or purchased as young plants. With minimal effort, you can enjoy the vibrant red fruits and their health benefits right in your own backyard.

6. Grapefruit trees

If you’re looking for low maintenance fruit trees in NZ, grapefruit trees are a great option. Here are three reasons why grapefruit trees are a good choice:

  1. Disease Resistance: Grapefruit trees are known for their strong resistance to diseases and pests. This means you won’t have to worry as much about spraying chemicals or dealing with constant maintenance to keep your tree healthy.
  2. Self-Pollinating: Many grapefruit tree varieties are self-pollinating, which means they don’t require cross-pollination from another tree to produce fruit. This makes them even easier to care for and ensures a higher chance of a successful harvest.
  3. Easy to Grow: Grapefruit trees are relatively easy to grow in NZ. They prefer a sunny spot with well-drained soil and regular watering. With minimal pruning and maintenance, you can enjoy a bountiful crop of juicy grapefruits.

How to Care Low Maintenance Fruit Trees in NZ

To care for low maintenance fruit trees in NZ, you need to provide them with adequate sunlight, water, and regular pruning.

First, choose the right tree for your climate and space. Research suitable fruit trees for your specific climate and soil type. Purchase from reputable nurseries or garden centers.

When planting, choose a sunny area with well-drained soil. Ensure that the tree receives enough sunlight throughout the day.

Regularly water the tree, especially during droughts, and check the soil moisture before watering. Mulch around the base of the tree to retain moisture.

Fertilize the tree annually with fruit tree fertilizer to promote healthy growth and fruit production.

Prune the tree as needed to remove dead or diseased branches. This will help maintain the tree’s shape and overall health.

Few Tips to Choose and Care Low Maintenance Fruit Trees

When choosing and caring for low maintenance fruit trees, it’s important to consider the specific needs of each tree while ensuring they receive proper care and attention.

Here are a few tips to help you choose and care for low maintenance fruit trees:

  1. Research suitable fruit trees for your climate and soil type. Different fruit trees have different requirements, so it’s important to choose ones that will thrive in your specific conditions.
  2. Purchase from reputable nurseries or garden centers. This ensures that you’re getting healthy, well-cared-for trees that are more likely to establish and grow successfully.
  3. Plant in a sunny area with well-drained soil. Most fruit trees require full sun to produce abundant fruit, so choose a location that receives at least 6 hours of direct sunlight per day. Well-drained soil helps prevent waterlogging and root rot.

What Fruit Trees are Easiest to Maintain

If you’re looking for low maintenance fruit trees that are easy to maintain in your NZ garden, consider Apricot trees, Cherry trees, Fig trees, and Peach trees.

These fruit trees are known for their hardiness and ability to thrive with minimal care. They require a sunny location and well-drained soil, and regular watering and feeding during the growing season.

With proper care, these fruit trees can provide you with delicious and flavorful fruits with little effort on your part.

1. Apricot Trees

One of the easiest fruit trees to maintain in NZ gardens is an apricot tree. Apricot trees require minimal care and can thrive in a variety of climates and soil conditions. Here are three reasons why apricot trees are low maintenance:

  1. Hardy and adaptable: Apricot trees are hardy and can tolerate a wide range of temperatures, from cool to warm. They can also adapt to different soil types, as long as the soil is well-drained.
  2. Disease resistant: Apricot trees are relatively resistant to diseases and pests, making them easier to care for. However, it’s still important to monitor the tree for any signs of disease or infestation.
  3. Self-fertile: Most apricot tree varieties are self-fertile, which means they don’t require another tree for cross-pollination. This makes it simpler to maintain and ensures a good fruit yield.

2. Cherry Trees

Cherry trees are another low maintenance fruit tree option for your NZ garden. These trees are known for their beautiful blossoms and delicious fruit. Cherries come in a variety of types, including sweet cherries and sour cherries, so you can choose the one that suits your taste.

They require a sunny spot and well-drained soil to thrive. Cherry trees should be watered regularly, especially during dry periods. Pruning is necessary to remove any dead or diseased branches and to maintain the tree’s shape. Fertilizing once a year with fruit tree fertilizer will help promote healthy growth and abundant fruit production.

With proper care, cherry trees can provide you with a bountiful harvest of tasty cherries with minimal effort.

3. Fig Trees

To continue our discussion on low maintenance fruit trees in NZ, let’s explore fig trees, which are among the easiest fruit trees to maintain.

Here are three reasons why fig trees are a great choice for low maintenance gardening:

  1. Hardy and adaptable: Fig trees are resilient and can tolerate various soil conditions. They’re also less prone to pests and diseases compared to other fruit trees.
  2. Minimal pruning: Fig trees have a natural growth habit and require little pruning. Occasional removal of dead or crossing branches is sufficient to maintain their shape and promote fruit production.
  3. Abundant and delicious fruit: Figs are known for their sweet and juicy fruit, which can be enjoyed fresh or used in cooking and baking. With minimal effort, you can enjoy a bountiful harvest from your fig tree.

4. Peach Trees

If you’re looking for the easiest fruit trees to maintain in NZ, consider planting peach trees. Peach trees are low maintenance and can thrive in NZ gardens. They prefer a sunny spot and well-drained soil.

Peaches are delicious and juicy fruits that can be eaten fresh or used in desserts. To care for peach trees, provide regular watering and feeding during the growing season. It’s important to prune the trees to remove any diseased or crossing branches.

Low Maintenance Fruit Trees for Coastal Areas NZ

Consider salt and wind tolerant fruit tree varieties for your coastal area garden in NZ. Coastal areas can present challenges for growing fruit trees due to the salty air and strong winds. However, there are several low maintenance fruit trees that can thrive in these conditions.

Here are three salt and wind tolerant fruit tree varieties to consider:

  1. Feijoas: Feijoas are well-suited for coastal areas as they’re drought-tolerant and can withstand a range of soil types. These trees produce fruit with a unique flavor that’s often described as a mix of pineapple, guava, and mint. Regular pruning is necessary to maintain their shape and promote fruit production.
  2. Quince: Quince trees are hardy and can tolerate coastal conditions. They produce a fragrant fruit that’s often used in cooking and preserves. These trees require regular watering and feeding to thrive in coastal areas.
  3. Citrus trees: Citrus trees, such as lemon and lime trees, are also suitable for coastal gardens. They prefer a sunny position and well-drained soil. Lemons are versatile fruits that can be used in cooking, baking, and beverages, while limes add a tangy flavor to dishes. Regular watering and occasional fertilization are necessary for optimal growth.

Frequently Asked Questions

Q: What Are Some Low Maintenance Fruit Trees That Are Suitable for NZ Gardens?

Some low maintenance fruit trees suitable for NZ gardens include feijoas, lemons, limes, mandarin oranges, and pomegranates. Choose the right tree for your climate, provide sunlight and water, fertilize annually, and prune as needed for healthy growth and fruit production.

Q: How Can I Care for Low Maintenance Fruit Trees in Nz?

To care for low maintenance fruit trees in NZ, choose the right tree for your climate and space. Provide sunlight, water, and regular soil moisture checks. Fertilize annually and prune as needed.

Q: What Are Some Tips for Choosing and Caring for Low Maintenance Fruit Trees?

When choosing low maintenance fruit trees, research suitable varieties for your climate and soil. Purchase from reputable nurseries and plant in a sunny area with well-drained soil. Regularly water, mulch, and prune as needed for optimal care.

Q: Which Fruit Trees Are the Easiest to Maintain?

The easiest low maintenance fruit trees for you to maintain are apricot, cherry, fig, and peach trees. They require regular watering, pruning, and fertilizing. Choose varieties suitable for your climate and soil type.

Q: What Are Some Low Maintenance Fruit Trees That Are Suitable for Coastal Areas in Nz?

For low maintenance fruit trees suitable for coastal areas in NZ, consider salt and wind tolerant varieties like quince, figs, pomegranates, and citrus fruits. Plant in a sheltered spot, provide regular watering and feeding, and protect from pests and diseases.

Conclusion

Creating a low maintenance fruit tree garden in New Zealand is achievable with the right selection and care.

Choosing suitable fruit trees for your climate and space, providing adequate sunlight, water, and soil moisture checks, fertilizing annually, and pruning as needed, you can enjoy a vibrant and productive garden with minimal effort.

Whether you’re a novice or experienced gardener, these tips will help you create a fruitful and low maintenance oasis in your NZ garden.